NCF想必看过我之前发的NCF的文章的同学们都已经很熟悉了
今天我们要来聊一聊的是NCF遇到Azure Cosmos DB后会碰撞出什么样的火花,让我们一起往下看
我们先来说说什么是Azure Cosmos DB
Azure Cosmos DB 是一个完全托管的无服务器 NoSQL 数据库,适用于任何大小或规模的高性能应用程序。获得保证的单位数毫秒性能和 99.999% 的可用性,由 SLA 提供支持,自动和即时可伸缩性,适用于 NoSQL 数据库(包括 MongoDB 和 Cassandra)的企业级安全性和开源 API。使用多区域写入和数据复制,在全球任何位置享受快速写入和读取功能。使用适用于 Azure Cosmos DB 的 Azure Synapse Link,通过无 ETL (提取、转换、加载)分析获取实时数据的见解。

主要优势 保证任何规模的速度(获得无与伦比的 SLA 支持的速度和吞吐量、快速的全局访问和即时弹性) 简化应用程序的开发(使用开源 API、多个 SDK、无架构数据和对操作数据的无 ETL 分析进行快速构建。) 关键任务就绪(保证每个应用程序的业务连续性、99.999% 的可用性和企业级安全性。) 完全托管和经济高效(端到端数据库管理,具有与应用程序和 TCO 需求相匹配的无服务器和自动缩放功能) Azure Synapse Link for Azure Cosmos DB(Azure Synapse Link for Azure Cosmos DB 是一种云原生混合事务和分析处理 (HTAP) 功能,可实现对 Azure Cosmos DB 中的操作数据进行准实时分析。 Azure Synapse Link 在 Azure Cosmos DB 和 Azure Synapse Analytics 之间建立紧密无缝的集成。) 步骤
- 下载NCF源码
- 打开Visual Studio,切换分支到master
- 修改数据库配置
- 运行NCF
- 安装Xncf模块生成器
- 生成Azure Cosmos DB的Xncf模块
- 安装Azure Cosmos DB的Xncf模块
- 在Azure Cosmos DB模块中引入ML.Blend
- 建立管理Cosmos DB的界面
- 编写管理Cosmos DB的方法
- 处理页面上的数据展示方式
- 对比Cosmos DB Emulator的数据
- 自由发挥
- 下载NCF源码
下载地址:https://github.com/NeuCharFramework/NCF (欢迎大家Star)
分支:master
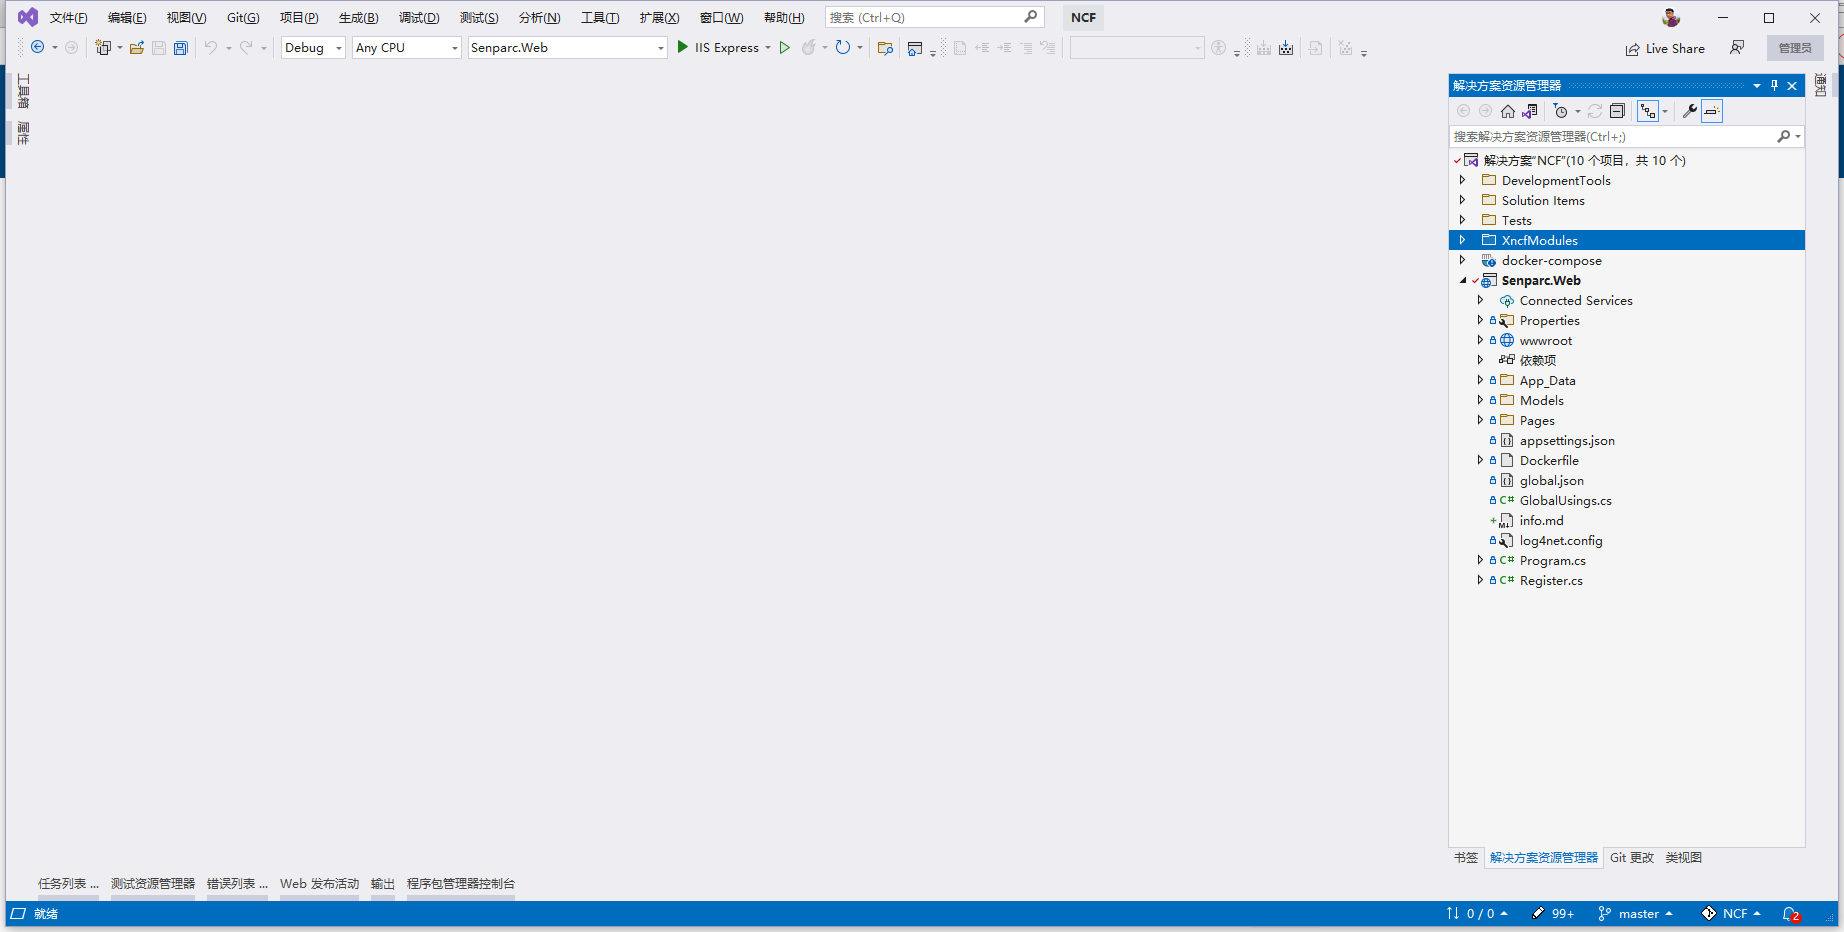
- 打开Visual Studio,切换分支到master
- 修改数据库配置
打开数据库配置文件
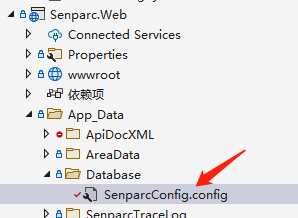
修改Sql-Server节点的内容,如下所示

修改这三个位置即可
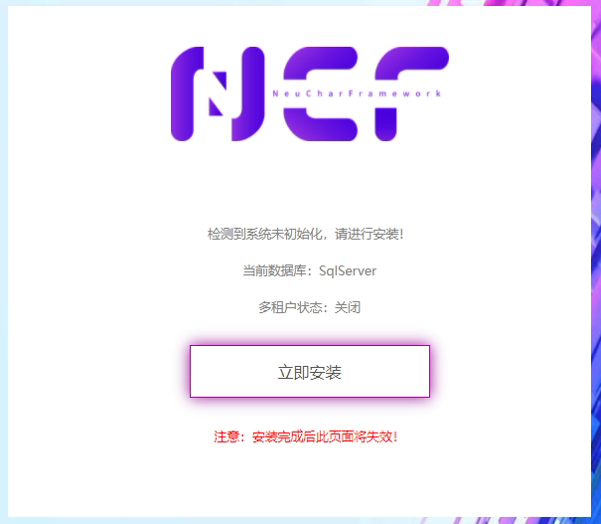
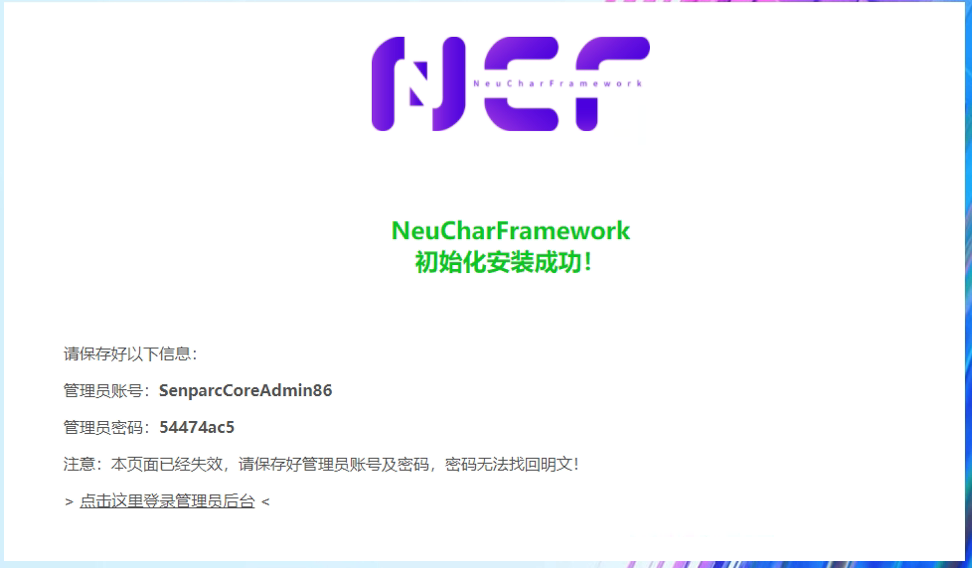
- 运行NCF
- 安装Xncf模块生成器
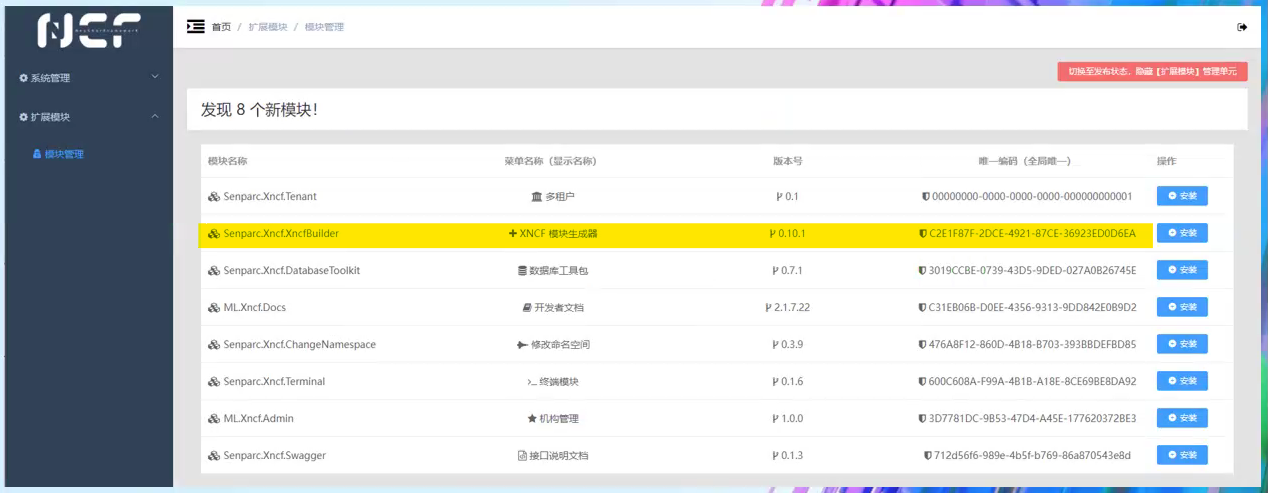
点击黄色背景区域的后边的按钮安装
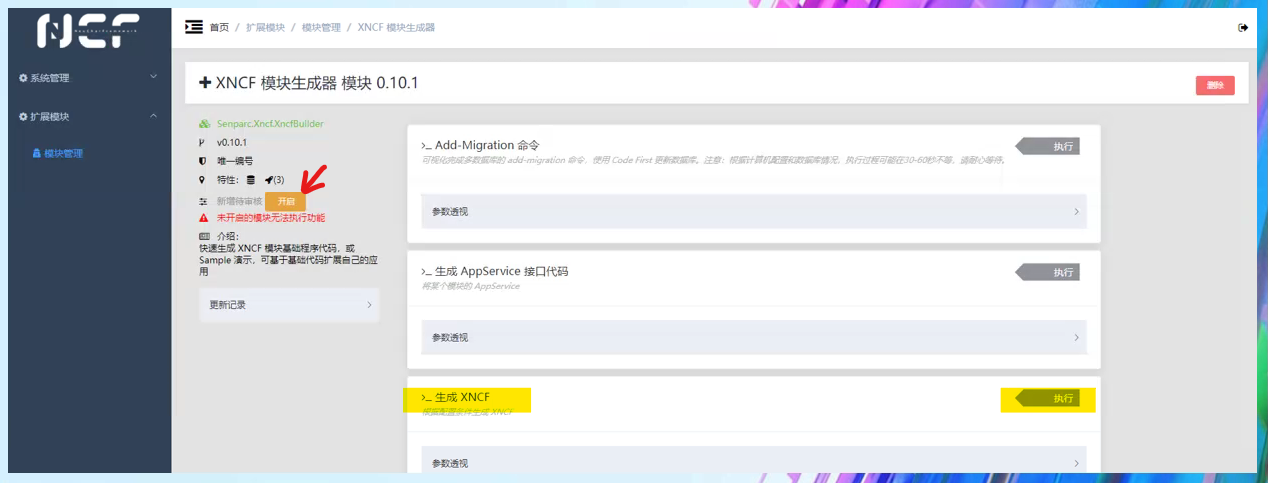
点击开启模块生成器
- 生成Azure Cosmos DB的Xncf模块
选择生成XNCF,输入对应的参数,即可生成模块,这里以Azure Cosmos DB模块为例
- 安装Azure Cosmos DB的Xncf模块
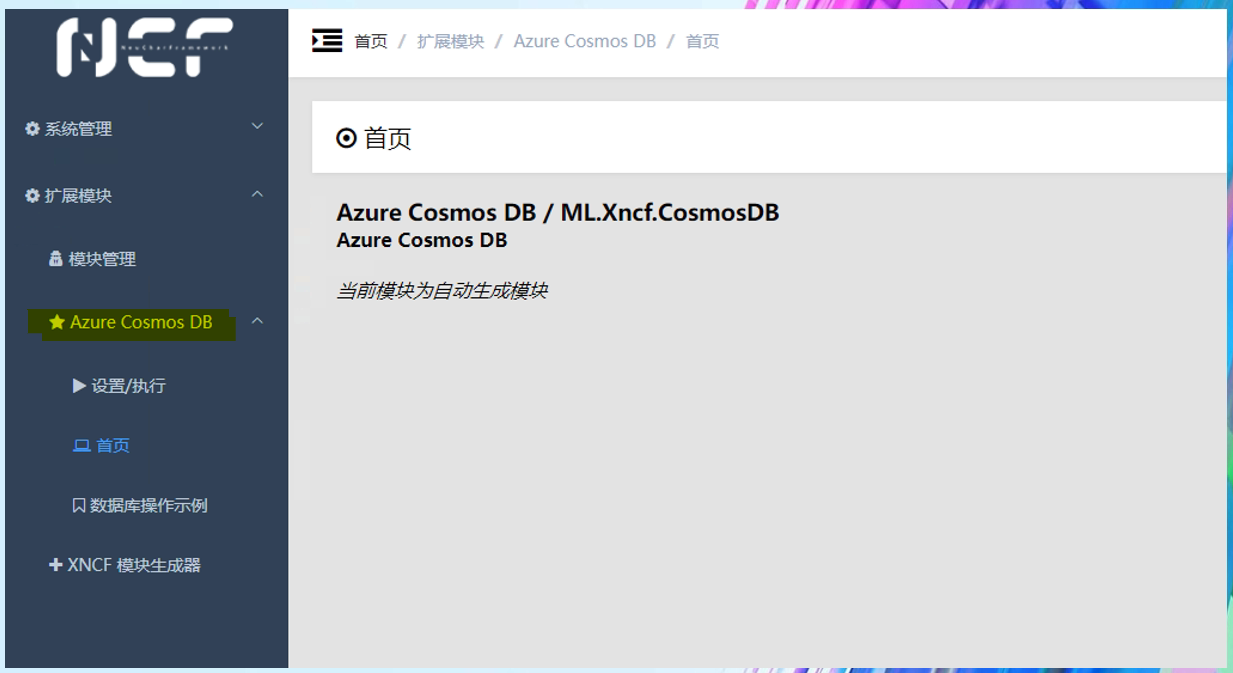
进入主页的页面如上图所示。
- 在Azure Cosmos DB模块中引入nuget包ML.Blend
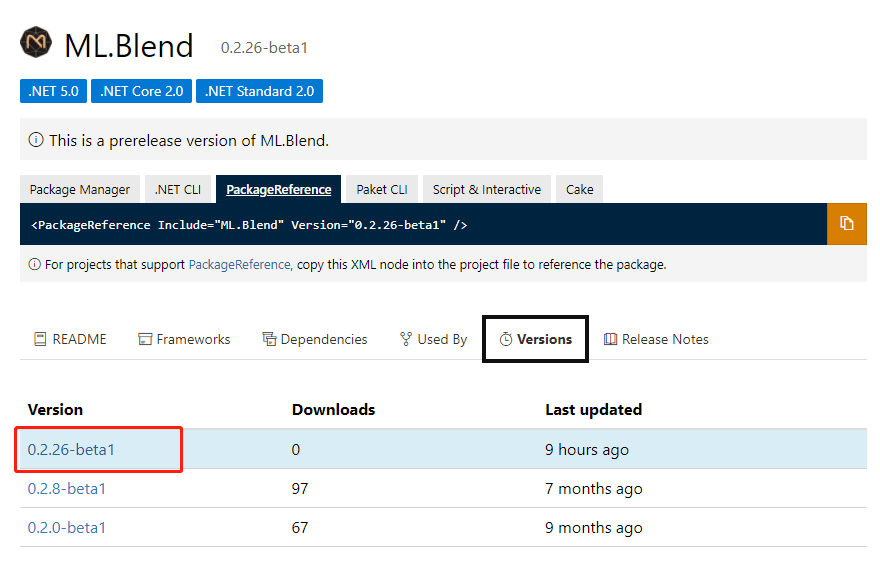
需要加载0.2.26的版本,里面对Azure Cosmos DB的Core Api进行了优化,方便大家快速的完成应用
- 建立管理Cosmos DB的界面
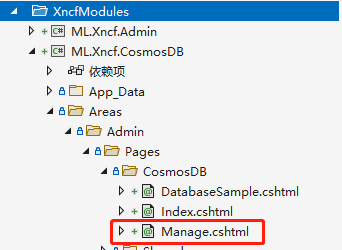
创建一个管理的界面

在Register.Area中增加一个菜单的选项来进入CosmosDB的管理界面
- 编写管理Cosmos DB的方法
- 创建页面上的UI界面样式
@page
@model ML.Xncf.CosmosDB.Areas.Admin.Pages.CosmosDB.ManageModel
@{
    ViewData["Title"] = "Azure Cosmos DB Manage";
    Layout = "_Layout_Vue";
}
@*参考网址:https://element.eleme.cn/#/zh-CN/component/table*@
@section HeaderContent{
<style>
    .mb-10 {
        margin-bottom: 10px;
    }
</style>
}

@section breadcrumbs {
<el-breadcrumb-item>扩展模块</el-breadcrumb-item>
<el-breadcrumb-item>Azure Cosmos DB</el-breadcrumb-item>
<el-breadcrumb-item>管理</el-breadcrumb-item>
}

<div>
    <el-container class="mb-10">
        <el-row>
            <el-button @@click="addItem()" type="primary">添加</el-button>
            <el-button @@click="toggleSelection([cosmosData[0], cosmosData[1]])">选中前2行</el-button>
            <el-button @@click="toggleSelection()">取消选择</el-button>
        </el-row>
    </el-container>
    <el-container>
        <el-table tooltip-effect="dark"
                  ref="multipleTable"
                  :data="cosmosData.filter(data => !search ||
            data.lastName.toLowerCase().includes(search.toLowerCase()))"
                  style="width: 100%"
                  @@selection-change="handleSelectionChange">
            <el-table-column type="selection"
                             show-overflow-tooltip="true"
                             width="55">
            </el-table-column>
            <el-table-column label="Id"
                             prop="id">
            </el-table-column>
            <el-table-column label="Key"
                             prop="partitionKey">
            </el-table-column>
            <el-table-column label="LastName"
                             prop="lastName">
            </el-table-column>
            <el-table-column align="right">
                <template slot="header" slot-scope="scope">
                    <el-input v-model="search"
                              size="mini"
                              placeholder="输入关键字搜索" />
                </template>
                <template slot-scope="scope">
                    <el-button size="mini"
                               @@click="handleEdit(scope.$index, scope.row)">Edit</el-button>
                    <el-button size="mini"
                               type="danger"
                               @@click="handleDelete(scope.$index, scope.row)">Delete</el-button>
                </template>
            </el-table-column>
        </el-table>
    </el-container>
</div>
以上代码内容完全可以参考Element UI中的组件部分,找到自己想使用的,直接使用就好了
- 创建界面上的对应数据及按钮需要调用的事件和方法
@section scripts{
<script>
    var app = new Vue({
        el: "#app",
        data() {
            return {
                moduleData: null,
                uid: '',
                search: '',
                tableData: [],
                cosmosData:[],
                multipleSelection: []
            }
        },
        computed: {
            backgroundColor() {
                let rgba = `rgba(${this.moduleData.colorDto.red},${this.moduleData.colorDto.green},${this.moduleData.colorDto.blue},1)`
                return rgba;
            }
        },
        mounted() {
            this.getList();
        },
        methods: {
            async getList(){
                const res = await service.get('/Admin/CosmosDB/Manage?handler=List');
                this.cosmosData = res.data.data;
            },
            async addItem(){
                const res = await service.get('/Admin/CosmosDB/Manage?handler=Add');
                this.getList();
            },
            async handleEdit(index, row) {
              console.log(index, row);
              const res = await service.get('/Admin/CosmosDB/Manage?handler=Edit&id=' + row.id + '&key=' + row.partitionKey);
              this.getList();
            },
            async handleDelete(index, row) {
              console.log(index, row);
              const res = await service.get('/Admin/CosmosDB/Manage?handler=Delete&id=' + row.id + '&key=' + row.partitionKey);
              this.getList();
           },
           toggleSelection(rows) {
        if (rows) {
          rows.forEach(row => {
            this.$refs.multipleTable.toggleRowSelection(row);
          });
        } else {
          this.$refs.multipleTable.clearSelection();
        }
      },
      handleSelectionChange(val) {
        this.multipleSelection = val;
      }
        }
    });
</script>
}
这是上一步中UI界面上对应的按钮,Table组件需要调用的数据请求及按钮触发的方法
- 创建CosmosDBService来处理增删改查的业务
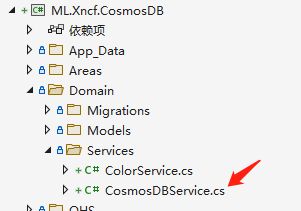
在Domain/Services下创建业务类CosmosDBService
public class CosmosDBService
    {
        private string strEndpointUrl = "https://localhost:8081";
        private string strPrimaryKey = "C2y6yDjf5/R+ob0N8A7Cgv30VRDJIWEHLM+4QDU5DE2nQ9nDuVTqobD4b8mGGyPMbIZnqyMsEcaGQy67XIw/Jw==";
        private string strApplicationName = "CosmosDBDotnetQuickstart";
        private string DatabaseName = "db01";
        private string ContainerName = "c01";

        public CosmosDBService()
        {
        }

        public async Task<List<Family>> GetList()
        {
            CoreApi coreApi = new CoreApi(strEndpointUrl, strPrimaryKey, strApplicationName);
            await coreApi.CreateDatabaseIfNotExistsAsync("TODOList01");
            await coreApi.CreateContainerAsync(ContainerName);
            await coreApi.ScaleContainerAsync();
            await coreApi.AddItemsToContainerAsync();
            var sqlQueryText = "SELECT * FROM c WHERE 1=1 ";
            var result = await coreApi.QueryItemsAsync<Family>(sqlQueryText);
            return result;
        }

        public async Task AddItem()
        {
            CoreApi coreApi = new CoreApi(strEndpointUrl, strPrimaryKey, strApplicationName);
            await coreApi.CreateDatabaseIfNotExistsAsync("TODOList01");
            await coreApi.CreateContainerAsync(ContainerName);
            await coreApi.ScaleContainerAsync();
            string strName = "MartyZane";
            Family andersenFamily = new Family
            {
                Id = $"{strName}{DateTime.Now.ToString("yyyyMMddHHmmssfff")}",
                PartitionKey = $"{strName}{DateTime.Now.ToString("yyyyMMddHHmmssfff")}",
                LastName = $"{strName}{DateTime.Now.ToString("yyyyMMddHHmmssfff")}",
                Parents = new Parent[]
                {
                    new Parent { FirstName = "Thomas" },
                    new Parent { FirstName = "Mary Kay" }
                },
                Children = new Child[]
                {
                    new Child
                    {
                        FirstName = "Henriette Thaulow",
                        Gender = "female",
                        Grade = 5,
                        Pets = new Pet[]
                        {
                            new Pet { GivenName = "Fluffy" }
                        }
                    }
                },
                Address = new Address { State = "WA", County = "King", City = "Seattle" },
                IsRegistered = false
            };
            await coreApi.AddItemsToContainerAsync<Family>(andersenFamily, andersenFamily.Id, andersenFamily.PartitionKey);
        }

        public async Task UpdateItem(string id, string key)
        {
            CoreApi coreApi = new CoreApi(strEndpointUrl, strPrimaryKey, strApplicationName);
            await coreApi.CreateDatabaseIfNotExistsAsync("TODOList01");
            await coreApi.CreateContainerAsync(ContainerName);
            await coreApi.ScaleContainerAsync();
            await coreApi.ReplaceFamilyItemAsync(id,key);
        }

        public async Task DeleteItem(string id,string key)
        {
            CoreApi coreApi = new CoreApi(strEndpointUrl, strPrimaryKey, strApplicationName);
            await coreApi.CreateDatabaseIfNotExistsAsync("TODOList01");
            await coreApi.CreateContainerAsync(ContainerName);
            await coreApi.ScaleContainerAsync();
            await coreApi.DeleteFamilyItemAsync(id,key);
        }
    }
以上源码,是所有的Service中的业务方法
- 在页面的调用方法中

在此文件中加入替换下面的源码
public class ManageModel : Senparc.Ncf.AreaBase.Admin.AdminXncfModulePageModelBase
    {
        private readonly IServiceProvider serviceProvider;

        public ManageModel(IServiceProvider serviceProvider, Lazy<XncfModuleService> xncfModuleService) : base(xncfModuleService)
        {
            this.serviceProvider = serviceProvider;
        }

        public async Task<IActionResult> OnGetListAsync()
        {
            CosmosDBService cosmosDBService = new CosmosDBService();
            var result = await cosmosDBService.GetList();
            return Ok(result);
        }

        public async Task<IActionResult> OnGetAddAsync()
        {
            CosmosDBService cosmosDBService = new CosmosDBService();
            cosmosDBService.AddItem();
            return Ok("200");
        }

        public async Task<IActionResult> OnGetEditAsync(string id, string key)
        {
            CosmosDBService cosmosDBService = new CosmosDBService();
            cosmosDBService.UpdateItem(id,key);
            return Ok("200");
        }

        public async Task<IActionResult> OnGetDeleteAsync(string id,string key)
        {
            CosmosDBService cosmosDBService = new CosmosDBService();
            cosmosDBService.DeleteItem(id,key);
            return Ok("200");
        }
    }
以上内容就是我们今天要聊的实例的所有源码
- 创建页面上的UI界面样式
- 处理页面上的数据展示方式

经过上面的操作后,呈现出来的样子如图所示,列表的展示,查询,添加,修改,删除功能就全部拥有了。
那么这些数据有没有工具可以可视化的查看呢?
答案:是肯定的,就是我们马上要聊的Azure Cosmos DB Emulator
- 对比Cosmos DB Emulator的数据
- 下载Cosmos DB Emulator的工具
下载地址:https://aka.ms/cosmosdb-emulator - 运行Cosmos DB Emulator
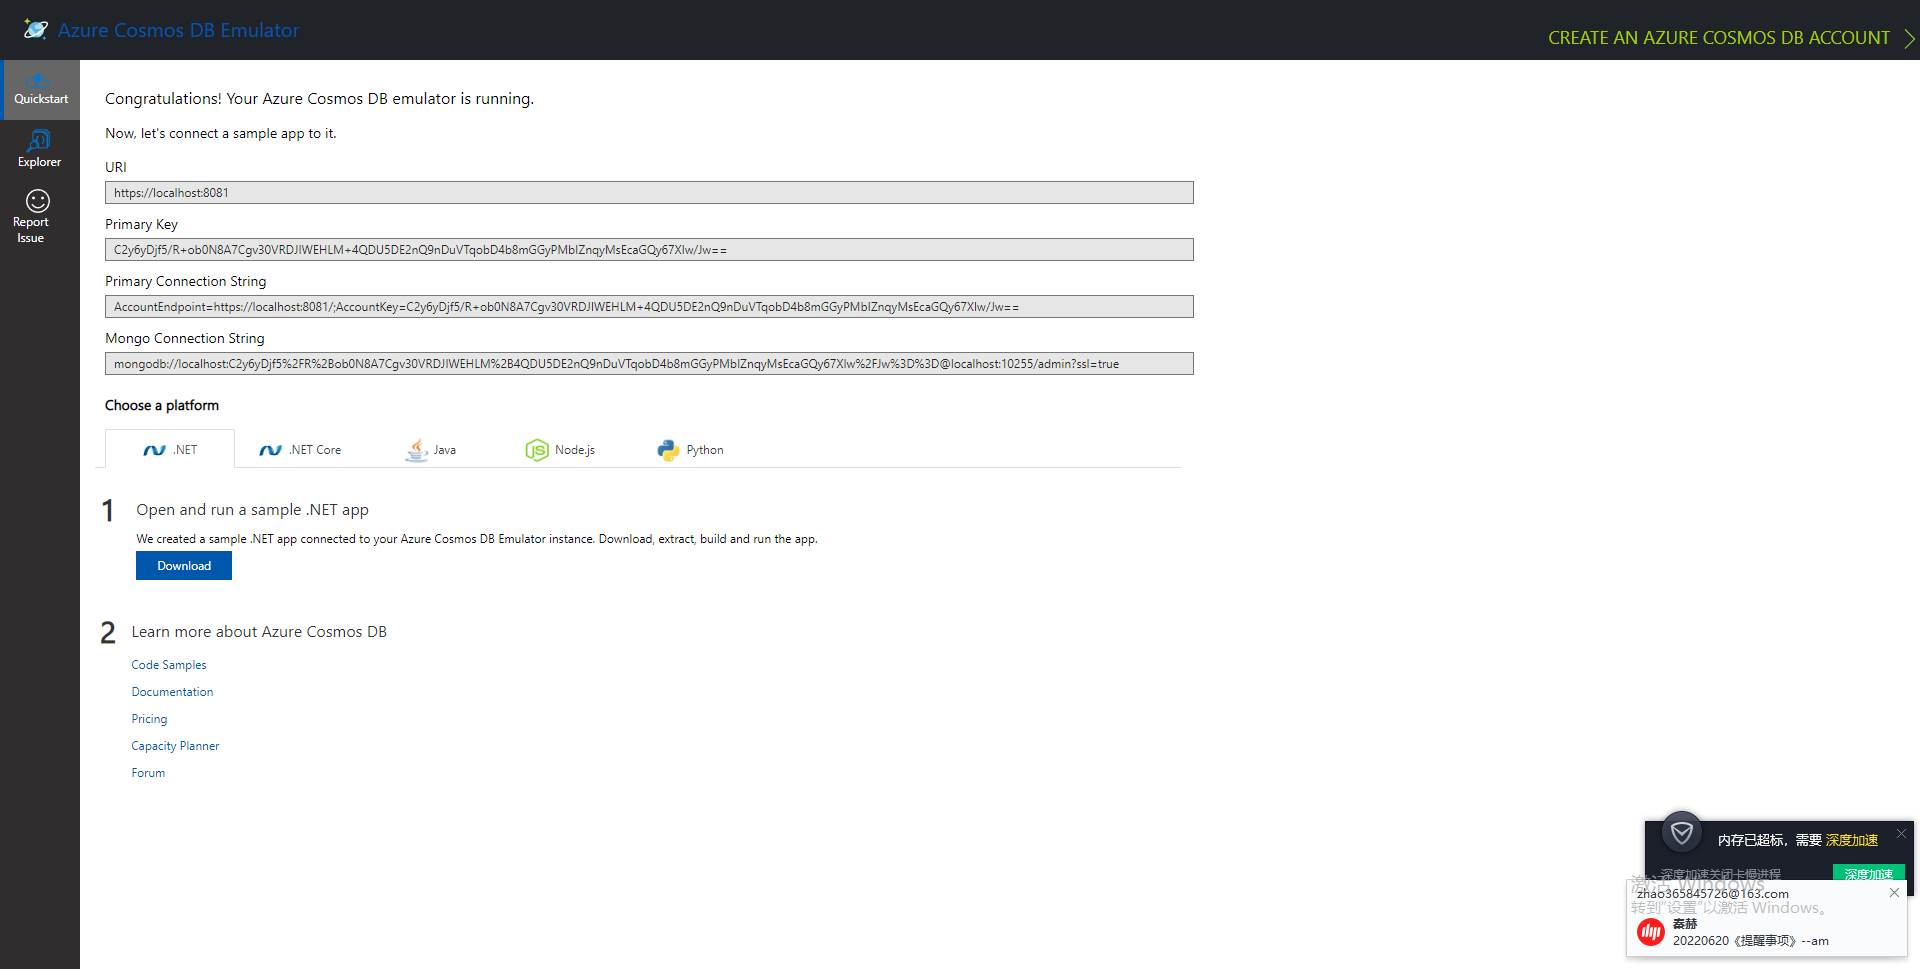
图中展示的是Azure Cosmos DB的首页
- 操作管理的模块
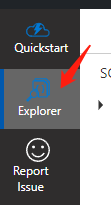
这个是数据的资源管理器,可以点击查看的数据的内容
- 对比数据
当我们在NCF操作了增删改数据的操作之后,那么可以直接到Emulator中去对应数据查看是否正确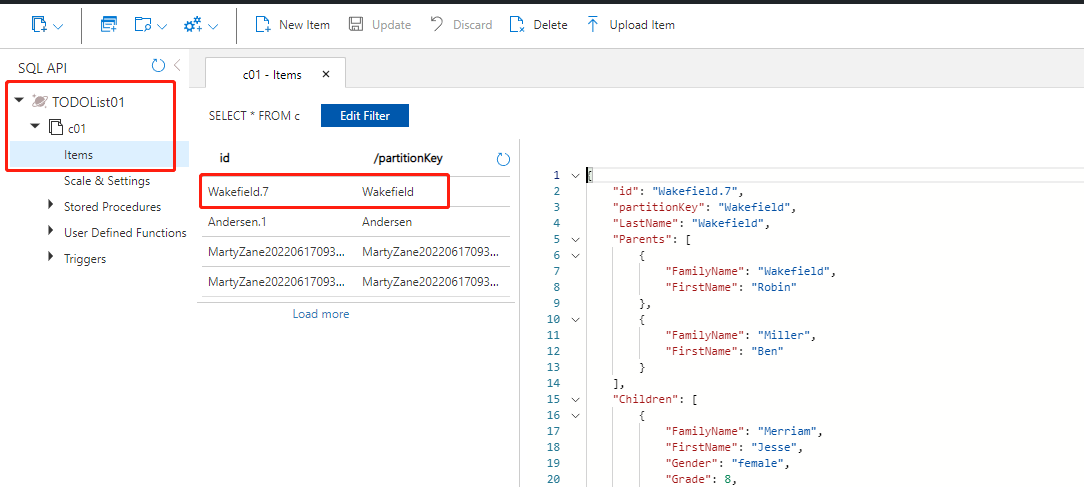
还可以根据自己的查询条件来快速查询数据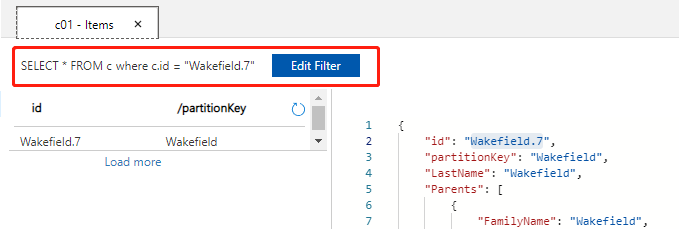
查询的语句沿用了SQL Server的一些语法,大家可以去尝试一下
- 查看请求性能
最后我们来看看使用Azure Cosmos DB的性能如何
平均的请求效率在几十毫秒,所以这个Azure Cosmos DB可以作为我们另外的一个管理数据的选择之一
- 下载Cosmos DB Emulator的工具
- 自由发挥
到此一个NCF集成Azure Cosmos DB的Demo实例就完整展示了,希望能够帮助到您。
后期精彩内容(敬请关注)
QQ:365845726 微信:zhao365845726 有兴趣可以加入QQ群: 群号:924439616(ML-Dotnet解决方案)