今日为你们带来的教程是关于Photoshop的,你们晓得滤镜中如何制作彩色玻璃球呢?下文就为大伙带来了Photoshop滤镜制作彩色玻璃球的详细操作步骤。
一、新建一个宽度为12,高度为16,分辨率为50的文件。
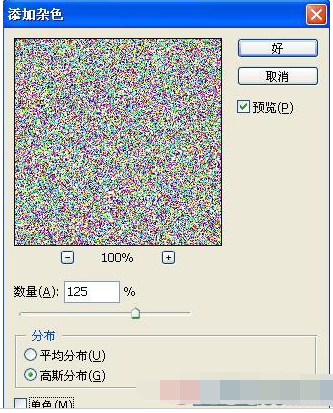
二、执行菜单栏中的“滤镜”“杂色”“添加杂色”命令,在弹出的对话框中,设置数量为125,高斯分布,如图01所示,图像效果如图02所示。

三、执行菜单栏中的“滤镜”“像素化”“马赛克”命令,在弹出的马赛克对话框中,设置单元格大小为15,如图03所示,图像效果如图04所示。


四、执行菜单栏中的”图像”“调整”“色相/饱和度”命令,在弹出的对话框中设置色相为0,饱和度为100,设置明度为31,如图05所示,图像效果如图06所示。


五、执行菜单栏中的“图像”“图像大小”命令,在弹出的对话框中设置参数如图07所示。

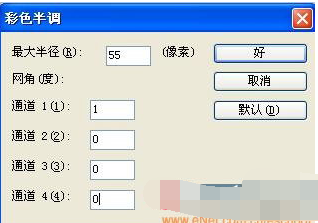
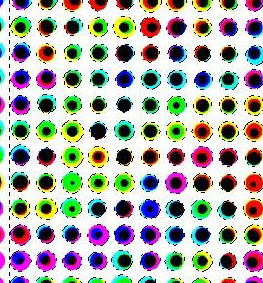
六、执行菜单栏中的“滤镜”“像素化”“彩色半调”命令,在弹出的对话框中,设置参数如图08所示,图像效果如图09所示。

七、选择工具箱中的“矩形选框工具”,建立如图10所示的选区,按Ctrl+J键,粘贴长方形选区内的图像的同时新建图层1图层。

八、选择工具箱中的“魔棒工具”,单击白色背景,将其载入选区,效果如图11所示。隐藏背景层,选择图层1,按Delete键删除白色背景,取消选区,效果如图12所示。

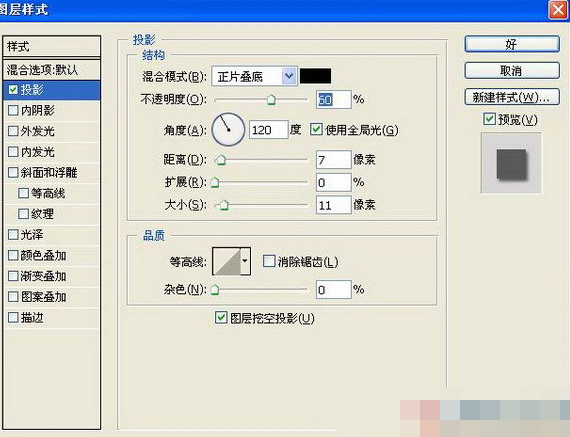
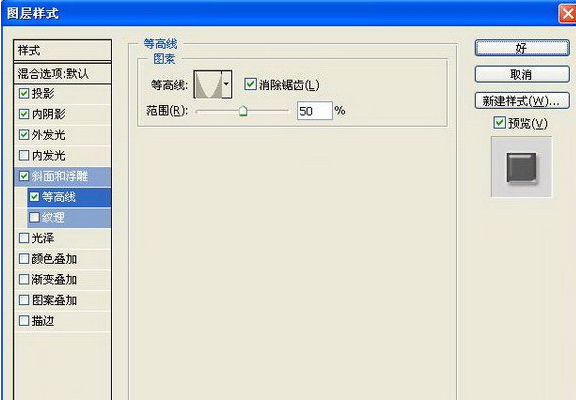
九、随便选择一个图形如图13所示,双击该图层添加图层样式,选择“投影”“内阴影”“斜面和浮雕”“等高线”,设置参数如图14-17所示,图像效果如图18所示。


十、在样式面板中,单击创建新样式按钮,在弹出的对话框中保持默认设置如图19所示,单击确定,创建新样式。

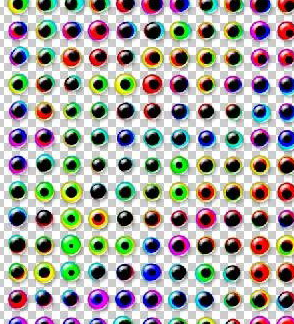
十一、选择刚才的图层1,单击新建样式,图像效果如图20所示。
十二、选择工具箱中的渐变工具,填充背景层,最终效果如图21所示。

根据上文描述的Photoshop滤镜制作彩色玻璃球的详细操作步骤,你们是不是都学会啦!