上一篇博客花了大量的时间把Spring的注入去学习了下,总结起来就两个字麻烦。麻烦在配置文件的编写配置上。那有更简单方式么?有,自动配置
1.1 依赖自动装配-
IoC容器根据bean所依赖的资源在容器中自动查找并注入到bean中的过程称为自动装配
-
按类型(常用)
-
按名称
-
按构造方法
-
不启用自动装配
-
创建一个Maven项目
-
pom.xml添加依赖
-
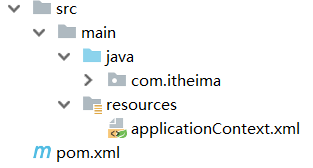
resources下添加spring的配置文件
最终项目的结构如下:
(1)项目中添加BookDao、BookDaoImpl、BookService和BookServiceImpl类
public interface BookDao {
public void save();
}
public class BookDaoImpl implements BookDao {
private String databaseName;
private int connectionNum;
public void save() {
System.out.println("book dao save ...");
}
}
public interface BookService {
public void save();
}
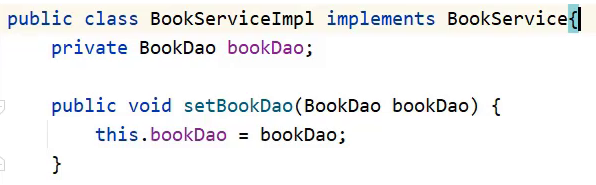
public class BookServiceImpl implements BookService{
private BookDao bookDao;
public void setBookDao(BookDao bookDao) {
this.bookDao = bookDao;
}
public void save() {
System.out.println("book service save ...");
bookDao.save();
}
}(2)resources下提供spring的配置文件
<?xml version="1.0" encoding="UTF-8"?>
<beans xmlns="http://www.springframework.org/schema/beans"
xmlns:xsi="http://www.w3.org/2001/XMLSchema-instance"
xsi:schemaLocation="http://www.springframework.org/schema/beans http://www.springframework.org/schema/beans/spring-beans.xsd">
<bean id="bookDao" class="com.itheima.dao.impl.BookDaoImpl"/>
<bean id="bookService" class="com.itheima.service.impl.BookServiceImpl">
<property name="bookDao" ref="bookDao"/>
</bean>
</beans>(3)编写AppForAutoware运行类,加载Spring的IOC容器,并从中获取对应的bean对象
public class AppForAutoware {
    public static void main( String[] args ) {
        ApplicationContext ctx = new ClassPathXmlApplicationContext("applicationContext.xml");
        BookService bookService = (BookService) ctx.getBean("bookService");
        bookService.save();
    }
}接下来,在上面这个环境中来完成自动装配:
自动装配只需要修改applicationContext.xml配置文件即可:
(1)将<property>标签删除
(2)在<bean>标签中添加autowire属性
首先来实现按照类型注入的配置
<?xml version="1.0" encoding="UTF-8"?>
<beans xmlns="http://www.springframework.org/schema/beans"
xmlns:xsi="http://www.w3.org/2001/XMLSchema-instance"
xsi:schemaLocation="http://www.springframework.org/schema/beans http://www.springframework.org/schema/beans/spring-beans.xsd">
<bean class="com.itheima.dao.impl.BookDaoImpl"/>
<!--autowire属性:开启自动装配,通常使用按类型装配-->
<bean id="bookService" class="com.itheima.service.impl.BookServiceImpl" autowire="byType"/>
</beans>注意事项:
-
需要注入属性的类中对应属性的setter方法不能省略
-
被注入的对象必须要被Spring的IOC容器管理
-
按照类型在Spring的IOC容器中如果找到多个对象,会报
NoUniqueBeanDefinitionException
一个类型在IOC中有多个对象,还想要注入成功,这个时候就需要按照名称注入,配置方式为:
<?xml version="1.0" encoding="UTF-8"?>
<beans xmlns="http://www.springframework.org/schema/beans"
xmlns:xsi="http://www.w3.org/2001/XMLSchema-instance"
xsi:schemaLocation="http://www.springframework.org/schema/beans http://www.springframework.org/schema/beans/spring-beans.xsd">
<bean class="com.itheima.dao.impl.BookDaoImpl"/>
<!--autowire属性:开启自动装配,通常使用按类型装配-->
<bean id="bookService" class="com.itheima.service.impl.BookServiceImpl" autowire="byName"/>
</beans>注意事项:
-
按照名称注入中的名称指的是什么?
-
bookDao是private修饰的,外部类无法直接方法
-
外部类只能通过属性的set方法进行访问
-
对外部类来说,setBookDao方法名,去掉set后首字母小写是其属性名
-
为什么是去掉set首字母小写?
-
这个规则是set方法生成的默认规则,set方法的生成是把属性名首字母大写前面加set形成的方法名
-
-
所以按照名称注入,其实是和对应的set方法有关,但是如果按照标准起名称,属性名和set对应的名是一致的
-
-
如果按照名称去找对应的bean对象,找不到则注入Null
-
当某一个类型在IOC容器中有多个对象,按照名称注入只找其指定名称对应的bean对象,不会报错
两种方式介绍完后,以后用的更多的是按照类型注入。
最后对于依赖注入,需要注意一些其他的配置特征:
-
自动装配用于引用类型依赖注入,不能对简单类型进行操作
-
使用按类型装配时(byType)必须保障容器中相同类型的bean唯一,推荐使用
-
使用按名称装配时(byName)必须保障容器中具有指定名称的bean,因变量名与配置耦合,不推荐使用
-
自动装配优先级低于setter注入与构造器注入,同时出现时自动装配配置失效
上一篇博客我们已经能完成引入数据类型和简单数据类型的注入,但是还有一种数据类型集合,集合中既可以装简单数据类型也可以装引用数据类型,对于集合,在Spring中该如何注入呢?
常见的集合类型有如下几种
-
数组
-
List
-
Set
-
Map
-
Properties
针对不同的集合类型,该如何实现注入呢?
2.1 环境准备-
创建一个Maven项目
-
pom.xml添加依赖
-
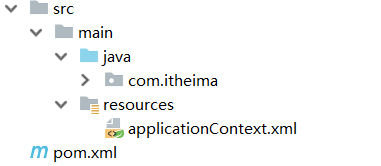
resources下添加spring的配置文件applicationContext.xml
最终项目的结构如下:
(1)项目中添加添加BookDao、BookDaoImpl类
public interface BookDao {
public void save();
}
public class BookDaoImpl implements BookDao {
public class BookDaoImpl implements BookDao {
private int[] array;
private List<String> list;
private Set<String> set;
private Map<String,String> map;
private Properties properties;
public void save() {
System.out.println("book dao save ...");
System.out.println("遍历数组:" + Arrays.toString(array));
System.out.println("遍历List" + list);
System.out.println("遍历Set" + set);
System.out.println("遍历Map" + map);
System.out.println("遍历Properties" + properties);
}
//setter....方法省略,自己使用工具生成
}(2)resources下提供spring的配置文件,applicationContext.xml
<?xml version="1.0" encoding="UTF-8"?>
<beans xmlns="http://www.springframework.org/schema/beans"
xmlns:xsi="http://www.w3.org/2001/XMLSchema-instance"
xsi:schemaLocation="http://www.springframework.org/schema/beans http://www.springframework.org/schema/beans/spring-beans.xsd">
<bean id="bookDao" class="com.itheima.dao.impl.BookDaoImpl"/>
</beans>(3)编写AppForDICollection运行类,加载Spring的IOC容器,并从中获取对应的bean对象
public class AppForDICollection {
    public static void main( String[] args ) {
        ApplicationContext ctx = new ClassPathXmlApplicationContext("applicationContext.xml");
        BookDao bookDao = (BookDao) ctx.getBean("bookDao");
        bookDao.save();
    }
}接下来,在上面这个环境中来完成集合注入:
下面的所以配置方式,都是在bookDao的bean标签中使用<property>进行注入
<?xml version="1.0" encoding="UTF-8"?>
<beans xmlns="http://www.springframework.org/schema/beans"
xmlns:xsi="http://www.w3.org/2001/XMLSchema-instance"
xsi:schemaLocation="http://www.springframework.org/schema/beans http://www.springframework.org/schema/beans/spring-beans.xsd">
<bean id="bookDao" class="com.itheima.dao.impl.BookDaoImpl">
</bean>
</beans><property name="array">
<array>
<value>100</value>
<value>200</value>
<value>300</value>
</array>
</property><property name="list">
<list>
<value>itcast</value>
<value>itheima</value>
<value>boxuegu</value>
<value>chuanzhihui</value>
</list>
</property><property name="set">
<set>
<value>itcast</value>
<value>itheima</value>
<value>boxuegu</value>
<value>boxuegu</value>
</set>
</property><property name="map">
<map>
<entry key="country" value="china"/>
<entry key="province" value="henan"/>
<entry key="city" value="kaifeng"/>
</map>
</property><property name="properties">
<props>
<prop key="country">china</prop>
<prop key="province">henan</prop>
<prop key="city">kaifeng</prop>
</props>
</property>配置完成后,运行下看结果:
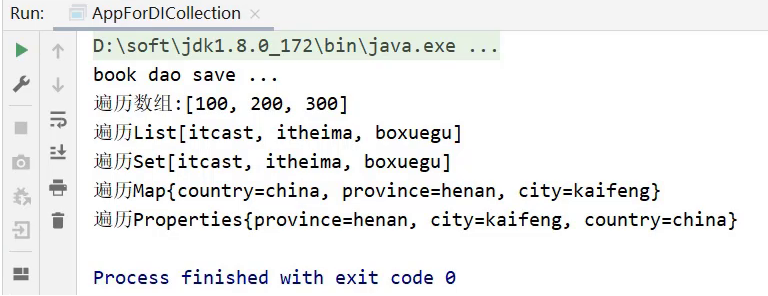
说明:
-
property标签表示setter方式注入,构造方式注入constructor-arg标签内部也可以写
<array>、<list>、<set>、<map>、<props>标签 -
List的底层也是通过数组实现的,所以
<list>和<array>标签是可以混用 -
集合中要添加引用类型,只需要把
<value>标签改成<ref>