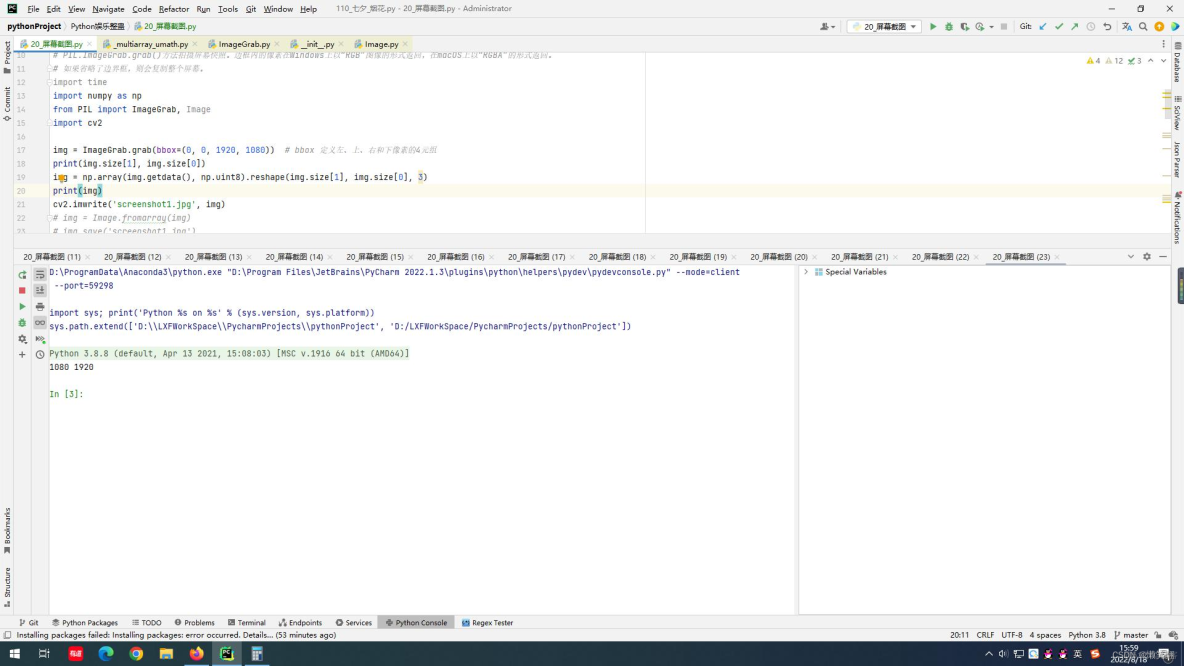
一、方法一 PIL中的ImageGrab模块 使用PIL中的ImageGrab模块简单,但是效率有点低 PIL是Python Imaging Library,它为python解释器提供图像编辑函数能力。 ImageGrab模块可用于将屏幕或剪贴板的内容
一、方法一
PIL中的ImageGrab模块
使用PIL中的ImageGrab模块简单,但是效率有点低
PIL是Python Imaging Library,它为python解释器提供图像编辑函数能力。 ImageGrab模块可用于将屏幕或剪贴板的内容复制到PIL图像存储器中。
PIL.ImageGrab.grab()方法拍摄屏幕快照。边框内的像素在Windows上以“RGB”图像的形式返回,在macOS上以“RGBA”的形式返回。
如果省略了边界框,则会复制整个屏幕。
import numpy as npfrom PIL import ImageGrab, Image
import cv2
img = ImageGrab.grab(bbox=(0, 0, 1920, 1080)) # bbox 定义左、上、右和下像素的4元组
print(img.size[1], img.size[0])
img = np.array(img.getdata(), np.uint8).reshape(img.size[1], img.size[0], 3)
print(img)
cv2.imwrite('screenshot1.jpg', img)
# img = Image.fromarray(img)
# img.save('screenshot1.jpg')
二、方法二
PyQt比调用windows API简单很多,而且有windows API的很多优势,比如速度快,可以指定获取的窗口,即使窗口被遮挡。
需注意的是,窗口最小化时无法获取截图。
首先需要获取窗口的句柄。
import win32guifrom PyQt5.QtWidgets import QApplication
import sys
hwnd_title = dict()
def get_all_hwnd(hwnd, mouse):
if win32gui.IsWindow(hwnd) and win32gui.IsWindowEnabled(hwnd) and win32gui.IsWindowVisible(hwnd):
hwnd_title.update({hwnd: win32gui.GetWindowText(hwnd)})
win32gui.EnumWindows(get_all_hwnd, 0)
# print(hwnd_title.items())
for h, t in hwnd_title.items():
if t != "":
print(h, t)
# 程序会打印窗口的hwnd和title,有了title就可以进行截图了。
hwnd = win32gui.FindWindow(None, 'C:\Windows\system32\cmd.exe')
app = QApplication(sys.argv)
screen = QApplication.primaryScreen()
img = screen.grabWindow(hwnd).toImage()
img.save("screenshot2.jpg")
三、方法三
pyautogui是比较简单的,但是不能指定获取程序的窗口,因此窗口也不能遮挡,不过可以指定截屏的位置
import pyautoguiimport cv2 # https://www.lfd.uci.edu/~gohlke/pythonlibs/#opencv
import numpy as nppy
from PIL import Image
img = pyautogui.screenshot(region=[0, 0, 1920, 1080]) # x,y,w,h
# img = Image.fromarray(np.uint8(img))
# img.save('screenshot3.png')
img = cv2.cvtColor(np.asarray(img), cv2.COLOR_RGB2BGR) # cvtColor用于在图像中不同的色彩空间进行转换,用于后续处理。
cv2.imwrite('screenshot3.jpg', img)

