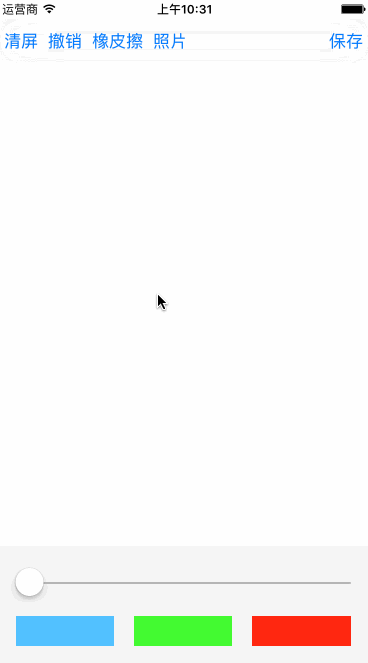
效果图
设计要求
1、画笔能设置大小、颜色
2、有清屏、撤销、橡皮擦、导入照片功能
3、能将绘好的画面保存到相册
实现思路
1、画笔的实现,我们可以通过监听用户的 平移手势 中创建 UIBezierPath 来实现线条的绘制
2、撤销功能,我们先来看下撤销功能,我们会想到用一个数组队列将用户的每一次的笔画都加入到数组中,然后撤销的时候只需要将最后添加进去的笔画pop掉,重新绘制就可以了
3、清屏功能就简单了,只需要将上面说到的那个数组清空重新绘制下就可以了
4、导入照片功能,可以用系统的 UIImagePickerController 选取照片得到UIImage,然后再将 UIImage 绘制到屏幕中就可以了
5、保存到相册功能,可以使用 UIGraphicsGetImageFromCurrentImageContext 获取当前的图片上下文,得到屏幕画面的 UIImage ,然后通过 UIImageWriteToSavedPhotosAlbum 写入到相册
具体代码实现
1、先画个界面

2、因为我们绘制线条会用到 UIBezierPath ,并且要能可设置颜色,但是UIBezierPath是没有设置颜色的属性,所以我们这里需要简单扩展一下,创建一个继承于 UIBezierPath 的子类 DrawPath
//
// DrawPath.h
// 画板
//
// Created by xgao on 16/4/13.
// Copyright © 2016年 xgao. All rights reserved.
//
#import <UIKit/UIKit.h>
@interface DrawPath : UIBezierPath
// 画笔颜色
@property(nonatomic,retain)UIColor* pathColor;
@end
这个子类只需要扩展一个属性,就是 pathColor 用来保存画笔的颜色
//
// DrawPath.m
// 画板
//
// Created by xgao on 16/4/13.
// Copyright © 2016年 xgao. All rights reserved.
//
#import "DrawPath.h"
@implementation DrawPath
@end
DrawPath.m 里面不需要做其它功能
3、接到来我们对画板功能的实现封装一下,创建一个继承于UIView的 DrawView子类
//
// DrawView.h
// 画板
//
// Created by xgao on 16/4/13.
// Copyright © 2016年 xgao. All rights reserved.
//

#import <UIKit/UIKit.h>

@interface DrawView : UIView

// 画线的宽度
@property(nonatomic,assign)CGFloat lineWidth;

// 线条颜色
@property(nonatomic,retain)UIColor* pathColor;

// 加载背景图片
@property(nonatomic,strong)UIImage* image;

// 清屏
- (void)clear;

// 撤销
- (void)undo;

// 橡皮擦
- (void)eraser;

// 保存
- (void)save;
@end
//
// DrawView.m
// 画板
//
// Created by xgao on 16/4/13.
// Copyright © 2016年 xgao. All rights reserved.
//

#import "DrawView.h"
#import "DrawPath.h"

@interface DrawView()

@property(nonatomic,strong) DrawPath* path;

// 线的数组
@property(nonatomic,strong) NSMutableArray* paths;

@end

@implementation DrawView

- (void)awakeFromNib{

 [self setUp];
}

- (instancetype)initWithFrame:(CGRect)frame
{
 self = [super initWithFrame:frame];
 if (self) {
 [self setUp];
 }
 return self;
}

// 重绘UI
- (void)drawRect:(CGRect)rect {

 for (DrawPath* path in self.paths) {

 if ([path isKindOfClass:[UIImage class]]) {
  // 画图片
  UIImage* image = (UIImage*)path;
  [image drawInRect:rect];
 }else{
  // 画线

  // 设置画笔颜色
  [path.pathColor set];

  // 绘制
  [path stroke];
 }
 }
}

// 懒加载属性
- (NSMutableArray*)paths{

 if (_paths == nil) {
 _paths = [NSMutableArray array];
 }
 return _paths;
}

// 重写image属性
- (void)setImage:(UIImage *)image{

 _image = image;

 // 将图片加入到线条数组中
 [self.paths addObject:image];

 [self setNeedsDisplay];
}

#pragma mark - Init

// 初始化
- (void)setUp{

 // 添加平移手势
 UIPanGestureRecognizer* panGes = [[UIPanGestureRecognizer alloc]initWithTarget:self action:@selector(panGes:)];
 [self addGestureRecognizer:panGes];

 // 默认值
 self.lineWidth = 1;
 self.pathColor = [UIColor blackColor];
}

#pragma mark - Event

// 平移事件
- (void)panGes:(UIPanGestureRecognizer*)ges{

 // 获取当前点
 CGPoint curPoint = [ges locationInView:self];

 if (ges.state == UIGestureRecognizerStateBegan) { // 开始移动

 // 创建贝塞尔曲线
 _path = [[DrawPath alloc]init];

 // 设置线条宽度
 _path.lineWidth = _lineWidth;

 // 线条默认颜色
 _path.pathColor = _pathColor;

 // 设置起始点
 [_path moveToPoint:curPoint];

 [self.paths addObject:_path];
 }

 // 连线
 [_path addLineToPoint:curPoint];

 // 重绘
 [self setNeedsDisplay];
}

#pragma mark - Method

// 清屏
- (void)clear{

 [self.paths removeAllObjects];

 [self setNeedsDisplay];
}

// 撤销
- (void)undo{

 [self.paths removeLastObject];

 [self setNeedsDisplay];
}

// 橡皮擦
- (void)eraser{

 self.pathColor = [UIColor whiteColor];

 [self setNeedsDisplay];
}

// 保存
- (void)save{

 // ---- 截图操作
 // 开启上下文
 UIGraphicsBeginImageContextWithOptions(self.frame.size, NO, 0);

 // 获取当前上下文
 CGContextRef context = UIGraphicsGetCurrentContext();

 // 渲染图层到上下文
 [self.layer renderInContext:context];

 // 从上下文中获取图片
 UIImage* image = UIGraphicsGetImageFromCurrentImageContext();

 // 关闭上下文
 UIGraphicsEndImageContext();

 // ---- 保存图片
 UIImageWriteToSavedPhotosAlbum(image, self, @selector(image:didFinishSavingWithError:contextInfo:), nil);

}

// 图片保存方法,必需写这个方法体,不能会保存不了图片
- (void)image:(UIImage *)image didFinishSavingWithError:(NSError *)error contextInfo:(void *)contextInfo{

 // 提示
 UIAlertView* alert = [[UIAlertView alloc]initWithTitle:@"保存成功" message:nil delegate:nil cancelButtonTitle:@"ok" otherButtonTitles:nil, nil];
 [alert show];
}
@end
4、接下来就是如果使用这个画板类了,直接上代码吧
//
// ViewController.m
// 画板
//
// Created by xgao on 16/4/13.
// Copyright © 2016年 xgao. All rights reserved.
//

#import "ViewController.h"
#import "DrawView.h"

@interface ViewController ()<UIImagePickerControllerDelegate,UINavigationControllerDelegate>

// 画板
@property (weak, nonatomic) IBOutlet DrawView *drawView;

@end

@implementation ViewController

- (void)viewDidLoad {
 [super viewDidLoad];

}

#pragma mark - Event

// 线条宽度变化
- (IBAction)lineWidthChange:(UISlider*)sender {

 _drawView.lineWidth = sender.value;
}

// 线条颜色变化
- (IBAction)pathColorChange:(UIButton*)sender {

 _drawView.pathColor = sender.backgroundColor;
}

// 清屏
- (IBAction)clearAction:(id)sender {

 [_drawView clear];
}

// 撤销
- (IBAction)undoAction:(id)sender {

 [_drawView undo];
}

// 橡皮擦
- (IBAction)eraserAction:(id)sender {

 [_drawView eraser];
}

// 照片
- (IBAction)pickerPhotoAction:(id)sender {

 // 照片选择控制器
 UIImagePickerController* picVC = [[UIImagePickerController alloc]init];
 // 照片源
 picVC.sourceType = UIImagePickerControllerSourceTypePhotoLibrary;
 // 委托
 picVC.delegate = self;

 [self presentViewController:picVC animated:YES completion:nil];
}

// 保存
- (IBAction)saveAction:(id)sender {

 [_drawView save];
}

#pragma mark - UIImagePickerControllerDelegate

- (void)imagePickerController:(UIImagePickerController *)picker didFinishPickingImage:(UIImage *)image editingInfo:(nullable NSDictionary<NSString *,id> *)editingInfo{

 // 设置图片
 _drawView.image = image;

 // 关闭窗口
 [self dismissViewControllerAnimated:YES completion:nil];
}
@end
到这里就差不多了,这个小功能实现的基本思路与具体代码我都已经放上来了,大家如果还有哪里不清楚的可以留言喔~~
以上就是本文的全部内容,希望本文的内容对大家的学习或者工作能带来一定的帮助,同时也希望多多支持自由互联!