介绍
在 Flutter 中滚动监听一般可以采用两种方式来实现,分别是ScrollController和NotificationListener这两种方式。
ScrollController介绍
ScrollController
介绍一下ScrollController常用的属性和方法:
offset:可滚动组件当前的滚动位置。jumpTo(double offset)跳转到指定位置,offset为滚动偏移量。animateTo(double offset,@required Duration duration,@required Curve curve)同jumpTo(double offset)一样,不同的是animateTo跳转时会执行一个动画,需要传入执行动画需要的时间和动画曲线。
ScrollPosition
ScrollPosition是用来保存可滚动组件的滚动位置的。一个 ScrollController 对象可能会被多个可滚动的组件使用,
ScrollController 会为每一个滚动组件创建一个 ScrollPosition 对象来存储位置信息。ScrollPosition 中存储的是在 ScrollController 的 positions 属性里面,他是一个List<ScrollPosition>数组,在 ScrollController 中真正保存位置信息的就是 ScrollPosition,而 offset 只是一个便捷使用的属性。查看源码中可以发现 offset 获取就是从 ScrollPosition 中获取的。
/// Returns the attached [ScrollPosition], from which the actual scroll offset
 /// of the [ScrollView] can be obtained.
 /// Calling this is only valid when only a single position is attached.
 ScrollPosition get position {
  assert(_positions.isNotEmpty, 'ScrollController not attached to any scroll views.');
  assert(_positions.length == 1, 'ScrollController attached to multiple scroll views.');
  return _positions.single;
 }

 /// The current scroll offset of the scrollable widget.
 /// Requires the controller to be controlling exactly one scrollable widget.
 double get offset => position.pixels;
一个ScrollController虽然可以对应多个可滚动组件,但是读取滚动位置offset,则需要一对一读取。在一对多的情况下,我们可以使用其他方法来实现读取滚动位置。假设现在一个ScrollController对应了两个可以滚动的组件,那么可以通过position.elementAt(index)来获取ScrollPosition,从而获得offset:
controller.positions.elementAt(0).pixels
controller.positions.elementAt(1).pixels
ScrollPosition的方法
ScrollPosition有两个常用方法:分别是animateTo()和jumpTo(),他们才是真正控制跳转到滚动位置的方法,在 ScrollController 中这两个同名方法,内部最终都会调用 ScrollPosition 这两个方法。
Future<void> animateTo(
  double offset, {
  @required Duration duration,
  @required Curve curve,
 }) {
  assert(_positions.isNotEmpty, 'ScrollController not attached to any scroll views.');
  final List<Future<void>> animations = List<Future<void>>(_positions.length);
  for (int i = 0; i < _positions.length; i += 1)
   // 调用 ScrollPosition 中的 animateTo 方法
   animations[i] = _positions[i].animateTo(offset, duration: duration, curve: curve);
  return Future.wait<void>(animations).then<void>((List<void> _) => null);
 }
ScrollController控制原理
ScrollController还有其他比较重要的三个方法:
1、createScrollPosition:当ScrollController和可滚动组件关联时,可滚动组件首先会调ScrollController的createScrollPosition方法来创建一个ScrollPosition来存储滚动位置信息。
ScrollPosition createScrollPosition(
  ScrollPhysics physics,
  ScrollContext context,
  ScrollPosition oldPosition);
2、在滚动组件调用createScrollPosition方法之后,接着会调用attach方法来将创建号的ScrollPosition信息添加到positions属性中,这一步称为“注册位置”,只有注册后animateTo()和jumpTo()才可以被调用。
void attach(ScrollPosition position);
3、最后当可滚动组件被销毁时,会调用detach()方法,将其ScrollPosition对象从ScrollController的positions属性中移除,这一步称为“注销位置”,注销后animateTo()和jumpTo()将不能再被调用。
void detach(ScrollPosition position);
NotificationListener介绍
通知冒泡
Flutter Widget 树中子 Widge t可以通过发送通知(Notification)与父(包括祖先) Widget 进行通信,父级组件可以通过NotificationListener组件来监听自己关注的通知,这种通信方式类似于 Web 开发中浏览器的事件冒泡,在 Flutter 中就沿用了“冒泡”这个术语,称为通知冒泡
通知冒泡和用户触摸事件冒泡是相似的,但有一点不同:通知冒泡可以中止,但用户触摸事件不行。
滚动通知
Flutter 中很多地方使用了通知,如可滚动组件(Scrollable Widget)滑动时就会分发滚动通知(ScrollNotification),而Scrollbar正是通过监听ScrollNotification来确定滚动条位置的。
switch (notification.runtimeType){
 case ScrollStartNotification: print("开始滚动"); break;
 case ScrollUpdateNotification: print("正在滚动"); break;
 case ScrollEndNotification: print("滚动停止"); break;
 case OverscrollNotification: print("滚动到边界"); break;
}
其中ScrollStartNotification和ScrollUpdateNotification等都是继承ScrollNotification类的,不同类型的通知子类会包含不同的信息,ScrollUpdateNotification有一个scrollDelta属性,它记录了移动的位移。
NotificationListener时继承StatelessWidget类的额,左右我们可以直接在放置在Widget 数中,通过里面的onNotification可以指定一个模板参数,该模板参数类型必须是继承自Notification,可以显式指定模板参数时,比如通知的类型为滚动结束通知:
NotificationListener<ScrollEndNotification>
这个时候NotificationListener便只会接收该参数类型的通知。
onNotification回调为通知处理回调,他的返回值时布尔类型(bool),当返回值为true时,阻止冒泡,其父级 Widget 将再也收不到该通知;当返回值为false时继续向上冒泡通知。
两者区别
首先这两种方式都可以实现对滚动的监听,但是他们还是有一些区别:
ScrollController可以控制滚动控件的滚动,而NotificationListener是不可以的。- 通过
NotificationListener可以在从可滚动组件到widget树根之间任意位置都能监听,而ScrollController只能和具体的可滚动组件关联后才可以。 - 收到滚动事件后获得的信息不同;
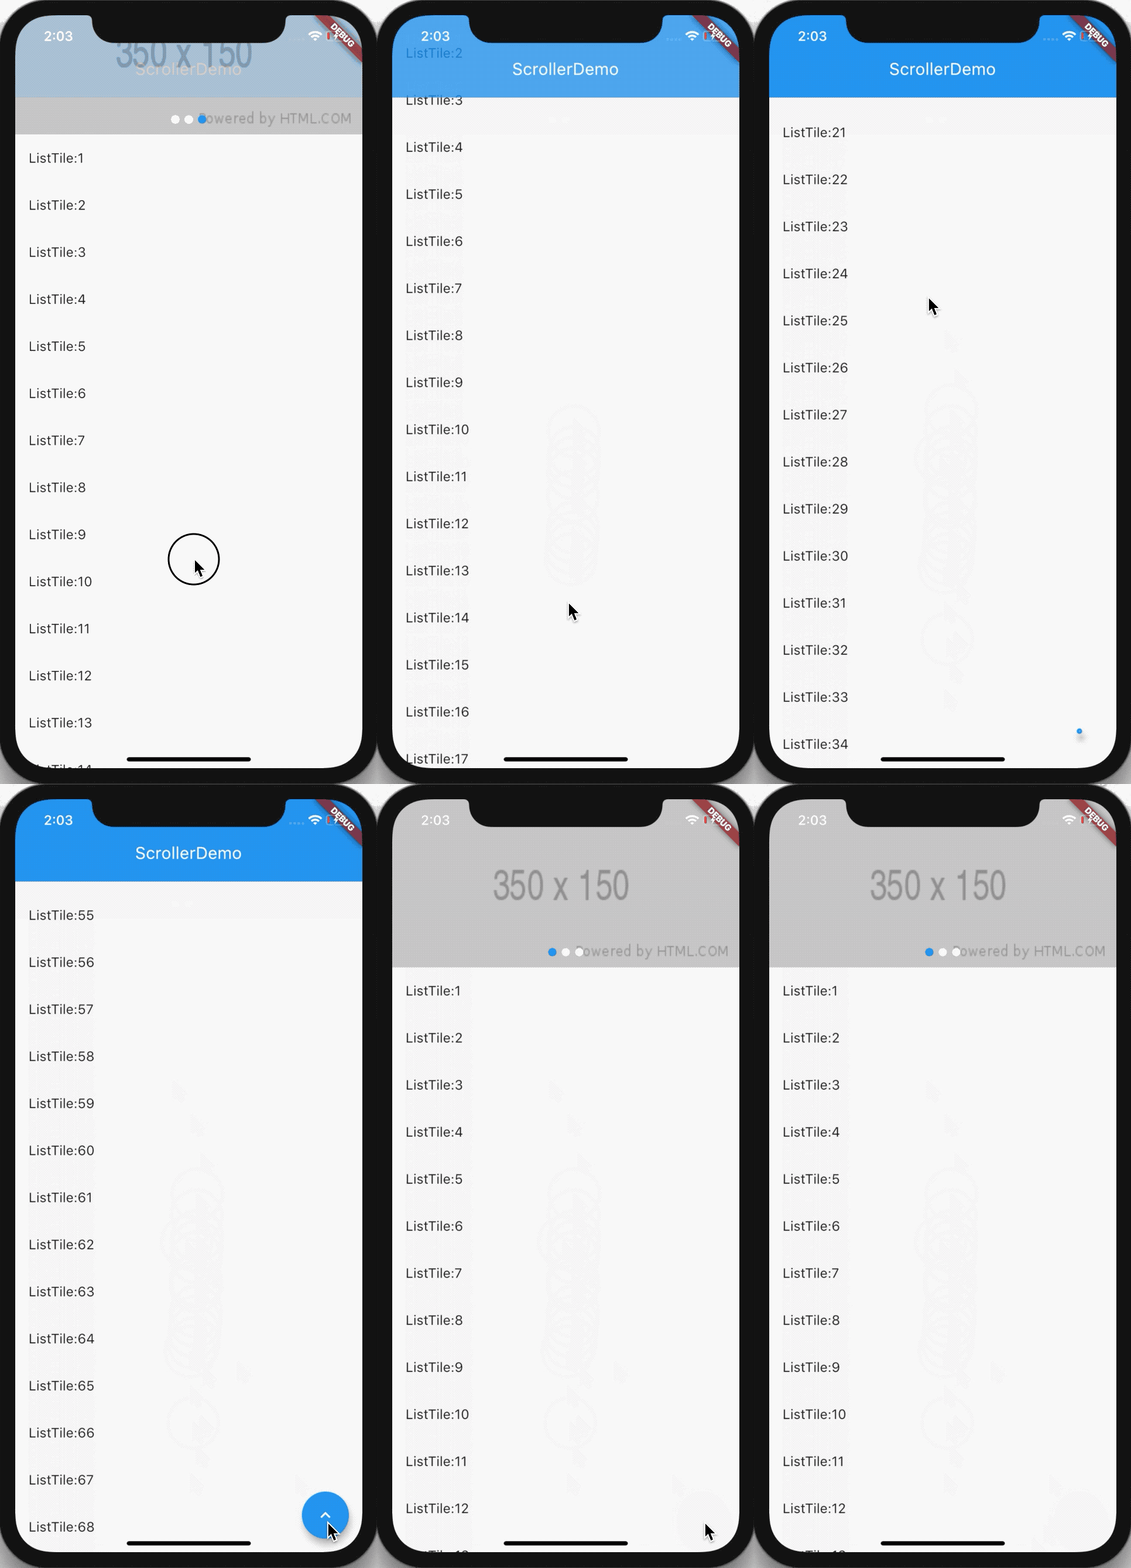
NotificationListener在收到滚动事件时,通知中会携带当前滚动位置和ViewPort的一些信息,而ScrollController只能获取当前滚动位置。ScrollController实例效果图

代码实现步骤
创建滚动所需的界面,一个Scaffold组件body里面方式一个Stack的层叠小部件,里面放置一个listview,和自定义的appBar;floatingActionButton放置一个返回顶部的悬浮按钮。
Scaffold(
   body: Stack(
    children: <Widget>[
     MediaQuery.removePadding(
      removeTop: true,
      context: context,
      child: ListView.builder(
       // ScrollController 关联滚动组件
       controller: _controller,
       itemCount: 100,
       itemBuilder: (context, index) {
        if (index == 0) {
         return Container(
          height: 200,
          child: Swiper(
           itemBuilder: (BuildContext context, int index) {
            return new Image.network(
             "http://via.placeholder.com/350x150",
             fit: BoxFit.fill,
            );
           },
           itemCount: 3,
           autoplay: true,
           pagination: new SwiperPagination(),
          ),
         );
        }
        return ListTile(
         title: Text("ListTile:$index"),
        );
       },
      ),
     ),
     Opacity(
      opacity: toolbarOpacity,
      child: Container(
       height: 98,
       color: Colors.blue,
       child: Padding(
        padding: const EdgeInsets.only(top: 30.0),
        child: Center(
         child: Text(
          "ScrollerDemo",
          style: TextStyle(color: Colors.white, fontSize: 20.0),
         ),
        ),
       ),
      ),
     )
    ],
   ),
   floatingActionButton: !showToTopBtn
     ? null
     : FloatingActionButton(
       child: Icon(Icons.keyboard_arrow_up),
       onPressed: () {
        _controller.animateTo(0.0, duration: Duration(milliseconds: 500), curve: Curves.ease);
       },
      ),
  )
创建ScrollController对象,在初始化中添加对滚动的监听,并和ListView这个可滚动小部件进行关联:
 double t = _controller.offset / DEFAULT_SCROLLER;
 if (t < 0.0) {
  t = 0.0;
 } else if (t > 1.0) {
  t = 1.0;
 }
 setState(() {
  toolbarOpacity = t;
 });
在 _controller.addListener 中添加相关业务代码,根据滚动的偏移量计算出透明度,实现appBar滚动渐变:
if(_controller.offset < DEFAULT_SHOW_TOP_BTN && showToTopBtn){
 setState(() {
 showToTopBtn = false;
	});
}else if(_controller.offset >= DEFAULT_SHOW_TOP_BTN && !showToTopBtn){
 setState(() {
  showToTopBtn = true;
 });
}
更具滚动的高度和当前floatingActionButton的现实状态,判断floatingActionButton是否需要展示:
if(_controller.offset < DEFAULT_SHOW_TOP_BTN && showToTopBtn){
 setState(() {
 showToTopBtn = false;
	});
}else if(_controller.offset >= DEFAULT_SHOW_TOP_BTN && !showToTopBtn){
 setState(() {
  showToTopBtn = true;
 });
}
点击floatingActionButton返回到顶部:
_controller.animateTo(0.0, duration: Duration(milliseconds: 500), curve: Curves.ease);
完整代码请参考下方GitHub项目中/demo/scroller_demo.dart文件。
NotificationListener实例
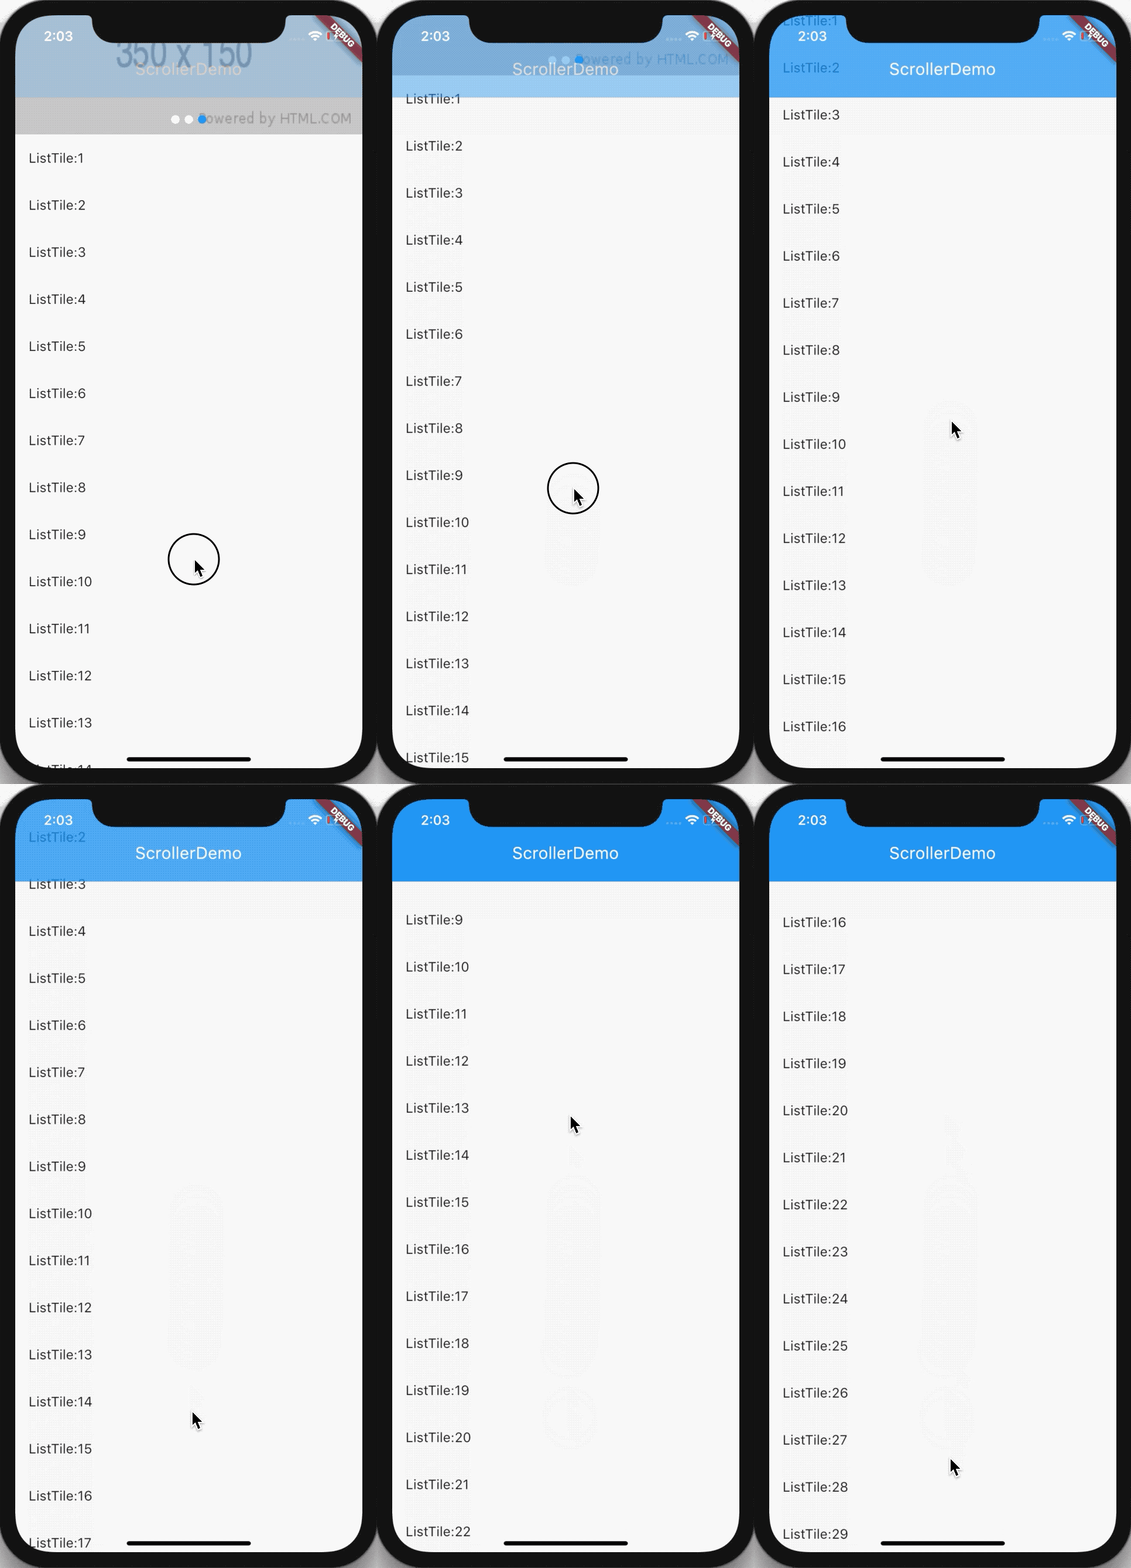
效果图

代码实现步骤
在 NotificationListener 实例中布局基本上和 ScrollController 一致,不同的地方在于 ListView 需要包裹在 NotificationListener 中作为 child,然后 NotificationListener 在 onNotification 中判断滚动偏移量:
if (notification is ScrollUpdateNotification && notification.depth == 0) {
 double t = notification.metrics.pixels / DEFAULT_SCROLLER;
 if (t < 0.0) {
  t = 0.0;
 } else if (t > 1.0) {
  t = 1.0;
 }
 setState(() {
  toolbarOpacity = t;
 });

 print(notification.metrics.pixels); //打印滚动位置
}
完整代码请参考下方GitHub项目中/demo/notification_listener_demo.dart文件
以上就是本文的全部内容,希望对大家的学习有所帮助,也希望大家多多支持自由互联。
