这一节我们主要来创建一个简单的 Android 的应用程序。 创建 HelloWorld 工程 启动 Android Studio,依次选择 File -- New -- New Project,将会出现如图 1 所示的界面。在 Application name 中输入项目名称
创建 HelloWorld 工程
启动 Android Studio,依次选择 File --> New --> New Project,将会出现如图 1 所示的界面。在 Application name 中输入项目名称“HelloWorld”,在 Company Domain 中输入“android.introduction”,系统会自动生成包名为“introduction.Android.helloWorld”。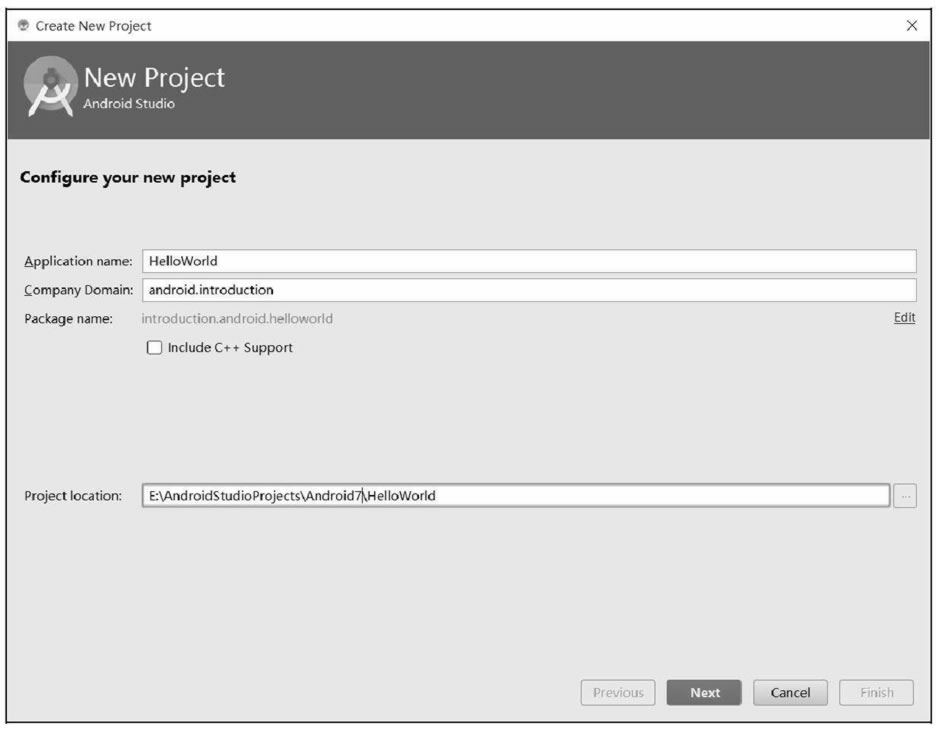
图 1 创建 HelloWorld 工程
Project Location 指定工程文件存放的位置。单击“Next”按钮,出现如图 2 所示的界面,用于选择应用运行的系统版本。选择运行平台为“Android 7.0”。
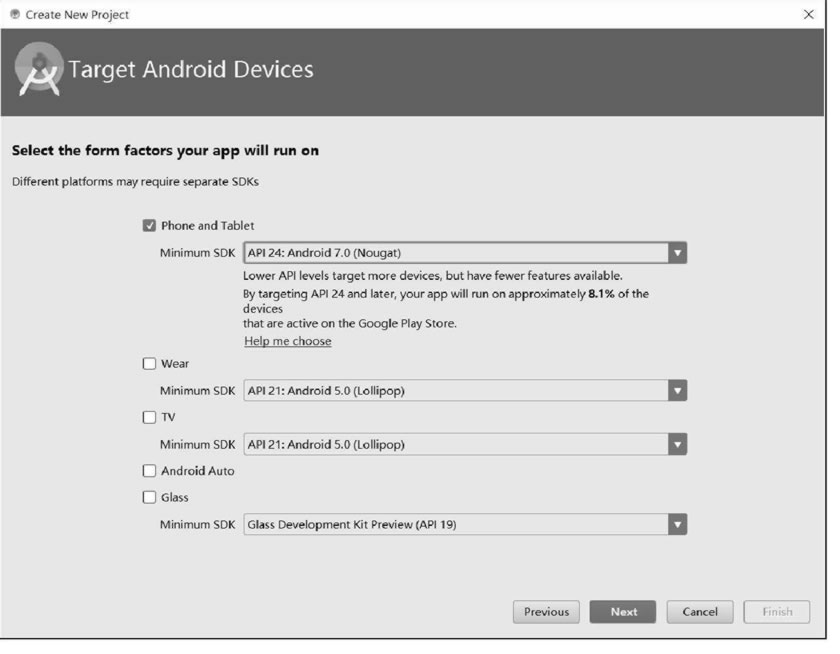
图 2 选择应用系统平台
再次单击“Next”按钮,进入创建 Activity 界面,如图 3 所示。该界面可以添加多种 Activity 的模板,本次添加一个基本的 Activity 即可,选择“Basic Activity”。
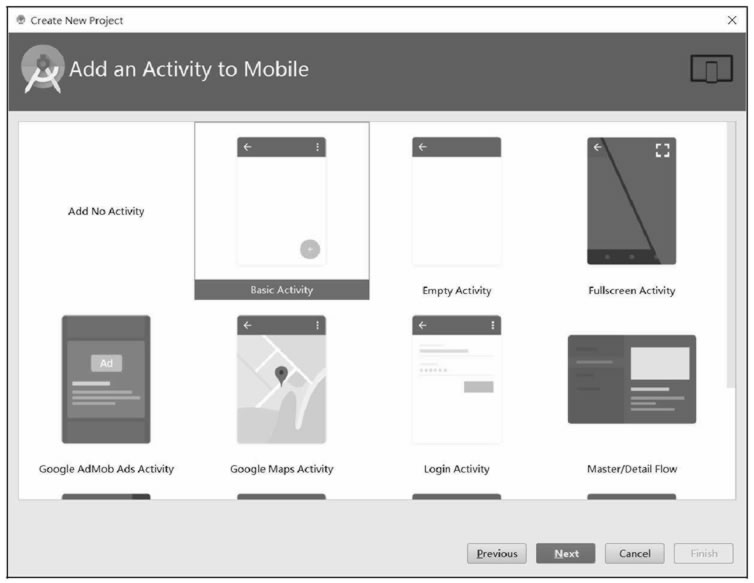
图 3 创建 Activity
单击“Next”按钮,进入如图 4 所示的界面,指定 Activity 的相关信息,例如 Activity 的名字、布局文件的名字、菜单资源的名字以及 Activity 上显示的标题。此处使用默认设置,不做更改。
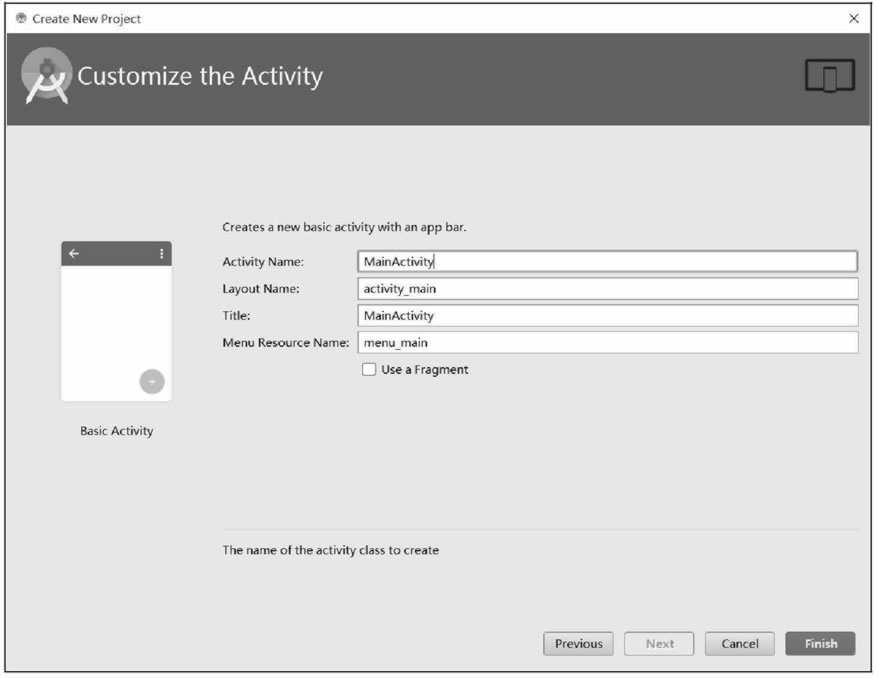
图 4 指定 Activity 的相关信息
设置完成后,单击“Finish”按钮完成工程的创建。
Android Studio 会根据刚才指定的相关信息生成相关模板代码,用户无须编写任何一行代码,该工程就可以运行。按 Shift+F10 快捷键,选择要运行的 AVD,可查看运行效果,如图 5 所示。
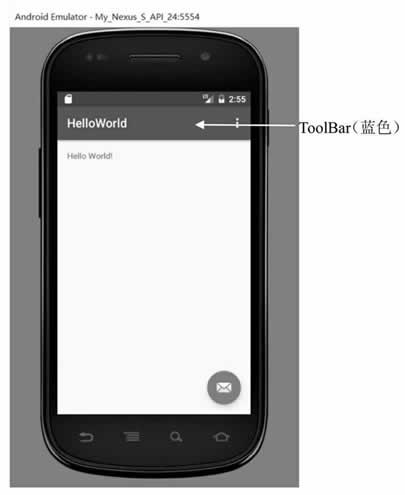
图 5 运行效果
相关代码
双击 HelloWorld 工程中的 MainActivity.java,该文件中已有程序代码如下:
package introduction.android.helloworld;

import android.os.Bundle;
import android.support.design.widget.FloatingActionButton;
import android.support.design.widget.Snackbar;
import android.support.v7.app.AppCompatActivity;
import android.support.v7.widget.Toolbar;
import android.view.View;
import android.view.Menu;
import android.view.MenuItem;

public class MainActivity extends AppCompatActivity {

    @Override
    protected void onCreate(Bundle savedInstanceState) {
        super.onCreate(savedInstanceState);
        setContentView(R.layout.activity_main);
        Toolbar toolbar = (Toolbar) findViewById(R.id.toolbar);
        setSupportActionBar(toolbar);

        FloatingActionButton fab = (FloatingActionButton) findViewById(R.id.fab);
        fab.setOnClickListener(new View.OnClickListener() {
            @Override
            public void onClick(View view) {
                Snackbar.make(view, "Replace with your own action", Snackbar.LENGTH_LONG)
                        .setAction("Action", null).show();

            }
        });
    }

    @Override
    public boolean onCreateOptionsMenu(Menu menu) {
        // Inflate the menu; this adds items to the action bar if it is present.
        getMenuInflater().inflate(R.menu.menu_main, menu);
        return true;
    }

    @Override
    public boolean onOptionsItemSelected(MenuItem item) {
        // Handle action bar item clicks here. The action bar will
        // automatically handle clicks on the Home/Up button, so long
        // as you specify a parent activity in AndroidManifest.xml.
        int id = item.getItemId();

        //noinspection SimplifiableIfStatement
        if (id == R.id.action_settings) {
            return true;
        }

        return super.onOptionsItemSelected(item);
    }
}
MainActivity.java 中的代码比较简单,表明类 MainActivity 继承了 AppCompatActivity 类,并重写了 onCreate() 方法。AppCompatActivity 类是 Android Studio 中默认的构建自定义 Activity 的模板类,与 Eclipse+ADT 环境中默认使用的 Activity 相比,AppCompatActivity 提供了对工具栏 ToolBar 的支持。相关代码如下:
Toolbar toolbar = (Toolbar) findViewById(R.id.toolbar);
setSupportActionBar(toolbar);
Activity_main.xml 的内容如下:
<?xml version="1.0" encoding="utf-8"?>
<android.support.design.widget.CoordinatorLayout
    xmlns:android="http://schemas.android.com/apk/res/android"
    xmlns:app="http://schemas.android.com/apk/res-auto"
    xmlns:tools="http://schemas.android.com/tools"
    android:layout_width="match_parent"
    android:layout_height="match_parent"
    tools:context="introduction.android.helloworld.MainActivity">

    <android.support.design.widget.AppBarLayout
        android:layout_width="match_parent"
        android:layout_height="wrap_content"
        android:theme="@style/AppTheme.AppBarOverlay">

        <android.support.v7.widget.Toolbar
            android:id="@+id/toolbar"
            android:layout_width="match_parent"
            android:layout_height="?attr/actionBarSize"
            android:background="?attr/colorPrimary"
            app:popupTheme="@style/AppTheme.PopupOverlay" />

    </android.support.design.widget.AppBarLayout>

    <include layout="@layout/content_main" />

    <android.support.design.widget.FloatingActionButton
        android:id="@+id/fab"
        android:layout_width="wrap_content"
        android:layout_height="wrap_content"
        android:layout_gravity="bottom|end"
        android:layout_margin="@dimen/fab_margin"
        app:srcCompat="@android:drawable/ic_dialog_email" />

</android.support.design.widget.CoordinatorLayout>
CoordinatorLayout 布局是 support v7 系统新增的布局,具有便于调度协调子布局的特点。该布局可看作是增强版的 FrameLayout,通常与 ToolBar 和 FloatingActionButton 合用。 ToolBar 是图 5 中显示 HelloWorld 的蓝色工具栏,具有承载系统菜单的功能。布局相关代码如下:
<android.support.design.widget.AppBarLayout
        android:layout_width="match_parent"
        android:layout_height="wrap_content"
        android:theme="@style/AppTheme.AppBarOverlay">

        <android.support.v7.widget.Toolbar
            android:id="@+id/toolbar"
            android:layout_width="match_parent"
            android:layout_height="?attr/actionBarSize"
            android:background="?attr/colorPrimary"
            app:popupTheme="@style/AppTheme.PopupOverlay" />

</android.support.design.widget.AppBarLayout>
FloatingActionButton 是图 5 中右下侧的邮箱图标的按钮,布局相关代码如下:
<android.support.design.widget.FloatingActionButton
        android:id="@+id/fab"
        android:layout_width="wrap_content"
        android:layout_height="wrap_content"
        android:layout_gravity="bottom|end"
        android:layout_margin="@dimen/fab_margin"
        app:srcCompat="@android:drawable/ic_dialog_email" />
在 MainActivity.java 中,FloatingActionButton 的事件处理代码为:
FloatingActionButton fab = (FloatingActionButton) findViewById(R.id.fab);
        fab.setOnClickListener(new View.OnClickListener() {
            @Override
            public void onClick(View view) {
                Snackbar.make(view, "Replace with your own action", Snackbar.LENGTH_LONG)
                        .setAction("Action", null).show();
            }
 });
该代码实现的功能是,当点击按钮时,显示 "Replace with your own action"。
<include layout ="@layout/content_main" />
这行代码将 content_main.xml 的布局嵌入 activity_main 布局中。content_main.xml 的代码为:
<?xml version="1.0" encoding="utf-8"?>

<android.support.constraint.ConstraintLayout
    xmlns:android="http://schemas.android.com/apk/res/android"
    xmlns:app="http://schemas.android.com/apk/res-auto"
    xmlns:tools="http://schemas.android.com/tools"
    android:layout_width="match_parent"
    android:layout_height="match_parent"
    app:layout_behavior="A@string/appbar_scrolling_view_behavior"
    tools:context="introduction.android.helloworld.MainActivity"
    tools:showIn="@layout/activity_main">

    <TextView
        android:layout_width="wrap_content"
        android:layout_height="wrap_content"
        android:text="Hello World!"
        app:layout_constraintBottom_toBottomOf="parent"
        app:layout_constraintLeft_toLeftOf="parent"
        app:layout_constraintRight_toRightOf="parent"
        app:layout_constraintTop_toTopOf="parent" />

</android.support.constraint.ConstraintLayout>
该文件中的代码表示当前的布局文件使用 LinearLayout 布局,该布局中仅有一个 TextView 组件用于显示信息,显示的内容为 "Hello World!"。Android Studio 鼓励用户将所有组件放置到 content_main.xml 中,而对 activity_main 中的代码尽量不做修改。
为了简化代码,降低阅读难度,在本教程的范例程序代码中,除非需要用到工具栏和悬浮按钮,其余都会将 .java 文件和 .xml 文件中的 ToolBar 和 FloatingActionButton 的相关代码移除掉,并且直接使用单个布局文件搭建界面,避免使用 include 将一个布局嵌入另一个布局中。
工程文件结构解析
没有书写一句程序代码,一个 Android 应用便创建成功了,但是这只是一个简单的 Android 应用,要创建更多的 Android 应用,还要详细地了解 Android 应用程序结构。 Android Studio 的 Project 工程文件结构如图 6 所示。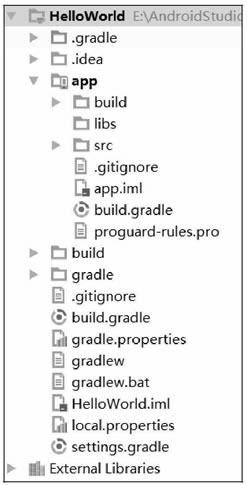
图 6 Android Studio工程文件结构
主要目录和作用:
app目录下的结构如图 7 所示:

图 7 app目录结构
下面分别介绍各个目录或文件的作用: