本文实例为大家分享了JS实现弹幕小案例的具体代码,供大家参考,具体内容如下 效果图: 步骤分析: 1、收集用户输入内容,根据内容创建一个标签--span,追加到某个容器中 2、为元
本文实例为大家分享了JS实现弹幕小案例的具体代码,供大家参考,具体内容如下
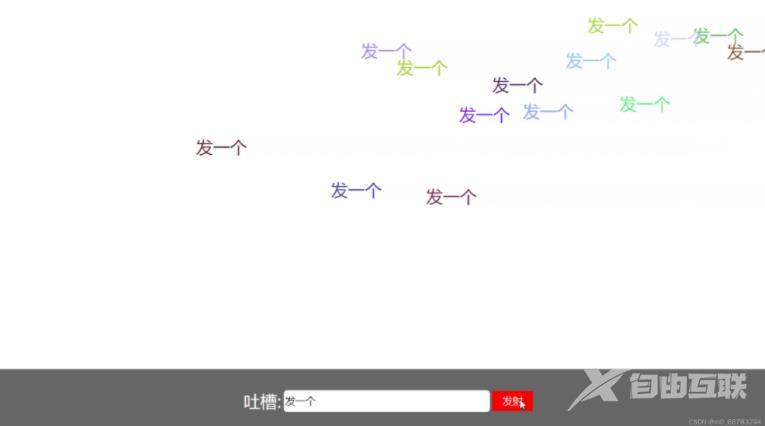
效果图:
步骤分析:
1、收集用户输入内容,根据内容创建一个标签--span,追加到某个容器中
2、为元素设置位置
- left:右侧--大容器外面
- top:上半区
3、通过样式设置来实现元素的动画,也可以通过定时器的方式实现动画
4、细节
- 文本颜色随机
- span动画结束之后应该进行自动的清除
html代码:
<div class="boxDom" id="boxDom">
      <div class="idDom" id="idDom">
        <div class="content">
          <p class="title">吐槽:</p>
          <input type="text" class="text" id="text" />
          <button type="button" class="btn" id="btn">发射</button>
        </div>
      </div>
</div>
css代码:
<style type="text/css">
      html,
      body {
        margin: 0px;
        padding: 0px;
        width: 100%;
        height: 100%;
        font-family: '微软雅黑';
        font-size: 62.5%;
      }

      .boxDom {
        width: 100%;
        height: 100%;
        position: relative;
        overflow: hidden;
      }

      .idDom {
        width: 100%;
        height: 100px;
        background: #666;
        position: fixed;
        bottom: 0px;
      }

      .content {
        display: inline-block;
        width: 430px;
        height: 40px;
        position: absolute;
        left: 0px;
        right: 0px;
        top: 0px;
        bottom: 0px;
        margin: auto;
      }

      .title {
        display: inline;
        font-size: 4em;
        vertical-align: bottom;
        color: #fff;
      }

      .text {
        border: none;
        width: 300px;
        height: 30px;
        border-radius: 5px;
        font-size: 2.4em;
      }

      .btn {
        width: 60px;
        height: 30px;
        background: #f90000;
        border: none;
        color: #fff;
        font-size: 2.4em;
      }

      span {
        /* width: 300px; */
        height: 40px;
        position: absolute;
        overflow: hidden;
        color: #000;
        font-size: 4em;
        line-height: 1.5em;
        cursor: pointer;
        white-space: nowrap;
      }
</style>
JS代码:
// 获取元素
let btn = document.querySelector('#btn')
let text = document.querySelector('#text')
let boxDom = document.querySelector('#boxDom')

// 为按钮绑定事件
btn.addEventListener('click', function() {
    // 获取用户输入内容
    // 表单元素input的值的获取是使用value
    let content = text.value
    // trim:去除左右空格
    if (content.trim().length == 0) {
        alert('请输入一个内容再发弹幕')
        return
    }
    // 创建一个元素
    // createElement:创建元素
    let span = document.createElement('span')
    span.innerText = content

    // 为元素设置样式
    // clientWidth:获取元素的实际宽度
    // 设置left值为元素右侧外
    span.style.left = boxDom.clientWidth + 'px'
    // 设置top为上半区随机位置
    span.style.top =
        parseInt((Math.random() * boxDom.clientHeight) / 2) + 'px'
    // span.style.color = setColor()
    //设置字体的随机颜色
    span.style.color = `rgb(${Math.random() * 255},${Math.random() *
        255},${Math.random() * 255})`

    // 让元素动起来 -- 配合过渡样式
    // setTimeout(() => {
    //   span.style.left = -span.clientWidth + 'px'
    // }, 200)
    // 距停止位置的距离
    let dis = boxDom.clientWidth
    // setInterval(需要执行的函数,时间间隔)
    let tid = setInterval(function() {
        dis -= 1
        span.style.left = dis + 'px'
        // 移动到目标位置,清除定时器
        if (dis < -span.clientWidth) {
            clearInterval(tid)
            // 将当前的span移除
            span.remove()
        }
    }, 4)

    // 添加到指定容器中
    // insertBefore:将指定的元素插入到参照元素的前面:父容器.insertBefore(子元素,参照元素)
    // appendChild:将元素追加到所有子元素的最后: 父容器.appendChild(子元素)
    // insertBefore:一定传入两个参数
    boxDom.insertBefore(span, boxDom.children[0])
})
以上就是本文的全部内容,希望对大家的学习有所帮助,也希望大家多多支持自由互联。