目录 直方图均衡化 自适应直方图均衡化 直方图均衡化 直方图均衡化(Histogram Equalization)是一种增强图像对比度(Image Contrast)的方法,其主要思想是将一副图像的直方图分布变成近似均匀
目录
- 直方图均衡化
- 自适应直方图均衡化
直方图均衡化
直方图均衡化(Histogram Equalization)是一种增强图像对比度(Image Contrast)的方法,其主要思想是将一副图像的直方图分布变成近似均匀分布,从而增强图像的对比度。
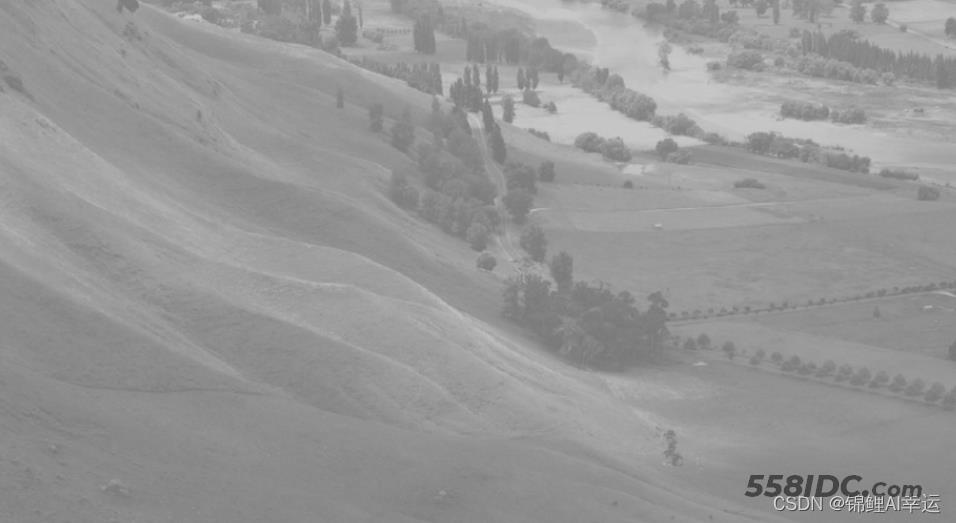
scenery.png原图(下载):

import cv2  # opencv读取的格式是BGR
import numpy as np
import matplotlib.pyplot as plt  # Matplotlib是RGB
# %matplotlib inline

def cv_show(img, name):
    cv2.imshow(name, img)
    cv2.waitKey()
    cv2.destroyAllWindows()


img = cv2.imread('DataPreprocessing/img/scenery.png', 0)  # 0表示灰度图
hist = cv2.calcHist([img], [0], None, [256], [0, 256])
print(hist.shape)

plt.hist(img.ravel(), 256)
plt.show()
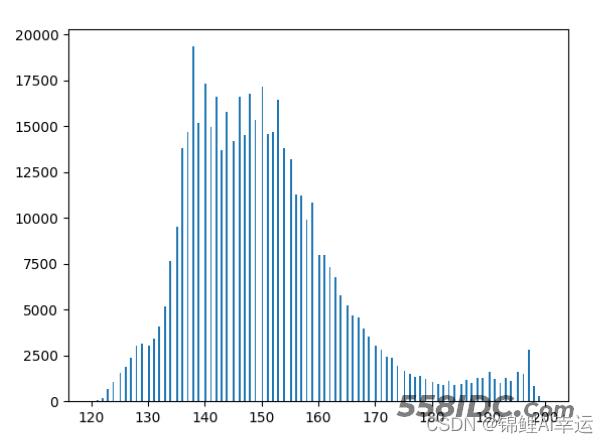
转为灰度图后,整张图片像素分布的直方图结果:

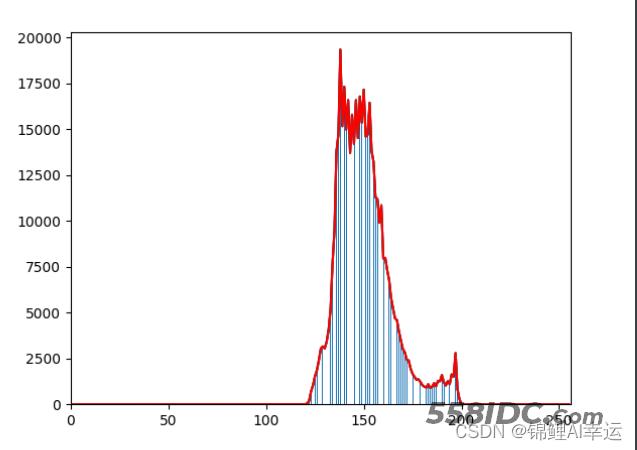
画出三通道的直方图分布:
color = ('b', 'g', 'r')
for i, col in enumerate(color):
    histr = cv2.calcHist([img], [i], None, [256], [0, 256])
    plt.plot(histr, color=col)
    plt.xlim([0, 256])

直方图均衡化处理:
img = cv2.imread('DataPreprocessing/img/scenery.png', 0)

equ = cv2.equalizeHist(img)
plt.hist(equ.ravel(), 256)
plt.show()
# cv_show(equ, "equ")
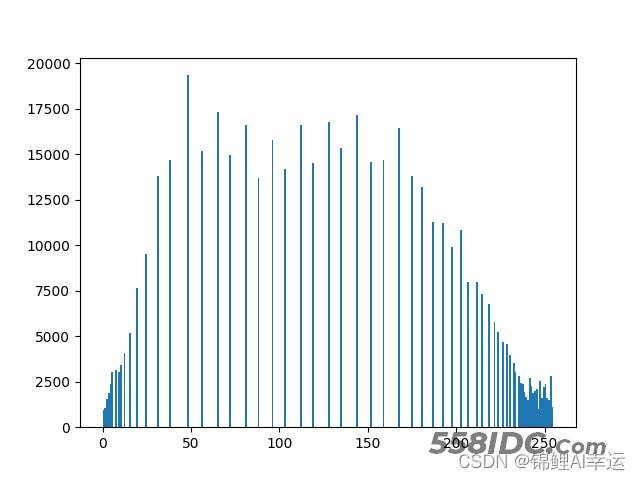
经过直方图均衡化处理后的像素分布:

自适应直方图均衡化
clahe = cv2.createCLAHE(clipLimit=2.0, tileGridSize=(8, 8))

res_clahe = clahe.apply(img)
res = np.hstack((img, equ, res_clahe))
cv2.imwrite("res_scenery.png", res)

cv_show(res, 'res')
展示所有的结果(原图 - - - 直方图均衡化 - - - 自适应直方图均衡化):

到此这篇关于Python+OpenCV之直方图均衡化详解的文章就介绍到这了,更多相关Python OpenCV直方图均衡化内容请搜索自由互联以前的文章或继续浏览下面的相关文章希望大家以后多多支持自由互联!
