投影变换(仿射变换) 在数学中,线性变换是将一个向量空间映射到另一个向量空间的函数,通常由矩阵实现。如果映射保留向量加法和标量乘法,则映射被认为是线性变换。 要将线

投影变换(仿射变换)
在数学中,线性变换是将一个向量空间映射到另一个向量空间的函数,通常由矩阵实现。如果映射保留向量加法和标量乘法,则映射被认为是线性变换。
要将线性变换应用于向量(即,一个点的坐标,在我们的例子中——像素的 x 和 y 值),需要将该向量乘以表示线性变换的矩阵。作为输出,你将获得一个坐标转换后的向量。
投影变换可以用以下矩阵表示:

其中:

是一个旋转矩阵。该矩阵定义了将要执行的变换类型:缩放、旋转等。

是平移向量。它只是移动点。

是投影向量。对于仿射变换,该向量的所有元素始终等于 0。
如果 x 和 y 是一个点的坐标,则可以通过简单的乘法进行变换:

这里,x' 和 y' 是变换点的坐标。
这就是仿射变换的全部理论。现在我将深入研究该程序:
步骤 1:读取源图像并获取源图像大小:
# Read source image
img_src = cv2.imread('source_image.jpg')
h, w, c = img_src.shape

# Get source image parameter:
#[[left,top], [left,bottom], [right, top], [right, bottom]]

img_src_coordinate = np.array([[0,0],[0,h],[w,0],[w,h]])
根据源图像,我们将得到相关坐标如下:
[[左,上],[左,下],[右,上],[右,下]]

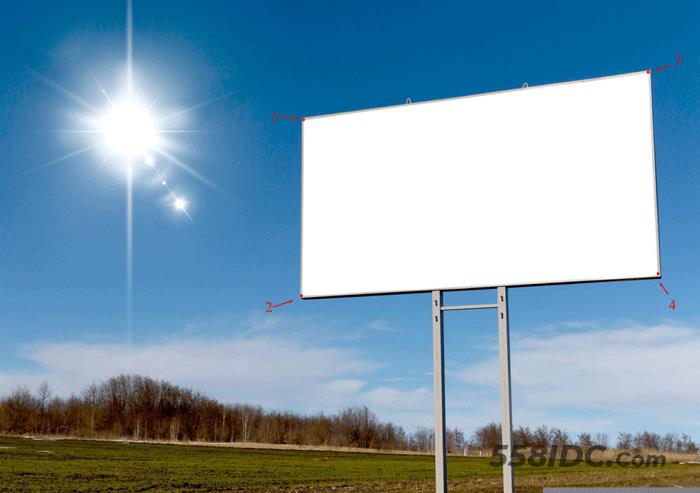
好的!现在我们使用 get_paste_position 来获取目标图像中的坐标,源图像将被粘贴到该坐标。

def get_paste_position(event, x, y, flags, paste_coordinate_list):
    cv2.imshow('collect coordinate', img_dest_copy)
    if event == cv2.EVENT_LBUTTONUP:
    # Draw circle right in click position
    cv2.circle(img_dest_copy, (x, y), 2, (0, 0, 255), -1)
    # Append new clicked coordinate to paste_coordinate_list
    paste_coordinate_list.append([x, y])
点击4个点后,我们将4个点保存到paste_coordinate_list:
while True:
    cv2.waitKey(1)
    if len(paste_coordinate) == 4:
        break
然后,这 4 个点将通过 cv2.findHomography 计算投影变换矩阵。
matrix, _ = cv2.findHomography(img_src_coordinate, paste_coordinate, 0)
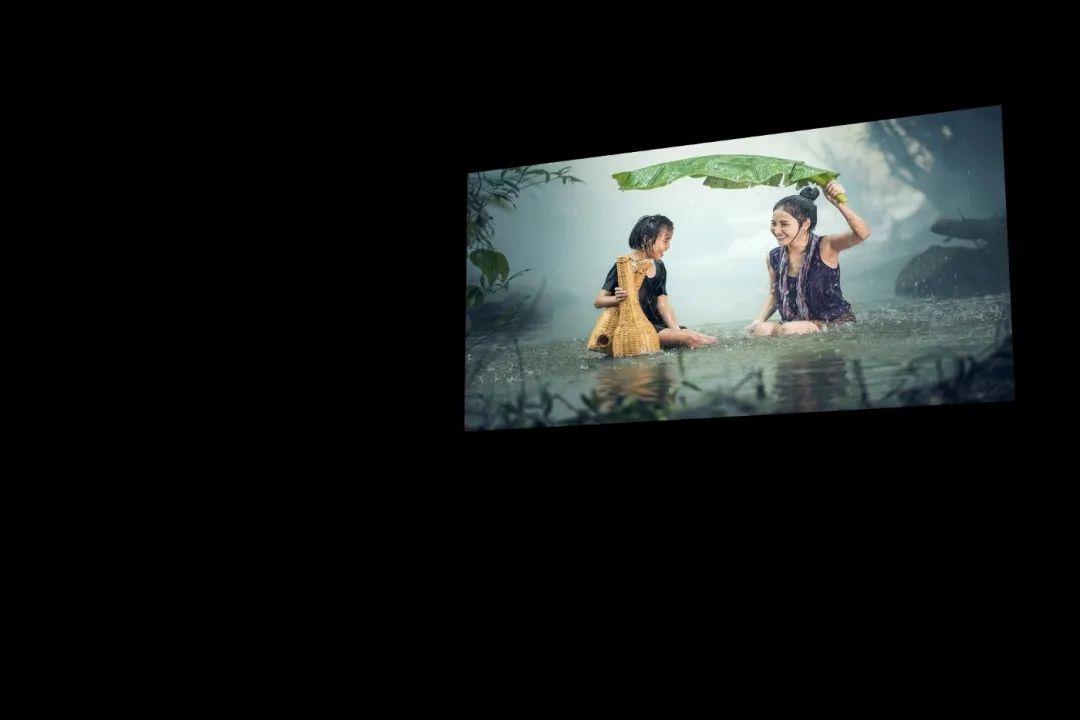
得到投影变换矩阵后,我们将使用 cv2.warpPerspective 将源图像转换为具有目标图像大小的透视图像。
perspective_img = cv2.warpPerspective(img_src, matrix, (img_dest.shape[1], img_dest.shape[0]))
这是透视图的样子:

透视图
最后,将透视图像应用于目标图像,这就是最终效果:

完整代码:
import cv2 as cv2
import numpy as np

# This function will get click pixel coordinate that source image will be pasted to destination image
def get_paste_position(event, x, y, flags, paste_coordinate_list):
    cv2.imshow('collect coordinate', img_dest_copy)
    if event == cv2.EVENT_LBUTTONUP:
    # Draw circle right in click position
    cv2.circle(img_dest_copy, (x, y), 2, (0, 0, 255), -1)

    # Append new clicked coordinate to paste_coordinate_list
    paste_coordinate_list.append([x, y])
if __name__ == '__main__':

    # Read source image
    img_src = cv2.imread('woman-1807533_960_720.webp', cv2.IMREAD_COLOR)

    # cv2.imwrite('source_image.jpg', img_src)
    h, w, c = img_src.shape

    # Get source image parameter: [[left,top], [left,bottom], [right, top], [right, bottom]]
    img_src_coordinate = np.array([[0,0],[0,h],[w,0],[w,h]])

    # Read destination image
    img_dest = cv2.imread('billboard-g7005ff0f9_1920.jpg', cv2.IMREAD_COLOR)

    # copy destination image for get_paste_position (Just avoid destination image will be draw)
    img_dest_copy = img_dest.copy()#np.tile(img_dest, 1)

    # paste_coordinate in destination image
    paste_coordinate = []
    cv2.namedWindow('collect coordinate')
    cv2.setMouseCallback('collect coordinate', get_paste_position, paste_coordinate)

    while True:
        cv2.waitKey(1)
        if len(paste_coordinate) == 4:
            break
    paste_coordinate = np.array(paste_coordinate)

    # Get perspective matrix
    matrix, _ = cv2.findHomography(img_src_coordinate, paste_coordinate, 0)
    print(f'matrix: {matrix}')
    perspective_img = cv2.warpPerspective(img_src, matrix, (img_dest.shape[1], img_dest.shape[0]))
    cv2.imshow('img', perspective_img)
    cv2.copyTo(src=perspective_img, mask=np.tile(perspective_img, 1), dst=img_dest)
    cv2.imshow('result', img_dest)
    cv2.waitKey()
    cv2.destroyAllWindows()
到此这篇关于Python使用 OpenCV 进行图像投影变换的文章就介绍到这了,更多相关Python OpenCV 图像投影内容请搜索自由互联以前的文章或继续浏览下面的相关文章希望大家以后多多支持自由互联!
