目录 1.vs中生成dll 2.unity中justatry脚本 3.在unity中调试 4.在vs中调试 4.1 把unity的工程生成对应的exe 4.2 在vs项目的属性中做如下设置 4.3 在VS工程的属性中的输出目录设置为上面的目录 5.注意
目录
- 1.vs中生成dll
- 2.unity中justatry脚本
- 3.在unity中调试
- 4.在vs中调试
- 4.1 把unity的工程生成对应的exe
- 4.2 在vs项目的属性中做如下设置
- 4.3 在VS工程的属性中的输出目录设置为上面的目录
- 5.注意vs和unity的平台x86/x64要对应
- 5.1 vs x86/x64
- 5.2 unity
1.vs中生成dll
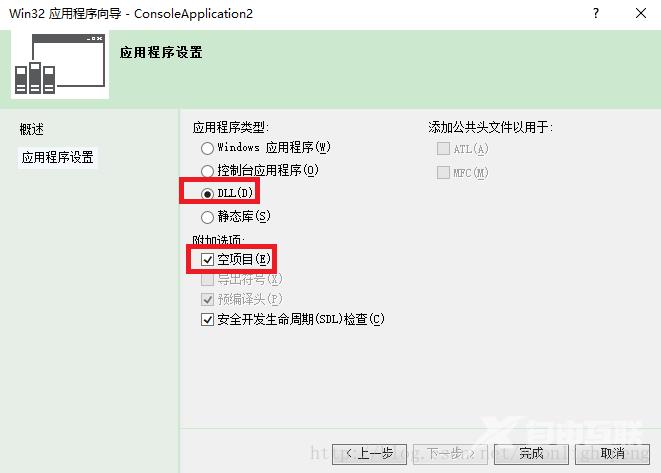
对应的生成dll的cpp如下
#include<opencv2/opencv.hpp>
#include "opencv2/core/core.hpp"
#include "opencv2/imgproc/imgproc.hpp"
using namespace cv;

#define EXPORT_API __declspec(dllexport)

VideoCapture my_camera;
int width = 640;
int height = 480;

extern "C" bool EXPORT_API openCamera()
{
	bool my_open = false;
	while (!my_camera.isOpened())
	{
		std::cout << "Cannot open the camera!" << std::endl;
		my_camera.open(0);//一个接口能同时打开两个摄像头
	}
	my_camera.set(CV_CAP_PROP_FRAME_WIDTH, width*2);
	my_camera.set(CV_CAP_PROP_FRAME_HEIGHT, height);
	if (my_camera.isOpened())
	{
		my_open = true;
	}
	return my_open;
}

extern "C" void   EXPORT_API recieveFrame(uchar* texturePtr)
{

	Mat my_frameBGR;
	Mat my_frameRBG;
	my_camera >> my_frameBGR;
	if (my_frameBGR.data)
	{
		cvtColor(my_frameBGR, my_frameRBG, CV_BGR2RGB);
		memcpy(texturePtr, my_frameRBG.data, my_frameRBG.cols*my_frameRBG.rows*my_frameRBG.channels()*sizeof(uchar));
	}

}

extern "C" void EXPORT_API closeCamera()
{
	if (my_camera.isOpened())
	{
		my_camera.release();
	}
}
2.unity中justatry脚本
using UnityEngine;
using System.Collections;
using System.Collections.Generic;
using System;
using System.Runtime.InteropServices;用 c++中 dll 文件需要引入
public class justatry : MonoBehaviour {
[DllImport("_dectecting")]
public static extern bool openCamera();
[DllImport("_dectecting")]
public static extern bool recieveFrame(byte[] imageData);
[DllImport("_dectecting")]
public static extern bool closeCamera();
public bool IsOpen = false;
public byte[] imageData;
public Texture2D tex;
public int Width = 640;
public int Length = 480;
// Use this for initialization
void Start () {
IsOpen = openCamera();
if(IsOpen)
{
imageData = new byte[Length * Width * 3*2];
tex = new Texture2D(Width*2, Length, TextureFormat.RGB24, false);
}
}
// Update is called once per frame
void Update () {
if (IsOpen)
{
recieveFrame(imageData);
tex.LoadRawTextureData(imageData);
tex.Apply();
GetComponent<Renderer>().material.mainTexture = tex;
}
}
void CloseCamera()
{
if (IsOpen)
{
closeCamera();
}
}
public void OnApplicatoinQuit()
{
closeCamera();
}
}
注意,脚本要挂在plane上
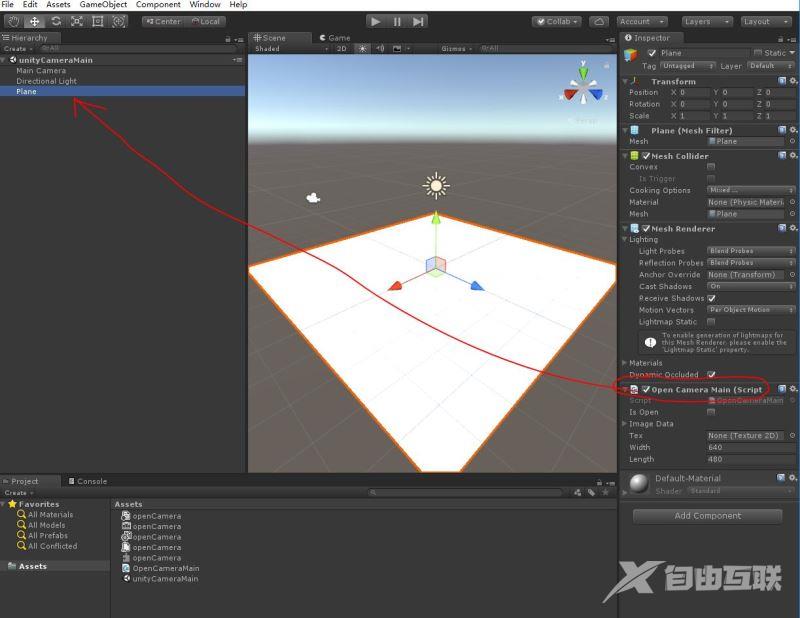
3.在unity中调试
dll的输出目录是 unity项目工程名\Assets\Plugins
D:\Michael Wang\SC\2018\1\openDoublecamera\UnityTry\Assets\Plugins

4.在vs中调试
4.1 把unity的工程生成对应的exe
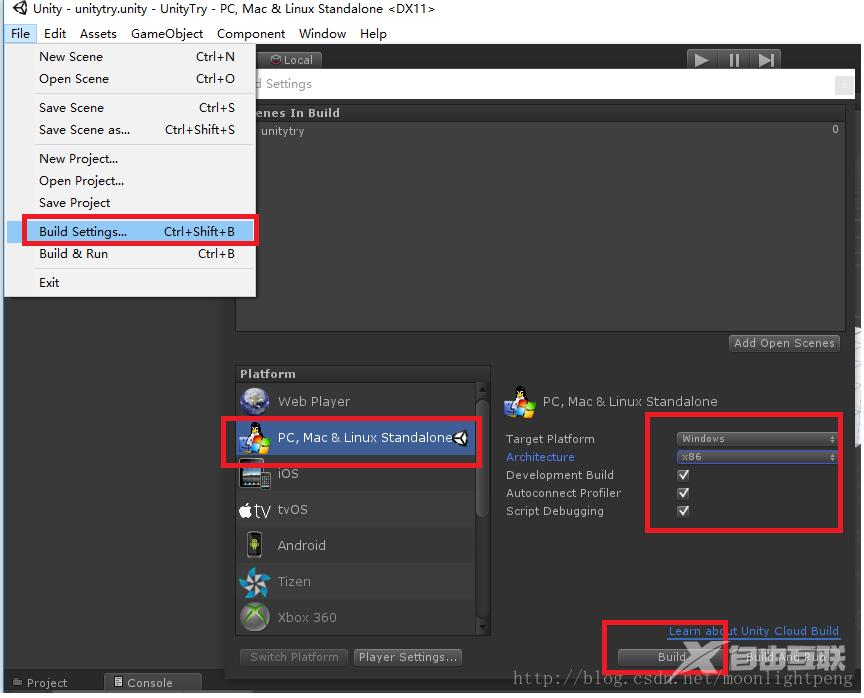
这是生成的unity exe对应的生成目录
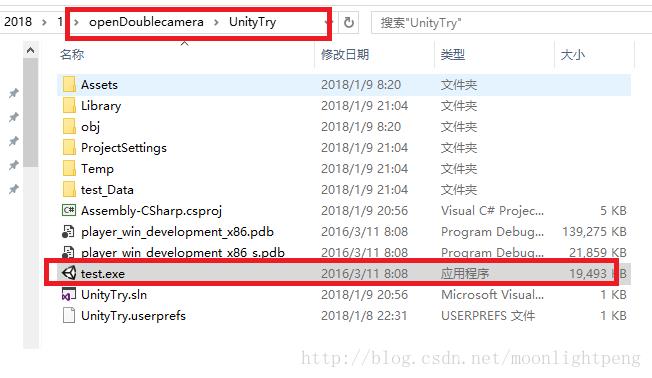
对应的目录如
D:\Michael Wang\SC\2018\1\openDoublecamera\UnityTry\test.exe
4.2 在vs项目的属性中做如下设置
命令后用上面的路径,注意是放在命令里不是命令参数里

在对应的unity exe目录中找到 unity工程名_Data下Plugins的目录是
D:\Michael Wang\SC\2018\1\openDoublecamera\UnityTry\test_Data\Plugins
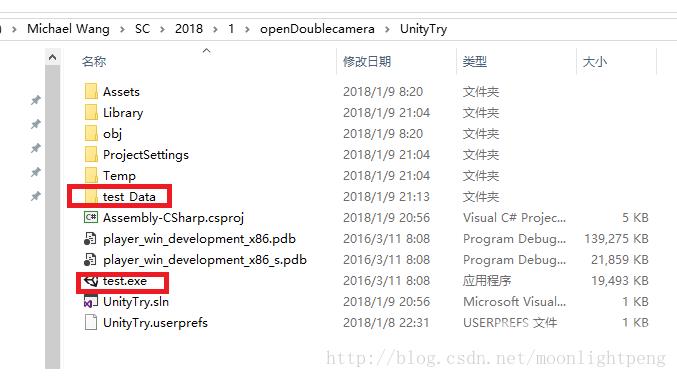
4.3 在VS工程的属性中的输出目录设置为上面的目录

做完以上设置就直接可以在VS下调试了。
5.注意vs和unity的平台x86/x64要对应
5.1 vs x86/x64
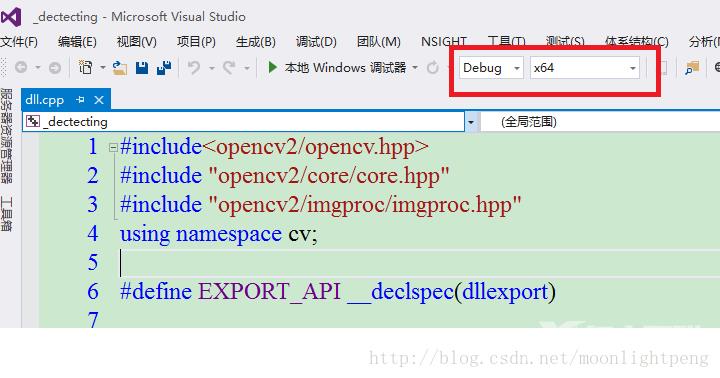
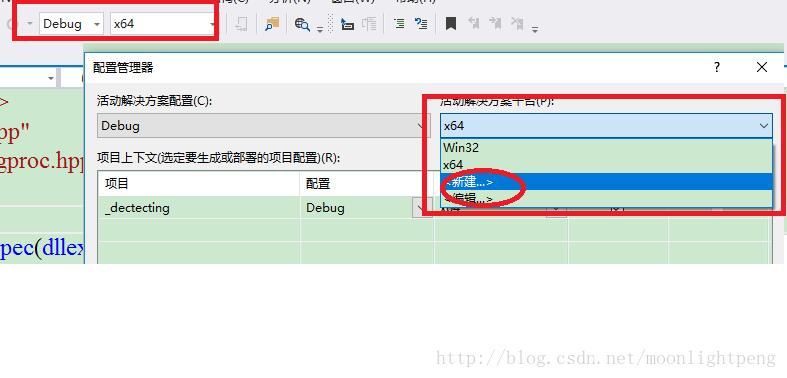
5.2 unity
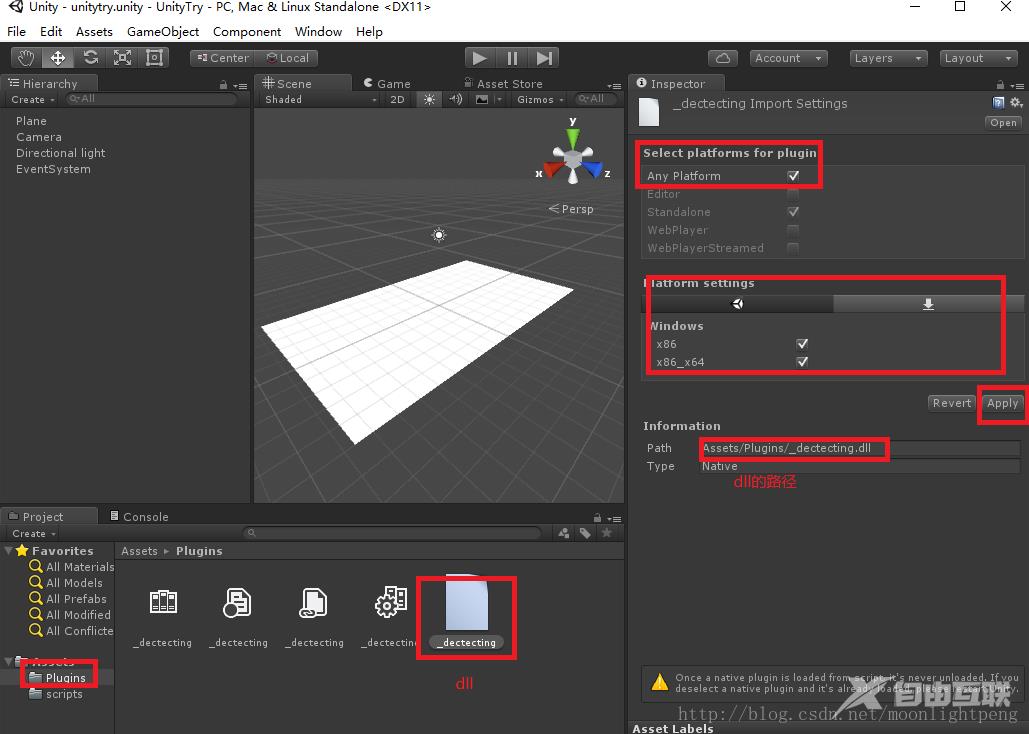
如果按以上设置还是不对,提示找不到dll,则把dll的输出放在与Plugins或Assets文件夹同一级尝试。
如果你已经把dll放在这里了,还是显示找不到,则一定是你用vs生成dll的库没有在环境变量里,然后unity里面调用时找不到vs生成dll所依赖的一些库。可以把一些你知道的库直接放在vs生成的dll一起,全放在unity工程里,应该就好了。
以上就是Unity调用C++ dll实现打开双目相机的详细内容,更多关于Unity双目相机的资料请关注自由互联其它相关文章!
