本文实例为大家分享了Android开发之PopupWindow实现弹窗的具体代码,供大家参考,具体内容如下
基本框架
在activity_main.xml中设置一个按钮,用于唤出弹窗;
<?xml version="1.0" encoding="utf-8"?>
<LinearLayout xmlns:android="http://schemas.android.com/apk/res/android"
    android:layout_width="match_parent"
    android:layout_height="match_parent"
    android:orientation="vertical">

    <Button
        android:text="Popup"
        android:onClick="Popup"
        android:layout_width="wrap_content"
        android:layout_height="wrap_content"/>


</LinearLayout>
再编写一个Layout资源文件popup_view.xml用于弹窗:
<?xml version="1.0" encoding="utf-8"?>
<LinearLayout xmlns:android="http://schemas.android.com/apk/res/android"
    android:layout_width="match_parent"
    android:layout_height="match_parent"
    android:background="@mipmap/ic_launcher"
    android:orientation="vertical">

    <Button
        android:id="@+id/btn1"
        android:text="Button1"
        android:layout_width="wrap_content"
        android:layout_height="wrap_content"/>

    <Button
        android:id="@+id/btn2"
        android:text="Button2"
        android:layout_width="wrap_content"
        android:layout_height="wrap_content"/>


</LinearLayout>
在MainActivity.java中编写按钮的点击事件,同样用View popup_view=getLayoutInflater().inflate(R.layout.popup_view,null);将上面编写的Layout资源转换成View,之后就可以新建一个弹窗并让其弹出。
package com.example.mypopupwindow;

import androidx.appcompat.app.AppCompatActivity;

import android.os.Bundle;
import android.view.View;
import android.view.ViewGroup;
import android.widget.PopupWindow;

public class MainActivity extends AppCompatActivity {

    @Override
    protected void onCreate(Bundle savedInstanceState) {
        super.onCreate(savedInstanceState);
        setContentView(R.layout.activity_main);
    }

    public void Popup(View view) {
        View popup_view=getLayoutInflater().inflate(R.layout.popup_view,null);
        PopupWindow window=new PopupWindow(popup_view, ViewGroup.LayoutParams.WRAP_CONTENT
                ,ViewGroup.LayoutParams.WRAP_CONTENT);
        window.showAsDropDown(view);
    }
}
点击按钮就会得到弹窗:
常用方法
setContentView(View contentView) 设置弹窗的ViewshowAsDropDown(View anchor) 弹窗的位置在控件的下方showAsDropDown(View anchor,int xoff,int yoff) 相对某个控件的位置,有偏移setFocusable(boolean focusable) 设置是否获取焦点setBackgroundDrawable(Drawable background) 设置背景dismiss() 关闭窗口setAnimationStyle(int animationStyle) 设置加载动画(在学习了动画后再深入)setTouchable(boolean touchable) 设置触摸使能setOutsideTouchable(boolean touchable) 设置弹窗外面的触摸使能
实例
将focusable设置为true,就可以通过点击弹窗以外的地方关闭弹窗。
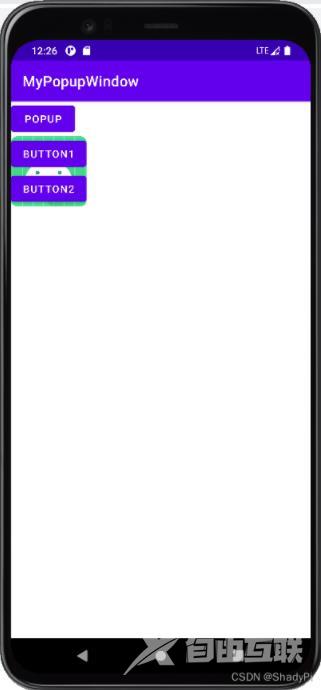
使用showAsDropDown(View anchor,int xoff,int yoff)就可以让弹窗有偏移:

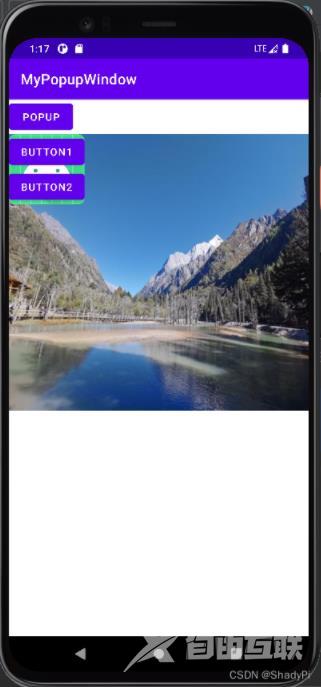
使用window.setBackgroundDrawable(getResources().getDrawable(R.drawable.image));设置弹窗的图片背景:
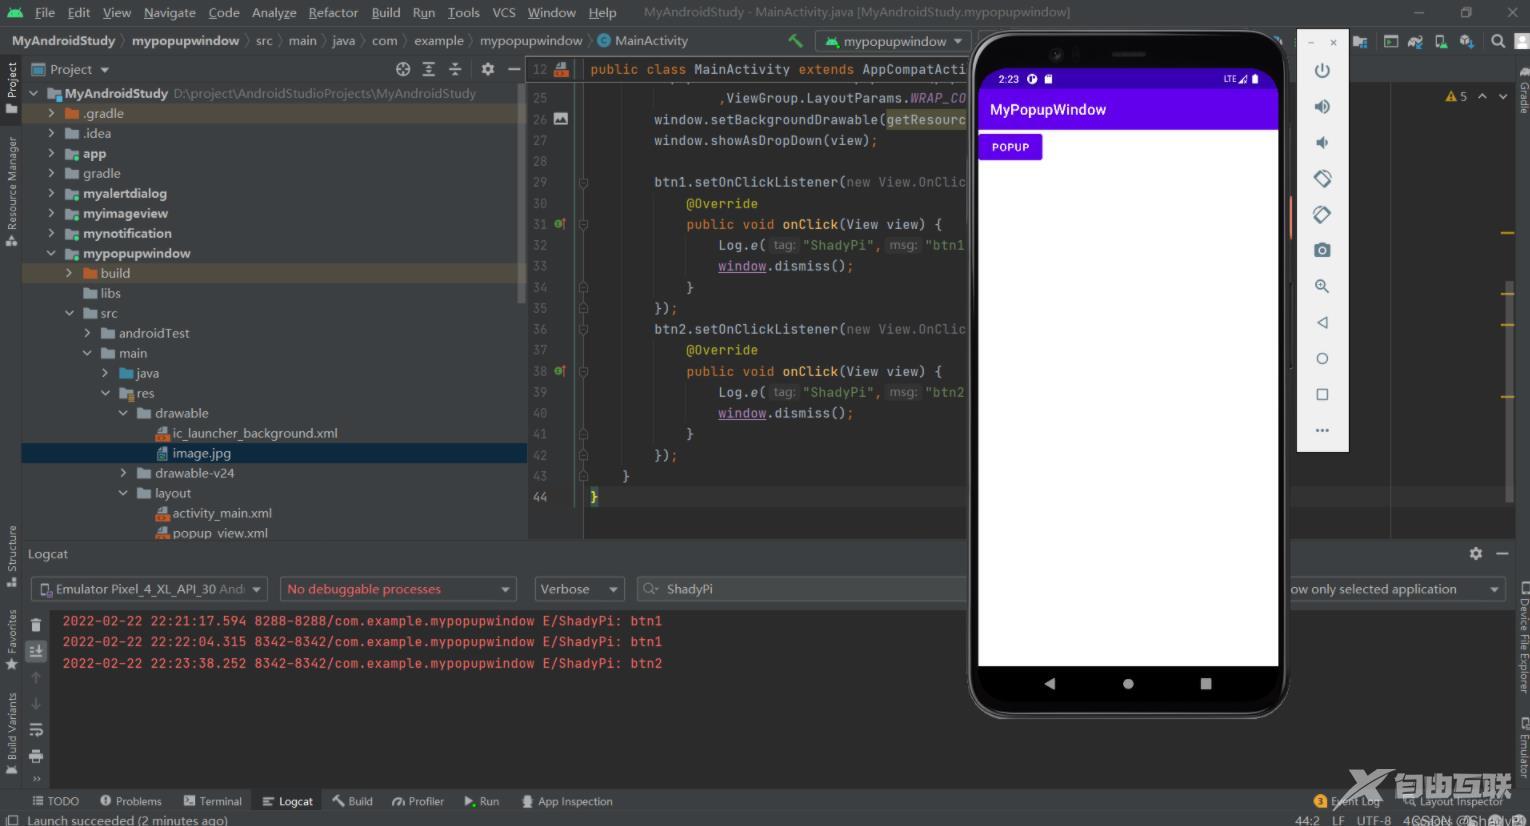
对于弹窗中的两个按钮也可以设置监听,从而实现一些点击事件,在点击事件的结尾可以添加dismiss()函数使得点击后弹窗关闭。
package com.example.mypopupwindow;

import androidx.appcompat.app.AppCompatActivity;

import android.os.Bundle;
import android.util.Log;
import android.view.View;
import android.view.ViewGroup;
import android.widget.Button;
import android.widget.PopupWindow;

public class MainActivity extends AppCompatActivity {

    @Override
    protected void onCreate(Bundle savedInstanceState) {
        super.onCreate(savedInstanceState);
        setContentView(R.layout.activity_main);
    }
    public void Popup(View view) {
        View popup_view=getLayoutInflater().inflate(R.layout.popup_view,null);
        Button btn1=popup_view.findViewById(R.id.btn1);
        Button btn2=popup_view.findViewById(R.id.btn2);

        PopupWindow window=new PopupWindow(popup_view, ViewGroup.LayoutParams.WRAP_CONTENT
                ,ViewGroup.LayoutParams.WRAP_CONTENT,true);
        window.setBackgroundDrawable(getResources().getDrawable(R.drawable.image));
        window.showAsDropDown(view);

        btn1.setOnClickListener(new View.OnClickListener() {
            @Override
            public void onClick(View view) {
                Log.e("ShadyPi","btn1");
                window.dismiss();
            }
        });
        btn2.setOnClickListener(new View.OnClickListener() {
            @Override
            public void onClick(View view) {
                Log.e("ShadyPi","btn2");
                window.dismiss();
            }
        });
    }
}
以上就是本文的全部内容,希望对大家的学习有所帮助,也希望大家多多支持自由互联。