目录
- 一、图形Drawable
- 二、形状图形
- 三、九宫格图片
- 四、状态列表图形
一、图形Drawable
Drawable类型表达了各种各样的图形,包括图片、色块、画板、背景等。
包含图片在内的图形文件放在res目录的各个drawable目录下,其中drawable目录一般保存描述性的XML文件,而图片文件一般放在具体分辨率的drawable目录下。
各视图的background属性、ImageView和ImageButton的src属性、TextView和Button四个方向的drawable***系列属性都可以引用图形文件。
二、形状图形
Shape图形又称形状图形,它用来描述常见的几何形状,包括矩形、圆角矩形、圆形、椭圆等。
形状图形的定义文件是以Shape标签为根节点的XML描述文件。
实际开发一般主要使用3个节点:stroke、corners、solid。
1、类型的形状:
- rectangle:矩形,默认
- oval:椭圆,此时corners节点失效
- line:直线,此时必须设置stroke节点,不然报错
- ring:圆环
2、size(尺寸)
size是shape的下级节点,它描述了形状图形的宽高尺寸,若无size节点,则表示宽高与宿主视图一样大小,下面是size节点的常用属性说明:
- height:像素类型,图形高度。
- width:像素类型,图形宽度。
3、stroke(描边)
stroke是shape的下级节点,它描述了形状图形的描边规格,若无stroke节点,则表示不存在描边,下面是stroke节点的常用属性说明:
- color:颜色类型,描边的颜色。
- dashGap:像素类型,每段虚线之间的间隔。
- dashWidth:像素类型,每段虚线的宽度,若dashGap和dashWidth有一个值为0,则描边为实线。
- wdith:像素类型,描边的厚度。
4、corners(圆角)
corners是shape的下级节点,它描述了形状图形的圆角大小,若无corners节点,则表示无圆角,下面是常用属性:
- bottomLeftRadius:坐下圆角的半径。
- bottomRightRadius:右下圆角的半径。
- topLeftRadius:左上圆角的半径。
- topRightRadius:右上圆角的半径。
- radius:四个圆角的半径。
5、solid(填充)
solid是shape的下级节点,它描述了形状图形的填充色彩,若无solid节点,则表示无填充颜色,下面的属性说明:
- color:内部填充的颜色。
6、padding(间隔)
padding是shape的下级节点,它描述了形状图形与周围边界的间隔,若无padding节点,则表示四周不设间隔,下面的常用属性:
- top:与上方的间隔。
- bottom:与下方的间隔。
- left:与左边的间隔。
- right:与右边的间隔。
7、gradient(渐变)
gradient是shape的下级节点,它描述了形状图形的颜色渐变,若无gradient节点,则表示没有渐变效果,下面的常用属性:
- angle:整型,渐变的起始角度,为0表示9点钟位置,增值大表示往逆时针方向旋转。
- type:渐变类型。
- centerX:浮点型,圆心的X坐标,type=linear时不可用。
- centerY:浮点型,圆心的Y坐标,type=linear时不可用。
- gradientRadius:整型,渐变半径,type=radial时需要设置。
- centerColor:渐变的中间颜色。
- startColor:渐变的起始颜色。
- endColor:渐变的终止颜色。
- useLevel:布尔类型,设置为true为无渐变色。
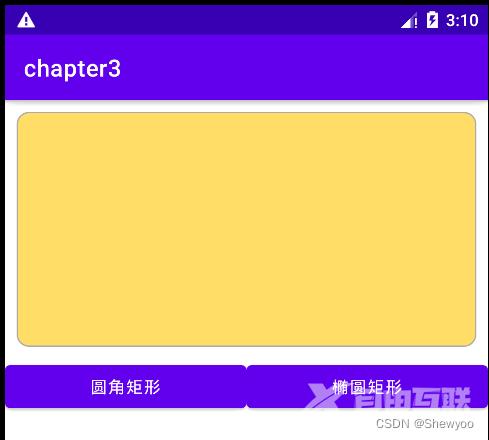
例:点击按钮切换图形
xml文件
<LinearLayout xmlns:android="http://schemas.android.com/apk/res/android"
    android:layout_width="match_parent"
    android:layout_height="match_parent"
    android:orientation="vertical">
    <View
        android:id="@+id/v_content"
        android:layout_width="match_parent"
        android:layout_height="200dp"
        android:layout_margin="10dp"/>
    <LinearLayout
        android:layout_width="match_parent"
        android:layout_height="wrap_content"
        android:orientation="horizontal">
        <Button
            android:id="@+id/btn_rect"
            android:layout_width="0dp"
            android:layout_height="wrap_content"
            android:layout_weight="1"
            android:text="圆角矩形"/>
        <Button
            android:id="@+id/btn_oval"
            android:layout_width="0dp"
            android:layout_height="wrap_content"
            android:layout_weight="1"
            android:text="椭圆矩形"/>
</LinearLayout>
</LinearLayout>
drawable下新建rect.xml文件
<shape xmlns:android="http://schemas.android.com/apk/res/android">
<!--指定形状内部的填充颜色-->
    <solid android:color="#ffdd66"/>
<!--    指定形状轮廓的粗细与颜色-->
    <stroke android:width="1dp"
            android:color="#aaaaaa"/>
<!--    指定形状四个圆角的半径-->
    <corners android:radius="10dp"/>
</shape>
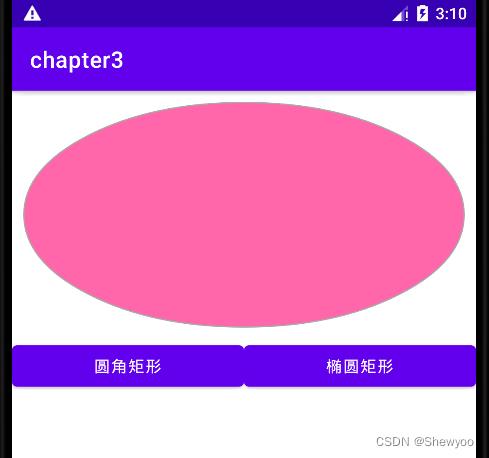
oval.xml文件
<shape xmlns:android="http://schemas.android.com/apk/res/android"
    android:shape="oval">
    <!--指定形状内部的填充颜色-->
    <solid android:color="#ff66aa"/>
    <!--    指定形状轮廓的粗细与颜色-->
    <stroke android:width="1dp"
        android:color="#aaaaaa"/>
</shape>
java代码
public class DrawableShapeActivity extends AppCompatActivity implements View.OnClickListener {
    private View v_content;
    @Override
    protected void onCreate(Bundle savedInstanceState) {
        super.onCreate(savedInstanceState);
        setContentView(R.layout.activity_drawable_shape);
        v_content = findViewById(R.id.v_content);
        findViewById(R.id.btn_rect).setOnClickListener(this);
        findViewById(R.id.btn_oval).setOnClickListener(this);
        //v_content的背景设置为圆角矩形
        v_content.setBackgroundResource(R.drawable.shape_rect_gold);
    }
    @Override
    public void onClick(View view) {
        switch (view.getId()){
            case R.id.btn_rect:
                v_content.setBackgroundResource(R.drawable.shape_rect_gold);
                break;
            case R.id.btn_oval:
                v_content.setBackgroundResource(R.drawable.shape_oval_rose);
                break;
        }
    }
}
运行结果:


三、九宫格图片
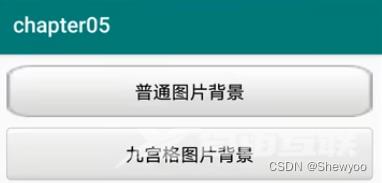
将某张图片设置成视图背景时,如果图片尺寸太小,则会自动拉伸使之填满背景,但图片拉的过大,会变得模糊。
使用九宫格图片:将图片后缀改为.9.png

四、状态列表图形
Button按钮的背景在正常情况下是凸起的,在按下时是凹陷的,从按下到弹起的过程,用户便能知道点击了这个按钮。
例:
当按钮被按下时使用的是第一个item的图片
<item android:drawable="@drawable/button_pressed" android:state_pressed="true"/>
<item android:drawable="@drawable/button_normal"/>
状态类型的取值说明
状态列表图形不仅用于按钮控件,还可用于其他拥有多种状态的控件。

到此这篇关于Android形状图形与状态列表图形及九宫格图片超详细讲解的文章就介绍到这了,更多相关Android形状图形内容请搜索自由互联以前的文章或继续浏览下面的相关文章希望大家以后多多支持自由互联!
