本文实例为大家分享了Android自定义控件实现雷达图的具体代码,供大家参考,具体内容如下 学习了大神的源代码(奈何不知大神的博客地址),觉得必须记录一下,方便以后再次学习
本文实例为大家分享了Android自定义控件实现雷达图的具体代码,供大家参考,具体内容如下
学习了大神的源代码(奈何不知大神的博客地址),觉得必须记录一下,方便以后再次学习。
效果如图所示:
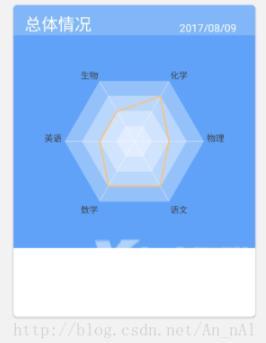
1.自定义雷达图控件:
public class MyPolygonView extends View {

    //-------------我们必须给的模拟数据-------------
    //n边形
    private int n = 6;
    //每个角对应的文字
    private String[] text = new String[]{"语文", "数学", "英语", "生物", "化学","物理"};
    //区域等级,值不能超过n边形的个数(每个角对应的值到达的层数)
    private int[] area = new int[]{3,3,2,2,3,2};

    //-------------View相关-------------
    //View自身的宽和高
    private int mHeight;
    private int mWidth;

    //-------------画笔相关-------------
    //边框的画笔
    private Paint borderPaint;
    //文字的画笔
    private Paint textPaint;
    //区域的画笔
    private Paint areaPaint;

    //-------------多边形相关-------------
    //n边形个数
    private int num = 4;
    //两个多边形之间的半径
    private int r = 60;
    //n边形顶点坐标
    private float x, y;
    //n边形角度
    private float angle = (float) ((2 * Math.PI) / n);
    //文字与边框的边距等级,值越大边距越小(文字与边框的距离)
    private int textAlign = 5;

    //-------------颜色相关-------------
    //边框颜色(整个n边型的区域颜色)
    private int mColor = getResources().getColor(R.color.app_polygon);
    //文字颜色
    private int textColor = getResources().getColor(R.color.app_black);
    //区域颜色(整个连线的颜色)
    private int strengthColor = Color.parseColor("#f9c172");

    public MyPolygonView(Context context) {
        super(context);
    }

    public MyPolygonView(Context context, AttributeSet attrs) {
        super(context, attrs);
    }

    public MyPolygonView(Context context, AttributeSet attrs, int defStyleAttr) {
        super(context, attrs, defStyleAttr);
    }

    @Override
    protected void onSizeChanged(int w, int h, int oldw, int oldh) {
        super.onSizeChanged(w, h, oldw, oldh);
        mWidth = w;
        mHeight = h;
    }

    @Override
    protected void onDraw(Canvas canvas) {
        super.onDraw(canvas);
        //初始化画笔
        initPaint();
        //画布移到中心点
        canvas.translate(mWidth / 2, mHeight / 2);
        //画n边形
        drawPolygon(canvas);
        //画n边形的中点到顶点的线
        drawLine(canvas);
        //画文字
        drawText(canvas);
        //画蓝色区域
        drawArea(canvas);
    }

    /**
     * 初始化画笔
     */
    private void initPaint() {
        //边框画笔
        borderPaint = new Paint();
        borderPaint.setAntiAlias(true);
        borderPaint.setStyle(Paint.Style.FILL_AND_STROKE);
        borderPaint.setColor(mColor);
        borderPaint.setStrokeWidth(3);

        //文字画笔
        textPaint = new Paint();
        textPaint.setTextSize(30);
        textPaint.setColor(textColor);
        textPaint.setAntiAlias(true);

        //区域画笔
        areaPaint = new Paint();
        areaPaint.setStrokeWidth(5);
        areaPaint.setColor(strengthColor);
        areaPaint.setAntiAlias(true);
        areaPaint.setStyle(Paint.Style.STROKE);
    }

    /**
     * 绘制多边形
     *
     * @param canvas
     */
    private void drawPolygon(Canvas canvas) {
        Path path = new Path();
        //n边形数目
        for (int j = 1; j <= num; j++) {
            float r = j * this.r;
            path.reset();
            //画n边形
            for (int i = 1; i <= n; i++) {
                x = (float) (Math.cos(i * angle) * r);
                y = (float) (Math.sin(i * angle) * r);
                if (i == 1) {
                    path.moveTo(x, y);
                } else {
                    path.lineTo(x, y);
                }
            }
            //关闭当前轮廓。如果当前点不等于第一个点的轮廓,一条线段是自动添加的
            path.close();
            canvas.drawPath(path, borderPaint);
        }
    }

    /**
     * 画多边形线段
     *
     * @param canvas
     */
    private void drawLine(Canvas canvas) {
        Path path = new Path();
        float r = num * this.r;
        for (int i = 1; i <= n; i++) {
            path.reset();
            x = (float) (Math.cos(i * angle) * r);
            y = (float) (Math.sin(i * angle) * r);
            path.lineTo(x, y);
            canvas.drawPath(path, borderPaint);
        }
    }

    /**
     * 画文字
     *
     * @param canvas
     */
    private void drawText(Canvas canvas) {
        float r = num * this.r;
        for (int i = 1; i <= n; i++) {
            //测量文字的宽高
            Rect rect = new Rect();
            textPaint.getTextBounds(text[i - 1], 0, text[i - 1].length(), rect);
            float textWidth = rect.width();
            float textHeight = rect.height();

            x = (float) (Math.cos(i * angle) * r);
            y = (float) (Math.sin(i * angle) * r);
            //位置微调
            if (x < 0) {
                x = x - textWidth;
            }
            if (y > 25) {
                y = y + textHeight;
            }
            //调文字与边框的边距
            float LastX = x + x / num / textAlign;
            float LastY = y + y / num / textAlign;
            canvas.drawText(text[i - 1],LastX, LastY, textPaint);
        }
    }

    /**
     * 画区域
     *
     * @param canvas
     */
    private void drawArea(Canvas canvas) {
        Path path = new Path();
        for (int  i= 1;  i<= n; i++) {
            float r = area[i - 1] * this.r;
            x = (float) (Math.cos(i * angle) * r);
            y = (float) (Math.sin(i * angle) * r);
            if (i == 1) {
                path.moveTo(x, y);
            } else {
                path.lineTo(x, y);
            }
        }
        //关闭当前轮廓。如果当前点不等于第一个点的轮廓,一条线段是自动添加的
        path.close();
        canvas.drawPath(path, areaPaint);
    }
    public void setArea (int[] area){
        this.area =area;
        invalidate();
    }

}
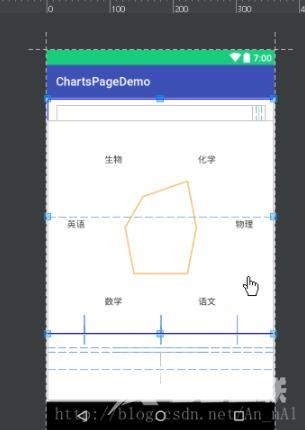
2.界面布局文件xml中直接使用:
<com.lotus.chartspagedemo.MyPolygonView
                android:id="@+id/polygon"
                android:layout_width="match_parent"
                android:layout_height="match_parent"
                android:visibility="visible" />
3.界面activity中可以设置控件颜色:
polygon.setBackgroundColor(getResources().getColor(R.color.app_blue));//雷达图的背景颜色
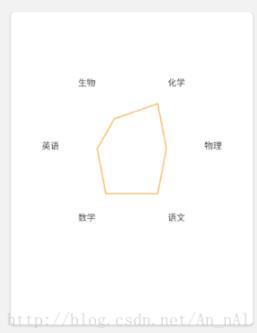
如果不设置背景颜色,效果就是:
以上就是本文的全部内容,希望对大家的学习有所帮助,也希望大家多多支持自由互联。