目录
- 简介
- Flow和FlowDelegate
- Flow的应用
- 总结
简介
我们在开发web应用的时候,有时候为了适应浏览器大小的调整,需要动态对页面的组件进行位置的调整。这时候就会用到flow layout,也就是流式布局。
同样的,在flutter中也有流式布局,这个流式布局的名字叫做Flow。事实上,在flutter中,Flow通常是和FlowDelegate一起使用的,FlowDelegate用来设置Flow子组件的大小和位置,通过使用FlowDelegate.paintChildre可以更加高效的进行子widget的重绘操作。今天我们来详细讲解flutter中flow的使用。
Flow和FlowDelegate
先来看下Flow的定义:
class Flow extends MultiChildRenderObjectWidget
Flow继承自MultiChildRenderObjectWidget,说它里面可以包含多个子widget。
再来看下它的构造函数:
  Flow({
    Key? key,
    required this.delegate,
    List<Widget> children = const <Widget>[],
    this.clipBehavior = Clip.hardEdge,
  }) : assert(delegate != null),
       assert(clipBehavior != null),
       super(key: key, children: RepaintBoundary.wrapAll(children));
可以看到Flow中主要有三个属性,分别是delegate,children和clipBehavior。
children很好理解了,它就是Flow中的子元素。
clipBehavior是一个Clip类型的变量,表示的是如何对widget进行裁剪。这里的默认值是none。
最后一个非常重要的属性就是FlowDelegate,FlowDelegate主要用来控制Flow中子widget的位置变换。所以,当我们在Flow中定义好子widget之后,剩下的就是定义FlowDelegate来控制如何展示这些子widget。
FlowDelegate是一个抽象类,所以我们在使用的时候,需要继承它。
FlowDelegate有几个非常重要的方法:
Size getSize(BoxConstraints constraints) => constraints.biggest;
这个方法用来定义Flow的size,对于Flow来说,它的size是和子widget的size是独立的,Flow的大小通过getSize方法来定义。
接下来是getConstraintsForChild方法:
BoxConstraints getConstraintsForChild(int i, BoxConstraints constraints) => constraints;
getConstraintsForChild用来控制子widget的Constraints。
paintChildren用来控制如何绘制子widget,也是我们必须要实现的方法:
void paintChildren(FlowPaintingContext context);
FlowDelegate还有两个方法,分别用来判断是否需要Relayout和Repaint,这两个方法的参数都是FlowDelegate:
bool shouldRelayout(covariant FlowDelegate oldDelegate) => false;
bool shouldRepaint(covariant FlowDelegate oldDelegate);
Flow的应用
有了上面的介绍,我们基本上已经了解如何构建Flow了,接下来我们通过一个具体的例子来加深对Flow的理解。
在本例中,我们主要是使用Flow来排列几个图标。
首先我们定义一个图标的数组:
  final List<IconData> buttonItems = <IconData>[
    Icons.home,
    Icons.ac_unit,
    Icons.adb,
    Icons.airplanemode_active,
    Icons.account_box_rounded,
  ];
然后通过每个图标对应的IconData来构建一个IconButton的widget:
  Widget flowButtonItem(IconData icon) {
    return Padding(
      padding: const EdgeInsets.symmetric(vertical: 10.0),
      child: IconButton(
        icon: Icon(icon,
          size: 50,
            color: Colors.blue
        ),
          onPressed: () {
            buttonAnimation.status == AnimationStatus.completed
                ? buttonAnimation.reverse()
                : buttonAnimation.forward();
          },
      )
    );
  }
这里我们使用的是IconButton,为了在不同IconButton之间留一些空间,我们将IconButton封装在Padding中。
在onPressed方法中,我们希望能够处理一些动画效果。这里的buttonAnimation是一个AnimationController对象:
AnimationController  buttonAnimation = AnimationController(
      duration: const Duration(milliseconds: 250),
      vsync: this,
    );
有了flowButtonItem之后,我们就可以构建Flow了:
  Widget build(BuildContext context) {
    return Flow(
      delegate: FlowButtonDelegate(buttonAnimation: buttonAnimation),
      children:
      buttonItems.map<Widget>((IconData icon) => flowButtonItem(icon)).toList(),
    );
  }
Flow的child就是我们刚刚创建的flowButtonItem,FlowButtonDelegate是我们需要新建的类,因为之前在构建flowButtonItem的时候,我们希望进行一些动画的绘制,而FlowDelegate又是真正用来控制子Widget绘制的类,所以我们需要将buttonAnimation作为参数传递给FlowButtonDelegate。
下面是FlowButtonDelegate的定义:
class FlowButtonDelegate extends FlowDelegate {
  FlowButtonDelegate({required this.buttonAnimation})
      : super(repaint: buttonAnimation);
  final Animation<double> buttonAnimation;
  @override
  bool shouldRepaint(FlowButtonDelegate oldDelegate) {
    return buttonAnimation != oldDelegate.buttonAnimation;
  }
  @override
  void paintChildren(FlowPaintingContext context) {
    double dy = 0.0;
    for (int i = 0; i < context.childCount; ++i) {
      dy = context.getChildSize(i)!.height * i;
      context.paintChild(
        i,
        transform: Matrix4.translationValues(
          0,
          dy * buttonAnimation.value,
          0,
        ),
      );
    }
  }
FlowButtonDelegate继承自FlowDelegate,并且传入了buttonAnimation对象。
这里我们根据buttonAnimation是否发生变化来决定是否进行Repaint。
如果需要进行Repaint,那么就要调用paintChildren的方法。
在paintChildren中,我们根据child自身的height和buttonAnimation的值来进行动画的绘制。
那么buttonAnimation的值是如何变化的呢?这就要回顾之前我们创建flowButtonItems的onPress方法了。
在onPress方法中,我们调用了buttonAnimation.reverse或者buttonAnimation.forward这两个方法来修改buttonAnimation的值。
运行之后的效果如下:

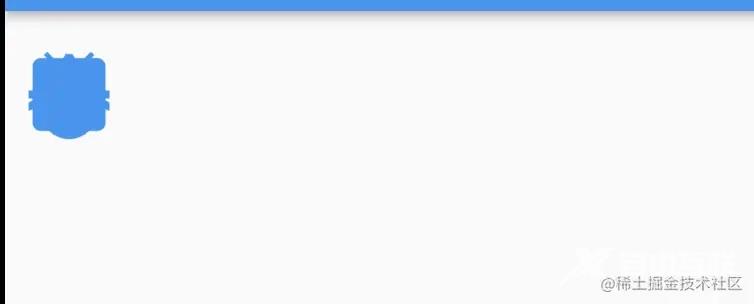
初始状态下,所有的组件都是在一起的。
当我们点击上面的图标的时候,我们可以得到下面的界面:

图标在动画中展开了。
总结
Flow是一种比较复杂的layout组件,如果和动画进行结合使用,可以得到非常完美的效果。
本文的例子:github.com/ddean2009/l…
以上就是flutter中使用流式布局示例详解的详细内容,更多关于flutter 流式布局的资料请关注自由互联其它相关文章!
