目录
- 技术选型
- 环境搭建
- 引入库
- 配置环境
- 运行
- 网络封装
- 结语
- 补充
- 总结
技术选型
公司现在需要开发移动端的h5,使用现在比较流行的vue 2.0开发,使用的脚手架是Vant2,网络访问使用的是axios,路由跳转使用的是vue-router,开发工具是vscode,作为一个安卓开发程序员,对vue是不熟悉的,好在把环境搭建起来了,通过博客记录一下
- Vant 2
- vue cli
- vue
- vue中使用axios最详细教程
- vue router
环境搭建
引入库
我这里已经安装好了nodejs,并且已经配置好了淘宝镜像
npm config set registry https://registry.npm.taobao.org
这些配置网上都有,可以自行查询。
vscode不能直接在工具里创建项目,要先创建一个空文件夹,然后通过vscode打开文件夹。
在E:\vueProject文件夹下创建VueForBlog文件夹,使用vscode打开(vscode默认只能打开一个项目,如果想打开多个,可以使用ctrl+shift+n),点击工具栏终端,新建终端,正式开始创建项目
终端输入
npm i vant@latest-v2 -S
再输入
npm install -g @vue/cli
安装完成
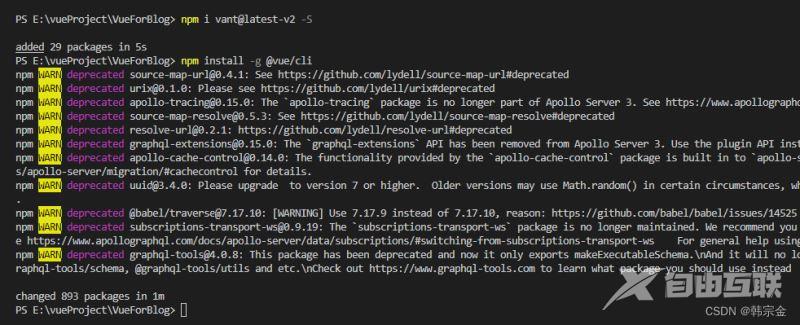
打开package.json看一下依赖

创建一个项目
vue create first-vue
这个好像不能用驼峰,我刚开始用firstVue就报错。一般会出现选择项,我这边选择了vue2
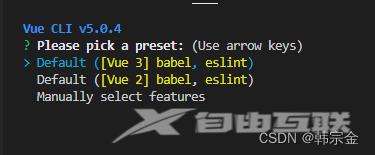
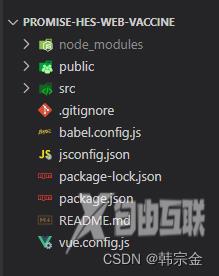
创建完成以后,会是这个样子

记住,后边要cd到工程里,否则还是在工程外创建引用之类的
下边用同样的方法,引入axios,router,还有vant需要使用的 postcss-px-to-viewport,postcss-pxtorem,lib-flexible
npm install vue-router@3.0.7
npm install axios
npm i -S amfe-flexible
npm install postcss postcss-pxtorem --save-dev
npm install postcss-px-to-viewport --save-dev
npm install --save less-loader less
配置环境
配置vant 的基础样式,方便引用vant的组件。在first\src\assets\style\下创建theme.less,内容
// Color Palette
@black: #000;
@white: #fff;
@gray-1: #f7f8fa;
@gray-2: #f2f3f5;
@gray-3: #ebedf0;
@gray-4: #dcdee0;
@gray-5: #c8c9cc;
@gray-6: #969799;
@gray-7: #646566;
@gray-8: #323233;
@red: #ee0a24;
@blue: #1989fa;
@orange: #ff976a;
@orange-dark: #ed6a0c;
@orange-light: #fffbe8;
@green: #07c160;

// Gradient Colors
@gradient-red: linear-gradient(to right, #ff6034, #ee0a24);
@gradient-orange: linear-gradient(to right, #ffd01e, #ff8917);

// Component Colors
@text-color: @gray-8;
@active-color: @gray-2;
@active-opacity: 0.7;
@disabled-opacity: 0.5;
@background-color: @gray-1;
@background-color-light: #fafafa;
@text-link-color: #576b95;

// Padding
@padding-base: 4px;
@padding-xs: @padding-base * 2;
@padding-sm: @padding-base * 3;
@padding-md: @padding-base * 4;
@padding-lg: @padding-base * 6;
@padding-xl: @padding-base * 8;

// Font
@font-size-xs: 10px;
@font-size-sm: 12px;
@font-size-md: 14px;
@font-size-lg: 16px;
@font-weight-bold: 500;
@line-height-xs: 14px;
@line-height-sm: 18px;
@line-height-md: 20px;
@line-height-lg: 22px;
@base-font-family: -apple-system, BlinkMacSystemFont, 'Helvetica Neue',
  Helvetica, Segoe UI, Arial, Roboto, 'PingFang SC', 'miui', 'Hiragino Sans GB',
  'Microsoft Yahei', sans-serif;
@price-integer-font-family: Avenir-Heavy, PingFang SC, Helvetica Neue, Arial,
  sans-serif;

// Animation
@animation-duration-base: 0.3s;
@animation-duration-fast: 0.2s;
@animation-timing-function-enter: ease-out;
@animation-timing-function-leave: ease-in;

// Border
@border-color: @gray-3;
@border-width-base: 1px;
@border-radius-sm: 2px;
@border-radius-md: 4px;
@border-radius-lg: 8px;
@border-radius-max: 999px;
同样目录下,创建一个public.css,内容
body {
  background-color: #f8f8f9;
  min-height: 100vh;
  min-width: 100vw;
}
.padding-lr10 {
  padding: 0 10px;
}
.phoneContant header .van-nav-bar {
  text-align: center;
  line-height: 56px;
  background: #68c2bd;
}
h3 {
  font-size: 16px;
}
.phoneContant header .van-nav-bar .van-icon {
  font-size: 20px;
  color: #fff;
}
.phoneContant header .van-nav-bar__title {
  color: #fff;
}
.contant {
  padding: 0 10px;
}
.re {
  position: relative;
}
.cardContant {
  background: #f5f5f5;
  height: 78vh;
  width: 100%;
  clear: both;
  padding: 8px 0;
}
.hosImg {
  width: 60px !important;
  height: 60px !important;
  border-radius: 50%;
}
这里的内容,是根据项目中需要的样式自定义的
在vue.config.js里进行配置
css: {
    loaderOptions: {
      less: {
        lessOptions: {
          modifyVars: {
            // 或者可以通过 less 文件覆盖(文件路径为绝对路径)
            hack: `true; @import "@/assets/style/theme.less";`,
          },
        },
      },
    },
  },
访问资源路径,有个快捷方法,设置一个符号,用来直接指定到src目录下,比用.或者..方便,还不容易出错,同样在vue.config.js里,@就代表src目录
  chainWebpack: (config) => {
    config.resolve.alias.set("@", resolve("src"));
    config.plugin("html").tap((args) => {
      args[0].minify = false;
      return args;
    });
  },
vue.config.js全部内容
const path = require("path");
// const CompressionWebpackPlugin = require("compression-webpack-plugin");
// // 定义压缩文件类型
// const productionGzipExtensions = ["js", "css"];
// let timeStamp = new Date().getTime();

function resolve(dir) {
  return path.join(__dirname, dir);
}
module.exports = {
  // 基本路径
  publicPath: "./",
  // 输出文件目录 不写则默认根目录
  outputDir: "dist",
  assetsDir: "static", // 静态资源目录 (js, css, img, fonts)
  lintOnSave: false,
  // eslint-loader 是否在保存的时候检查
  // lintOnSave: 'error',
  // devServer: {
  //   // development server port 8000
  //   port: 8000,
  //   // If you want to turn on the proxy, please remove the mockjs /src/main.jsL11
  //   proxy: {
  //     '/api/': {
  //       target: process.env.VUE_APP_APIUrl,
  //       changeOrigin: true
  //     }
  //   }
  // },
  // /assets/style/public.css.less
  css: {
    loaderOptions: {
      less: {
        lessOptions: {
          modifyVars: {
            // 或者可以通过 less 文件覆盖(文件路径为绝对路径)
            hack: `true; @import "@/assets/style/theme.less";`,
          },
        },
      },
    },
  },
  devServer: {
    // 设置主机地址
    // 设置默认端口
    port: 8080,
    // // 设置代理
    // proxy: {
    //   "/": {
    //     // target: "http://198.166.21.56:8080/",
    //     ws: true, // 支持ws协议;websocket的缩写;
    //     changeOrigin: true, // 是否跨域
    //     pathRewrite: {
    //       // 路径替换
    //       "^/api": "",
    //     },
    //   },
    // },

  },
  // use the full build with in-browser compiler?
  // https://vuejs.org/v2/guide/installation.html#Runtime-Compiler-vs-Runtime-only
  // compiler: false,

  // webpack配置
  // see https://github.com/vuejs/vue-cli/blob/dev/docs/webpack.md   webpack链接API,用于生成和修改webapck配置
  //部署打包html带引号
  chainWebpack: (config) => {
    config.resolve.alias.set("@", resolve("src"));
    config.plugin("html").tap((args) => {
      args[0].minify = false;
      return args;
    });
  },
  //压缩打包文件大小
  configureWebpack: (config) => {
    if (process.env.NODE_ENV === "Production") {
      // config.output.filename = `assets/js/[name].${timeStamp}.js`;
      // config.output.chunkFilename = `assets/js/[name].${timeStamp}.js`;
      config.plugins.push(
        new CompressionWebpackPlugin({
          algorithm: "gzip",
          test: new RegExp("\\.(" + productionGzipExtensions.join("|") + ")$"),
          threshold: 10240,
          minRatio: 0.8,
        })
      );
    }
    config.externals = {
      //   'vue': 'Vue',
      //   'vuex': 'Vuex',
      //   'vue-router': 'VueRouter',
      //   'element-ui': 'ELEMENT',
      //   'Axios': 'axios',
      //   'jquery': '$',
      //   'moment': 'moment',
      //   'js-cookie': 'Cookies',
      //   'echarts': 'echarts',
      //   'tinymce/tinymce': 'tinymce'
    };
    // }
  },
  // configureWebpack: (config) => {// webpack配置,值位对象时会合并配置,为方法时会改写配置
  //   if (debug) { // 开发环境配置
  //     config.devtool = 'cheap-module-eval-source-map'
  //   } else { // 生产环境配置

  //   }
  //   Object.assign(config, { // 开发生产共同配置
  //     resolve: {
  //       alias: {
  //         '@': path.resolve(__dirname, './src')//设置路径别名
  //         //...
  //       }
  //     }
  //   })
  // },
  // vue-loader 配置项
  // https://vue-loader.vuejs.org/en/options.html
  // vueLoader: {},

  // 生产环境是否生成 sourceMap 文件
  productionSourceMap: false,
  // css相关配置 配置高于chainWebpack中关于css loader的配置
  // css: {
  //   // 是否使用css分离插件 ExtractTextPlugin
  //   extract: true,
  //   // 开启 CSS source maps?是否在构建样式地图,false将提高构建速度
  //   sourceMap: false,
  //   // css预设器配置项
  //   loaderOptions: {},
  //   // 启用 CSS modules for all css / pre-processor files.
  //   modules: false
  // },
  // use thread-loader for babel & TS in production build
  // enabled by default if the machine has more than 1 cores 构建时开启多进程处理babel编译
  //parallel: require('os').cpus().length > 1,
  // 是否启用dll
  // See https://github.com/vuejs/vue-cli/blob/dev/docs/cli-service.md#dll-mode
  // dll: false,

  // PWA 插件相关配置
  // see https://github.com/vuejs/vue-cli/tree/dev/packages/%40vue/cli-plugin-pwa
  //pwa: {},
  // webpack-dev-server 相关配置
  // devServer: {
  //   open: process.platform === 'darwin',
  //   host: '0.0.0.0',
  //   port: 8080,
  //   https: false,
  //   hotOnly: false,
  //   proxy: null, // 设置代理
  //   before: app => { }
  // },
  // 第三方插件配置
  pluginOptions: {
    // ...
  },
};
lintOnSave: false,这个的意思就是关闭语法检查,要不然会很多报错,运行不起来
在first-vue目录下,新建一个.postcssrc.js,在里边配置postcss
module.exports = {
  plugins: {
    //...
    autoprefixer: {
      browsers: ["Android >= 4.0", "iOS >= 7"],
    },
    "postcss-pxtorem": {
      rootValue: 37.5, //vant-UI的官方根字体大小是37.5
      propList: ["*"],
    },
  },
};
底部安全区适配
在public目录下的index.html文件配置底部安全区适配
<!DOCTYPE html>
<html lang="en">
  <head>
    <meta base="/" id="base" />
    <meta charset="utf-8" />
    <meta http-equiv="X-UA-Compatible" content="IE=edge" />
    <meta
      name="viewport"
      content="width=device-width, initial-scale=1.0, maximum-scale=1.0, minimum-scale=1.0, viewport-fit=cover,user-scalable=no"
    />

    <link rel="icon" href="<%= BASE_URL %>favicon.ico" rel="external nofollow"  />
    <title>首页</title>
  </head>

  <body>

    <!-- 开启顶部安全区适配 -->
    <van-nav-bar safe-area-inset-top />
    <div id="app"></div>
    <!-- built files will be auto injected -->
    <!-- 开启底部安全区适配 -->
    <van-number-keyboard safe-area-inset-bottom />
  </body>
</html>
<script>

</script>
src目录下,新建router目录,下边新建index.js,对router进行配置
import Vue from "vue";
//路由
import VueRouter from "vue-router";
import { asyncRouterMap } from "@/config/router.config";
Vue.use(VueRouter);
const routes = []
  const router = new VueRouter({
    routes: routes.concat(asyncRouterMap),

    mode: "hash",
  });

  export default router;
在src的config目录下,新建router.config,这个对应路由和相应的页面
export const asyncRouterMap = [
  {
    path: "/",
    component: () => import("@/components/Header.vue"),
    meta: { title: "首页" },
    // redirect: '/dashboard/workplace',
    redirect: "/home",
    children: [
      {
        path: "/home",
        name: "home",
        component: () => import("@/views/Home.vue"),
        hidden: true,
        meta: { title: "首页" },
      },
      {
        path: "/second",
        name: "second",
        component: () => import("@/views/Second.vue"),
        hidden: true,
        meta: { title: "第二页" },
      },

    ],
  },
  {
    path: "*",
    redirect: "/home",
    hidden: true,
  },
];
具体页面,等会创建
对App.vue进行修改
<template>
  <div id="app">
    <router-view></router-view>
  </div>
</template>

<script>

export default {
  name: 'App',

}
</script>

<style>
#app {
  height: 100%;
}
.el-header,
.el-footer {
  background-color: #b3c0d1;
  color: #333;
  text-align: center;
  line-height: 60px;
}

body > .el-container {
  margin-bottom: 40px;
}
</style>
我现在需要对一个头部组件进行封装,因为每个页面都有头部导航栏,所以封装成一个组件
在components目录里,新建Header.vue
<template>
  <div class="phoneContant">
    <header>

      <van-nav-bar
        class="personheader"
        :fixed="true"
        :placeholder="true"
        :safe-area-inset-top="true"
        :title="$route.meta.title"
        left-text=""
        :left-arrow="true"
        @click-left="back"
      />
    </header>
        <router-view></router-view>
  </div>
</template>

<script>

var config = {
  isAndroid: /Android/i.test(navigator.userAgent), //判断是否为移动端
  isIos: !!navigator.userAgent.match(/\(i[^;]+;( U;)? CPU.+Mac OS X/), //判断是否为IOS
};

export default {
  name: "Headers",
  //import引入的组件需要注入到对象中才能使用
  components: {},
  data() {
    //这里存放数据
    return {
      title: "",
    };
  },
  //监听属性 类似于data概念
  computed: {},
  //监控data中的数据变化
  watch: {
    $route: {
      handler(newRouter, fromRouter) {

      },
      immediate: true,
    },
  },
  //方法集合
  methods: {
    back() {
    this.$router.go(-1);

      return false;
    },
  },
  //生命周期 - 创建完成(可以访问当前this实例)
  created() {
    let cont = window.history.length;
    console.log("window.history.length-----------------roomstep");
    console.log(cont);
  },
  //生命周期 - 挂载完成(可以访问DOM元素)
  mounted() {

  },
  beforeCreate() {}, //生命周期 - 创建之前
  beforeMount() {}, //生命周期 - 挂载之前
  beforeUpdate() {}, //生命周期 - 更新之前
  updated() {}, //生命周期 - 更新之后
  beforeDestroy() {}, //生命周期 - 销毁之前
  destroyed() {

  }, //生命周期 - 销毁完成
  activated() {}, //如果页面有keep-alive缓存功能,这个函数会触发
};
</script>
在main.js里进行引入vant和css样式,以及其他组件
import Vue from 'vue'
import App from './App.vue'
import "@/assets/style/public.css";
import router from "@/router";
import Vant from "vant";
import "vant/lib/index.less";
import "@/assets/style/public.css";
Vue.config.productionTip = false
Vue.use(Vant);

new Vue({
  router,
  render: h => h(App),
}).$mount('#app')
在src下创建一个views文件夹,新建两个vue,Home.vue和Second.vue,内容很简单
Home.vue
<template>

  <div class="phoneContant">
    <van-button type="warning" @click="goToNext">进入下一页</van-button>
  </div>
</template>

<script>

export default {
  name: "Home",
  data() {
    return {
      msg: "我是首页",
    };
  },
  methods: {
    goToNext() {
      this.$router.push("/second");
    },

  },
};
</script>

<style>
</style>
Second.vue
<template>
<div>
    {{msg}}
</div>

</template>

<script>
export default {
    data(){
        return{
            msg:"第二页"
        }
    }
}
</script>

<style>

</style>
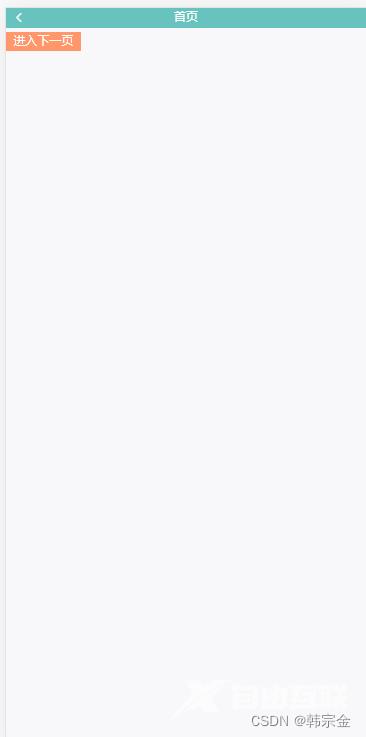
运行
命令行输入
npm run serve
没问题的话,就能运行起来了。如果想要中断运行,终端里边用ctrl+c快捷键
网络封装
对axios进行封装一下,方便使用。在src下新建utils文件夹,utils下新建request.js,
import axios from "axios";
import { Notify } from "vant";
import router from "@/router";

const baseURL =BaseUrl
  // process.env.NODE_ENV === "development" ? "/api" : window.productionUrl;
//创建axios实例
const service = axios.create({
  baseURL, // api的base_url  window.productionUrl
  withCredentials: true,
  timeout: 30000, // 请求超时时间
});

// 发送请求拦截器
service.interceptors.request.use(
  (config) => {
    const Nonce =
      Math.ceil(+new Date() / 1000) + "" + Math.ceil(Math.random() * 10000);
    const CurTime = Math.floor(+new Date() / 1000).toString();
    config.headers["Content-Type"] = "application/json;charset=UTF-8";

    return config;
  },
  (error) => {
    return Promise.reject(error);
  }
);

//发送请求响应拦截
service.interceptors.response.use(
  (response) => {
    const res = JSON.parse(CryptoJS.decrypt(response.data));
    // 错误的status情况
    // console.log(res);
    if (!res.result) {
      Notify({ type: "danger", message: res.message || "error" });
      return Promise.reject(res.message || "error");
    } else {
      return res;
    }
  },
  (error) => {
    Notify({ type: "danger", message: error.message || "error" });
    return Promise.reject(error);
  }
);

export default service;
结语
现在只是搭建了工程,如果没有缺少步骤的话,应该是可以运行起来的,剩下的还有很多工作要做。。。
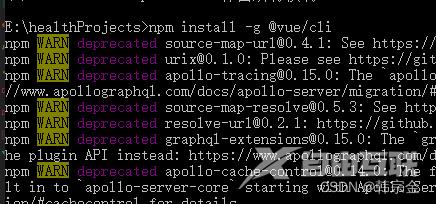
补充
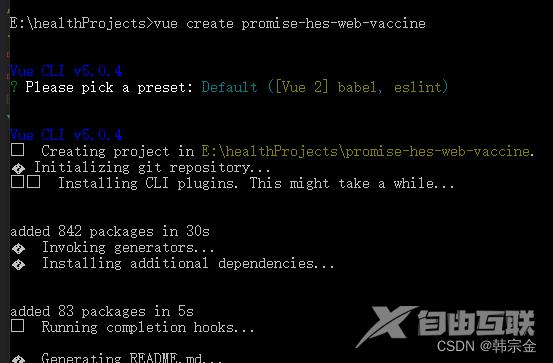
之前的工程创建方式顺序应该错了,不是先创建文件夹,然后再用vscode打开,再执行vue create命令,这样的话,主目录下,就会有子目录,子目录就是项目名。如果想主目录就是项目,要现在需要创建工程的地方,打开cmd命令行,执行命令,然后用vscode打开
总结
到此这篇关于vue开发移动端h5环境搭建的文章就介绍到这了,更多相关vue移动端h5环境搭建内容请搜索易盾网络以前的文章或继续浏览下面的相关文章希望大家以后多多支持易盾网络!