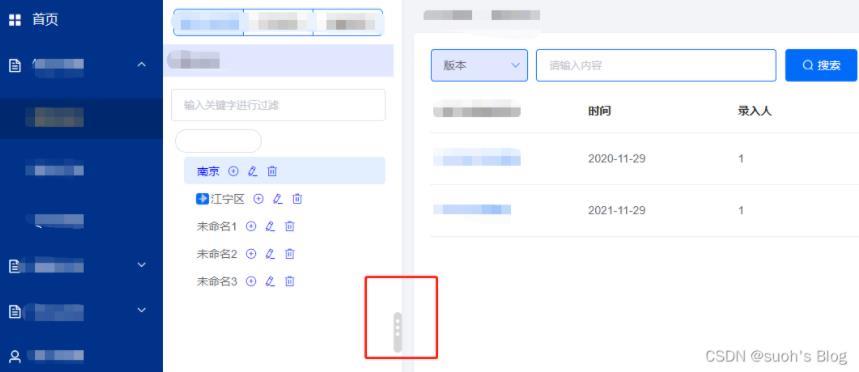
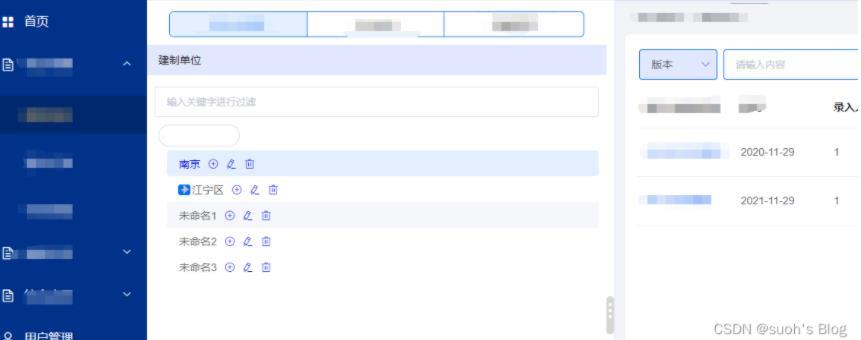
本文实例为大家分享了vue实现伸缩菜单的具体代码,供大家参考,具体内容如下 先看效果: 点击图片按钮可调整菜单宽度 伸缩后 页面结构一共分为三部分,加上一个伸缩按钮,在你的
本文实例为大家分享了vue实现伸缩菜单的具体代码,供大家参考,具体内容如下
先看效果:
点击图片按钮可调整菜单宽度

伸缩后

页面结构一共分为三部分,加上一个伸缩按钮,在你的项目对应的部分都加上class名。
我这里定义的分别是box、left、mid、resize(按钮类名)
html

页面结构划分完成之后,完善一下样式(直接复制,菜单类名换成你的)
/*拖拽区div样式*/
.resize {
    cursor: col-resize;
    position: relative;
    // top: 45%;
    top: 400px;
    background-color: #d6d6d6;
    border-radius: 5px;
    margin-top: -10px;
    width: 10px;
    height: 50px;
    background-size: cover;
    background-position: center;
    font-size: 32px;
    color: white;
}
/*拖拽区鼠标悬停样式*/
.resize:hover {
    color: #444444;
}
//左侧菜单设置百分比宽度,方便拖拽自适应
.main_menu {
    width:22%; /*右侧初始化宽度*/
    height: 100%;
    background: #BF334E!important;
    box-shadow: 0px 0px 0px 0px rgba(0, 0, 0, 0.11);
}
methods里面的拖拽函数:
// 拖拽事件
dragControllerDiv() {
            var resize = document.getElementsByClassName('resize')
            var left = document.getElementsByClassName('left')
            var mid = document.getElementsByClassName('mid')
            var box = document.getElementsByClassName('box')
            for (let i = 0; i < resize.length; i++) {
                // 鼠标按下事件
                resize[i].onmousedown = function (e) {
                    //颜色改变提醒
                    resize[i].style.background = '#818181'
                    var startX = e.clientX
                    resize[i].left = resize[i].offsetLeft
                    // 鼠标拖动事件
                    document.onmousemove = function (e) {
                        console.log('鼠标按下')
                        var endX = e.clientX
                        var moveLen = resize[i].left + (endX - startX - 270) // (endx-startx)=移动的距离。resize[i].left+移动的距离=左边区域最后的宽度
                        var maxT = box[i].clientWidth - resize[i].offsetWidth - 270// 容器宽度 - 左边区域的宽度 = 右边区域的宽度
                        console.log(moveLen,maxT)
                        if (moveLen < 32) moveLen = 270 // 左边区域的最小宽度为32px
                        if (moveLen > maxT - 150) moveLen = maxT - 650 //右边区域最小宽度为150px
                        resize[i].style.left = moveLen // 设置左侧区域的宽度
                        for (let j = 0; j < left.length; j++) {
                            console.log( left[j].style)
                            left[j].style.width = moveLen + 'px'
                            mid[j].style.width = box[i].clientWidth - moveLen - 10 + 'px'
                        }
                    }
                    // 鼠标松开事件
                    document.onmouseup = function (evt) {
                        console.log('鼠标收起')
                        //颜色恢复
                        resize[i].style.background = '#d6d6d6'
                        document.onmousemove = null
                        document.onmouseup = null
                        resize[i].releaseCapture && resize[i].releaseCapture() //当你不在需要继续获得鼠标消息就要应该调用ReleaseCapture()释放掉
                    }
                    resize[i].setCapture && resize[i].setCapture() //该函数在属于当前线程的指定窗口里设置鼠标捕获
                    return false
                }
            }
        },
mounted里面调用:
mounted() {
         this.dragControllerDiv()
    },
以上就是本文的全部内容,希望对大家的学习有所帮助,也希望大家多多支持易盾网络。
