目录
- 引言
- 为啥要预构建
- 预构建的流程
- 1. 查找依赖
- 2. 对查找到的依赖进行构建
- 缓存与预构建
- 总结
引言
vite在官网介绍中,第一条就提到的特性就是自己的本地冷启动极快。这主要是得益于它在本地服务启动的时候做了预构建。出于好奇,抽时间了解了下vite在预构建部分的主要实现思路,分享出来供大家参考。
为啥要预构建
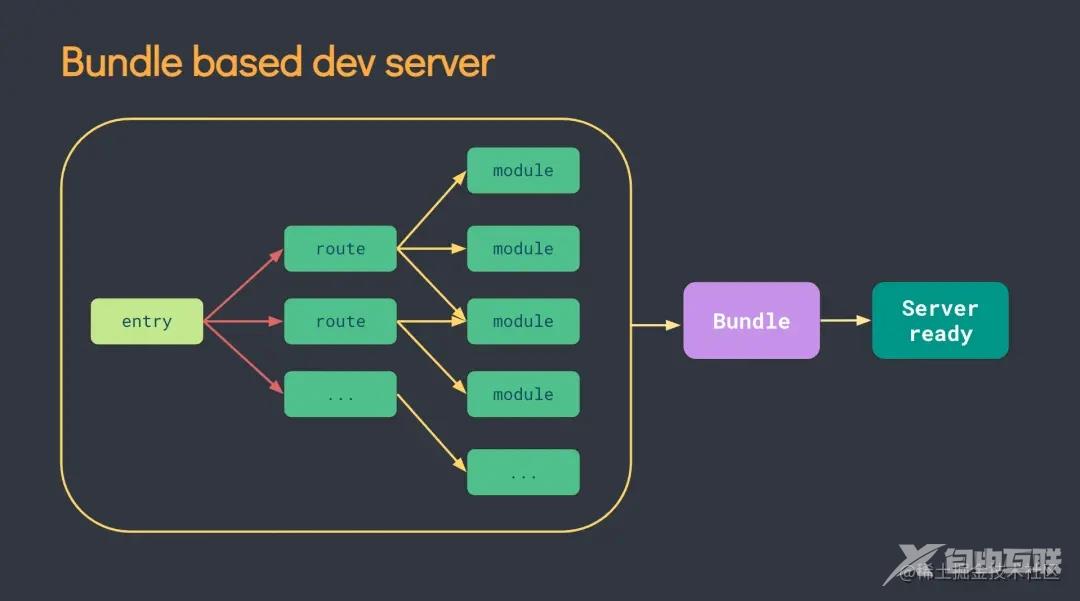
简单来讲就是为了提高本地开发服务器的冷启动速度。按照vite的说法,当冷启动开发服务器时,基于打包器的方式启动必须优先抓取并构建你的整个应用,然后才能提供服务。随着应用规模的增大,打包速度显著下降,本地服务器的启动速度也跟着变慢。
为了加快本地开发服务器的启动速度,vite 引入了预构建机制。在预构建工具的选择上,vite选择了 esbuild 。esbuild 使用 Go 编写,比以 JavaScript 编写的打包器构建速度快 10-100 倍,有了预构建,再利用浏览器的esm方式按需加载业务代码,动态实时进行构建,结合缓存机制,大大提升了服务器的启动速度。
预构建的流程
1. 查找依赖
如果是首次启动本地服务,那么vite会自动抓取源代码,从代码中找到需要预构建的依赖,最终对外返回类似下面的一个deps对象:
{
  vue: '/path/to/your/project/node_modules/vue/dist/vue.runtime.esm-bundler.js',
  'element-plus': '/path/to/your/project/node_modules/element-plus/es/index.mjs',
  'vue-router': '/path/to/your/project/node_modules/vue-router/dist/vue-router.esm-bundler.js'
}
具体实现就是,调用esbuild的build api,以index.html作为查找入口(entryPoints),将所有的来自node_modules以及在配置文件的optimizeDeps.include选项中指定的模块找出来。
//...省略其他代码
  if (explicitEntryPatterns) {
    entries = await globEntries(explicitEntryPatterns, config)
  } else if (buildInput) {
    const resolvePath = (p: string) => path.resolve(config.root, p)
    if (typeof buildInput === 'string') {
      entries = [resolvePath(buildInput)]
    } else if (Array.isArray(buildInput)) {
      entries = buildInput.map(resolvePath)
    } else if (isObject(buildInput)) {
      entries = Object.values(buildInput).map(resolvePath)
    } else {
      throw new Error('invalid rollupOptions.input value.')
    }
  } else {
    // 重点看这里:使用html文件作为查找入口
    entries = await globEntries('**/*.html', config)
  }
//...省略其他代码
build.onResolve(
        {
          // avoid matching windows volume
          filter: /^[\w@][^:]/
        },
        async ({ path: id, importer }) => {
          const resolved = await resolve(id, importer)
          if (resolved) {
            // 来自node_modules和在include中指定的模块
            if (resolved.includes('node_modules') || include?.includes(id)) {
              // dependency or forced included, externalize and stop crawling
              if (isOptimizable(resolved)) {
                // 重点看这里:将符合预构建条件的依赖记录下来,depImports就是对外导出的需要预构建的依赖对象
                depImports[id] = resolved
              }
              return externalUnlessEntry({ path: id })
            } else if (isScannable(resolved)) {
              const namespace = htmlTypesRE.test(resolved) ? 'html' : undefined
              // linked package, keep crawling
              return {
                path: path.resolve(resolved),
                namespace
              }
            } else {
              return externalUnlessEntry({ path: id })
            }
          } else {
            missing[id] = normalizePath(importer)
          }
        }
      )
但是熟悉esbuild的小伙伴可能知道,esbuild默认支持的入口文件类型有js、ts、jsx、css、json、base64、dataurl、binary、file(.png等),并不包括html。
vite是如何做到将index.html作为打包入口的呢?原因是vite自己实现了一个esbuild插件esbuildScanPlugin,来处理.vue和.html这种类型的文件。
具体做法是读取html的内容,然后将里面的script提取到一个esm格式的js模块。
      // 对于html类型(.VUE/.HTML/.svelte等)的文件,提取文件里的script内容。html types: extract script contents -----------------------------------
      build.onResolve({ filter: htmlTypesRE }, async ({ path, importer }) => {
        const resolved = await resolve(path, importer)
        if (!resolved) return
        // It is possible for the scanner to scan html types in node_modules.
        // If we can optimize this html type, skip it so it's handled by the
        // bare import resolve, and recorded as optimization dep.
        if (resolved.includes('node_modules') && isOptimizable(resolved)) return
        return {
          path: resolved,
          namespace: 'html'
        }
      })
      // 配合build.onResolve,对于类html文件,提取其中的script,作为一个js模块extract scripts inside HTML-like files and treat it as a js module
      build.onLoad(
        { filter: htmlTypesRE, namespace: 'html' },
        async ({ path }) => {
          let raw = fs.readFileSync(path, 'utf-8')
          // Avoid matching the content of the comment
          raw = raw.replace(commentRE, '<!---->')
          const isHtml = path.endsWith('.html')
          const regex = isHtml ? scriptModuleRE : scriptRE
          regex.lastIndex = 0
          // js 的内容被处理成了一个虚拟模块
          let js = ''
          let scriptId = 0
          let match: RegExpExecArray | null
          while ((match = regex.exec(raw))) {
            const [, openTag, content] = match
            const typeMatch = openTag.match(typeRE)
            const type =
              typeMatch && (typeMatch[1] || typeMatch[2] || typeMatch[3])
            const langMatch = openTag.match(langRE)
            const lang =
              langMatch && (langMatch[1] || langMatch[2] || langMatch[3])
            // skip type="application/ld+json" and other non-JS types
            if (
              type &&
              !(
                type.includes('javascript') ||
                type.includes('ecmascript') ||
                type === 'module'
              )
            ) {
              continue
            }
            // 默认的js文件的loader是js,其他对于ts、tsx jsx有对应的同名loader
            let loader: Loader = 'js'
            if (lang === 'ts' || lang === 'tsx' || lang === 'jsx') {
              loader = lang
            }
            const srcMatch = openTag.match(srcRE)
            // 对于<script src='path/to/some.js'>引入的js,将它转换为import 'path/to/some.js'的代码
            if (srcMatch) {
              const src = srcMatch[1] || srcMatch[2] || srcMatch[3]
              js += `import ${JSON.stringify(src)}\n`
            } else if (content.trim()) {
              // The reason why virtual modules are needed:
              // 1. There can be module scripts (`<script context="module">` in Svelte and `<script>` in Vue)
              // or local scripts (`<script>` in Svelte and `<script setup>` in Vue)
              // 2. There can be multiple module scripts in html
              // We need to handle these separately in case variable names are reused between them
              // append imports in TS to prevent esbuild from removing them
              // since they may be used in the template
              const contents =
                content +
                (loader.startsWith('ts') ? extractImportPaths(content) : '')
                // 将提取出来的script脚本,存在以xx.vue?id=1为key的script对象中script={'xx.vue?id=1': 'js contents'}
              const key = `${path}?id=${scriptId++}`
              if (contents.includes('import.meta.glob')) {
                scripts[key] = {
                  // transformGlob already transforms to js
                  loader: 'js',
                  contents: await transformGlob(
                    contents,
                    path,
                    config.root,
                    loader,
                    resolve,
                    config.logger
                  )
                }
              } else {
                scripts[key] = {
                  loader,
                  contents
                }
              }
              const virtualModulePath = JSON.stringify(
                virtualModulePrefix + key
              )
              const contextMatch = openTag.match(contextRE)
              const context =
                contextMatch &&
                (contextMatch[1] || contextMatch[2] || contextMatch[3])
              // Especially for Svelte files, exports in <script context="module"> means module exports,
              // exports in <script> means component props. To avoid having two same export name from the
              // star exports, we need to ignore exports in <script>
              if (path.endsWith('.svelte') && context !== 'module') {
                js += `import ${virtualModulePath}\n`
              } else {
                // e.g. export * from 'virtual-module:xx.vue?id=1'
                js += `export * from ${virtualModulePath}\n`
              }
            }
          }
          // This will trigger incorrectly if `export default` is contained
          // anywhere in a string. Svelte and Astro files can't have
          // `export default` as code so we know if it's encountered it's a
          // false positive (e.g. contained in a string)
          if (!path.endsWith('.vue') || !js.includes('export default')) {
            js += '\nexport default {}'
          }
          return {
            loader: 'js',
            contents: js
          }
        }
      )
由上文我们可知,来自node_modules中的模块依赖是需要预构建的。
例如import ElementPlus from 'element-plus'。
因为在浏览器环境下,是不支持这种裸模块引用的(bare import)。
另一方面,如果不进行构建,浏览器面对由成百上千的子模块组成的依赖,依靠原生esm的加载机制,每个的依赖的import都将产生一次http请求。面对大量的请求,浏览器是吃不消的。
因此客观上需要对裸模块引入进行打包,并处理成浏览器环境下支持的相对路径或路径的导入方式。
例如:import ElementPlus from '/path/to/.vite/element-plus/es/index.mjs'。
2. 对查找到的依赖进行构建
在上一步,已经得到了需要预构建的依赖列表。现在需要把他们作为esbuild的entryPoints打包就行了。
//使用esbuild打包,入口文件即为第一步中抓取到的需要预构建的依赖
    import { build } from 'esbuild'
   // ...省略其他代码
    const result = await build({
      absWorkingDir: process.cwd(),
     // flatIdDeps即为第一步中所得到的需要预构建的依赖对象
      entryPoints: Object.keys(flatIdDeps),
      bundle: true,
      format: 'esm',
      target: config.build.target || undefined,
      external: config.optimizeDeps?.exclude,
      logLevel: 'error',
      splitting: true,
      sourcemap: true,
// outdir指定打包产物输出目录,processingCacheDir这里并不是.vite,而是存放构建产物的临时目录
      outdir: processingCacheDir,
      ignoreAnnotations: true,
      metafile: true,
      define,
      plugins: [
        ...plugins,
        esbuildDepPlugin(flatIdDeps, flatIdToExports, config, ssr)
      ],
      ...esbuildOptions
    })
    // 写入_metadata文件,并替换缓存文件。Write metadata file, delete `deps` folder and rename the new `processing` folder to `deps` in sync
    commitProcessingDepsCacheSync()
vite并没有将esbuild的outdir(构建产物的输出目录)直接配置为.vite目录,而是先将构建产物存放到了一个临时目录。当构建完成后,才将原来旧的.vite(如果有的话)删除。然后再将临时目录重命名为.vite。这样做主要是为了避免在程序运行过程中发生了错误,导致缓存不可用。
  function commitProcessingDepsCacheSync() {
    // Rewire the file paths from the temporal processing dir to the final deps cache dir
    const dataPath = path.join(processingCacheDir, '_metadata.json')
    writeFile(dataPath, stringifyOptimizedDepsMetadata(metadata))
    // Processing is done, we can now replace the depsCacheDir with processingCacheDir
    // 依赖处理完成后,使用依赖缓存目录替换处理中的依赖缓存目录
    if (fs.existsSync(depsCacheDir)) {
      const rmSync = fs.rmSync ?? fs.rmdirSync // TODO: Remove after support for Node 12 is dropped
      rmSync(depsCacheDir, { recursive: true })
    }
    fs.renameSync(processingCacheDir, depsCacheDir)
  }
}
以上就是预构建的主要处理流程。
缓存与预构建
vite冷启动之所以快,除了esbuild本身构建速度够快外,也与vite做了必要的缓存机制密不可分。
vite在预构建时,除了生成预构建的js文件外,还会创建一个_metadata.json文件,其结构大致如下:
{
  "hash": "22135fca",
  "browserHash": "632454bc",
  "optimized": {
    "vue": {
      "file": "/path/to/your/project/node_modules/.vite/vue.js",
      "src": "/path/to/your/project/node_modules/vue/dist/vue.runtime.esm-bundler.js",
      "needsInterop": false
    },
    "element-plus": {
      "file": "/path/to/your/project/node_modules/.vite/element-plus.js",
      "src": "/path/to/your/project/node_modules/element-plus/es/index.mjs",
      "needsInterop": false
    },
    "vue-router": {
      "file": "/path/to/your/project/node_modules/.vite/vue-router.js",
      "src": "/path/to/your/project/node_modules/vue-router/dist/vue-router.esm-bundler.js",
      "needsInterop": false
    }
  }
}
hash 是缓存的主要标识,由vite的配置文件和项目依赖决定(依赖的信息取自package-lock.json、yarn.lock、pnpm-lock.yaml)。 所以如果用户修改了vite.config.js或依赖发生了变化(依赖的添加删除更新会导致lock文件变化)都会令hash发生变化,缓存也就失效了。这时,vite需要重新进行预构建。当然如果手动删除了.vite缓存目录,也会重新构建。
// 基于配置文件+依赖信息生成hash
const lockfileFormats = ['package-lock.json', 'yarn.lock', 'pnpm-lock.yaml']
function getDepHash(root: string, config: ResolvedConfig): string {
  let content = lookupFile(root, lockfileFormats) || ''
  // also take config into account
  // only a subset of config options that can affect dep optimization
  content += JSON.stringify(
    {
      mode: config.mode,
      root: config.root,
      define: config.define,
      resolve: config.resolve,
      buildTarget: config.build.target,
      assetsInclude: config.assetsInclude,
      plugins: config.plugins.map((p) => p.name),
      optimizeDeps: {
        include: config.optimizeDeps?.include,
        exclude: config.optimizeDeps?.exclude,
        esbuildOptions: {
          ...config.optimizeDeps?.esbuildOptions,
          plugins: config.optimizeDeps?.esbuildOptions?.plugins?.map(
            (p) => p.name
          )
        }
      }
    },
    (_, value) => {
      if (typeof value === 'function' || value instanceof RegExp) {
        return value.toString()
      }
      return value
    }
  )
  return createHash('sha256').update(content).digest('hex').substring(0, 8)
}
在vite启动时首先检查hash的值,如果当前的hash值与_metadata.json中的hash值相同,说明项目的依赖没有变化,无需重复构建了,直接使用缓存即可。
// 计算当前的hash
const mainHash = getDepHash(root, config)
 const metadata: DepOptimizationMetadata = {
    hash: mainHash,
    browserHash: mainHash,
    optimized: {},
    discovered: {},
    processing: processing.promise
  }
 let prevData: DepOptimizationMetadata | undefined
    try {
      const prevDataPath = path.join(depsCacheDir, '_metadata.json')
      prevData = parseOptimizedDepsMetadata(
        fs.readFileSync(prevDataPath, 'utf-8'),
        depsCacheDir,
        processing.promise
      )
    } catch (e) { }
    // hash is consistent, no need to re-bundle
    // 比较缓存的hash与当前hash
    if (prevData && prevData.hash === metadata.hash) {
      log('Hash is consistent. Skipping. Use --force to override.')
      return {
        metadata: prevData,
        run: () => (processing.resolve(), processing.promise)
      }
    }
总结
以上就是vite预构建的主要处理逻辑,总结起来就是先查找需要预构建的依赖,然后将这些依赖作为entryPoints进行构建,构建完成后更新缓存。vite在启动时为提升速度,会检查缓存是否有效,有效的话就可以跳过预构建环节,缓存是否有效的判定是对比缓存中的hash值与当前的hash值是否相同。由于hash的生成算法是基于vite配置文件和项目依赖的,所以配置文件和依赖的的变化都会导致hash发生变化,从而重新进行预构建。
更多关于vitejs预构建流程的资料请关注易盾网络其它相关文章!,希望大家以后多多支持易盾网络!