目录
- 前言
- 1、设置国际化属性文件
- 2、创建解析器和拦截器
- 3、启动配置文件设置
- 4、控制器示例
- 5、小结
前言
Springboot国际化可以帮助使用者在不同语言环境中构建应用程序,这样应用程序可以有效地适应不同语言文化背景下的用户需求。
此外,Springboot国际化也可以方便多语言应用程序重用和维护,从而减少了系统部署的时间成本和维护的费用。
要实现Springboot国际化应用,主要有三个步骤。
1、设置国际化属性文件
定义国际化资源文件,使用properties格式的文件,将不同的多国语言文本资源放在不同的文件中,每个文件的命名采用【locale】+【messages】的方式,如zh_CN.properties、en_US.properties等。
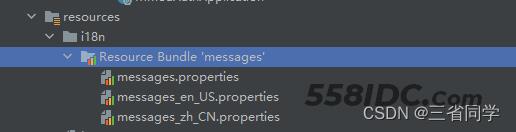
message.properties文件内容可为空。
message.en_US.properties内容示例:
40001=Hello
message.zh_CN.properties内容示例:
40001=你好
2、创建解析器和拦截器
import org.springframework.context.annotation.Bean;
import org.springframework.context.annotation.Configuration;
import org.springframework.web.servlet.config.annotation.InterceptorRegistry;
import org.springframework.web.servlet.config.annotation.WebMvcConfigurer;
import org.springframework.web.servlet.i18n.LocaleChangeInterceptor;
import org.springframework.web.servlet.i18n.SessionLocaleResolver;

import java.util.Locale;

@Configuration
public class LocaleConfig {

	@Bean
	public SessionLocaleResolver localeResolver() {
		SessionLocaleResolver localeResolver = new SessionLocaleResolver();
		localeResolver.setDefaultLocale(Locale.CHINA);
		return localeResolver;
	}

	@Bean
	public WebMvcConfigurer localeInterceptor() {
		return new WebMvcConfigurer() {
			@Override
			public void addInterceptors(InterceptorRegistry registry) {
				LocaleChangeInterceptor localeInterceptor = new LocaleChangeInterceptor();
				localeInterceptor.setParamName("lang");
				registry.addInterceptor(localeInterceptor);
			}
		};
	}
}
3、启动配置文件设置
application.properties中添加如下内容
#i18n
spring.messages.basename=i18n.messages
spring.messages.cache-duration=3600
spring.messages.encoding=UTF-8
application.yml中添加如下内容
spring:
  messages:
    basename: i18n/messages
4、控制器示例
Springboot的国际化是通过一个称为“messageSource”的bean实现的。
import java.util.HashMap;
import java.util.Map;

import javax.servlet.http.HttpServletRequest;

import org.springframework.beans.factory.annotation.Autowired;
import org.springframework.context.MessageSource;
import org.springframework.context.i18n.LocaleContextHolder;
import org.springframework.web.bind.annotation.CrossOrigin;
import org.springframework.web.bind.annotation.GetMapping;
import org.springframework.web.bind.annotation.RequestMapping;
import org.springframework.web.bind.annotation.RestController;

@RestController
@RequestMapping("/test")
public class TestControler {

	@Autowired
	private MessageSource messageSource;

	@GetMapping("/hello")
	public Map<Object, Object> test() {
		Map<Object, Object> result = new HashMap<Object, Object>();
		result.put("code", 40001);
		result.put("msg", messageSource.getMessage("40001", null, LocaleContextHolder.getLocale()));
		return result;
	}

}
5、小结
Springboot国际化可以帮助使用者在不同语言环境中构建应用程序,这样应用程序可以有效地适应不同语言文化背景下的用户需求。
此外,Springboot国际化也可以方便多语言应用程序重用和维护,从而减少了系统部署的时间成本和维护的费用。要实现Springboot国际化应用,主要有三个步骤。
1.设置国际化属性文件:要实现Springboot国际化,首先要准备一系列国际化属性文件,包括语言和地区信息。
2.注册国际化消息资源:将属性文件中的语言和地区信息注册到Springboot应用程序中,并指定默认值,以便在扩展多语言时可以快速、高效地访问相关属性资源。
3.定义多语言捆绑文件:将已定义的国际化属性文件与应用程序结合起来,形成多语言捆绑文件,以便在用户选择不同语言时可以及时调整应用程序语言版本。
到此这篇关于SpringBoot实现前后端分离国际化的示例详解的文章就介绍到这了,更多相关SpringBoot国际化内容请搜索自由互联以前的文章或继续浏览下面的相关文章希望大家以后多多支持自由互联!