目录
- 1.基本用法
- 2.样式修改
- 3.清除浮动
- 4.content属性
- 1、string
- 2、attr()
- 3、url()/uri()
- 4、counter()
before/after伪类相当于在元素内部插入两个额外的标签,其最适合也是最推荐的应用就是图形生成。在一些精致的UI实现上,可以简化HTML代码,提高可读性和可维护性。
效果使用:

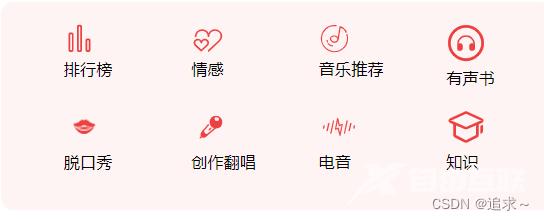
像这种小图标大多使用before,after来实现,不仅简单还方便。
1.基本用法
:before和:after的作用就是在指定的元素内容(而不是元素本身)之前或者之后插入一个包含content属性指定内容的行内元素,最基本的用法如下:
#example:before {
    content: "#";
    color: red;
}
#example:after {
    content: "$";
    color: red;
}
这两个伪类都属于内联元素,但是用display:block;属性可以将其转换成块状元素,比较常见的用法就是样式的一些实现,还有就是清除浮动的效果。。
2.样式修改
代码如下所示:
<div class="quote">
    <span>打老虎</span>
</div>
.quote:before,.quote:after{//用这两个伪类实现样式渲染
     content:"";
     display:inline-block;
     width:5%;
     margin:5px 1%;
     border-bottom:1px solid blue;
}
3.清除浮动
代码如下所示:
<div class="parent">
    <div class="son1"></div>
    <div class="son2"></div>
</div>
<div class="parent2">parent2</div>
//css代码
.son1{
     width:300px;
     height:200px;
     background-color: lightgray;
     float:left;
}
.son2{
     width:300px;
     height:100px;
     background-color: lightblue;
     float:left;
}
.parent2{
     width:400px;
     height: 400px;
     background-color:blue;
     color:#fff;
     text-align:center;
     line-height:400px;
     font-size:30px;
}
如果在上面代码中加上这段代码用来清除浮动则会达到不一样的效果:
.parent:after{
     content:"";
     display:block;//设为块状元素
     clear:both;   //用这个属性来清除浮动
}
::before和::after下特有的content,用于在css渲染中向元素逻辑上的头部或尾部添加内容。
这些添加不会出现在DOM中,不会改变文档内容,不可复制,仅仅是在css渲染层加入。
所以不要用:before或:after展示有实际意义的内容,尽量使用它们显示修饰性内容,例如图标。
注意:在使用before和after时content必不可少。
注意:在使用before和after时content必不可少。
注意:在使用before和after时content必不可少。
4.content属性
::before和::after必须配合content属性来使用,content用来定义插入的内容,content必须有值,至少是空。默认情况下,伪类元素的display是默认值inline,可以通过设置display:block来改变其显示。
content可取以下值。
1、string
使用引号包一段字符串,将会向元素内容中添加字符串。如:a:after{content:""}
<!DOCTYPE html>
<meta charset="utf-8" />
<style type="text/css">
p::before{
    content: "《";
    color: blue;
}
p::after{
    content: "》";
    color: blue;
}
</style>
<p>平凡的世界</p>
2、attr()
通过attr()调用当前元素的属性,比如将图片alt提示文字或者链接的href地址显示出来。
<style type="text/css">
a::after{
    content: "(" attr(href) ")";
}
</style>
<a href="http://www.cnblogs.com/starof" rel="external nofollow" >starof</a>
3、url()/uri()
用于引用媒体文件。
举例:“百度”前面给出一张图片,后面给出href属性。
<style>
a::before{
    content: url("https://www.baidu.com/img/baidu_jgylogo3.gif");
}
a::after{
    content:"("attr(href)")";
}
a{
    text-decoration: none;
}
</style>
---------------------------
<body>
<a href="http://www.baidu.com" rel="external nofollow" >百度</a>
</body>
4、counter()
调用计数器,可以不使用列表元素实现序号功能。
配合counter-increment和counter-reset属性使用:
h2:before { counter-increment: chapter; content: "Chapter " counter(chapter) ". " }
<style>
body{
    counter-reset: section;
}
h1{
    counter-reset: subsection;
}
h1:before{
    counter-increment:section;
    content:counter(section) "、";
}
h2:before{
    counter-increment:subsection;
    content: counter(section) "." counter(subsection) "、";
}
</style>
------------------------------------------------
<body>
<h1>HTML tutorials</h1>
<h2>HTML Tutorial</h2>
<h2>XHTML Tutorial</h2>
<h2>CSS Tutorial</h2>
<h1>Scripting tutorials</h1>
<h2>JavaScript</h2>
<h2>VBScript</h2>
<h1>XML tutorials</h1>
<h2>XML</h2>
<h2>XSL</h2>
</body>
到此这篇关于JavaScript前端中的伪类元素before和after使用详解的文章就介绍到这了,更多相关JS before和after内容请搜索易盾网络以前的文章或继续浏览下面的相关文章希望大家以后多多支持易盾网络!