win11内存卡顿怎么清理 方法一 1、首先我们点击桌面下方的开始菜单图标,然后选择设置选项。如图所示: 2、接着我们在系统里找到存储选项,点击进去。如图所示: 3、进入存储界面

方法一
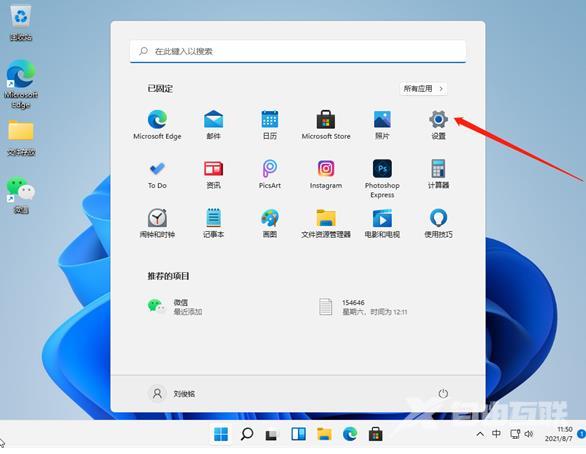
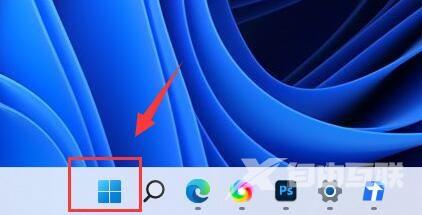
1、首先我们点击桌面下方的开始菜单图标,然后选择设置选项。如图所示:
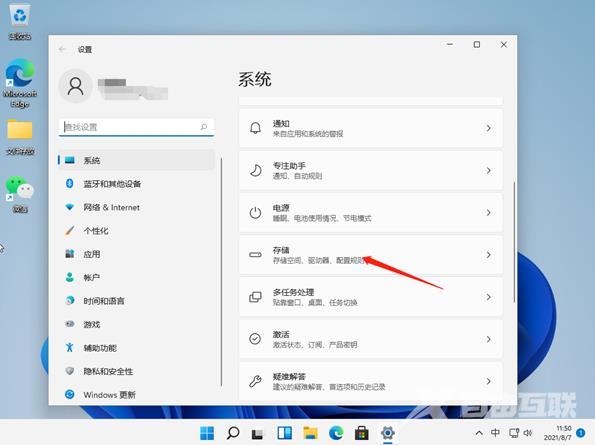
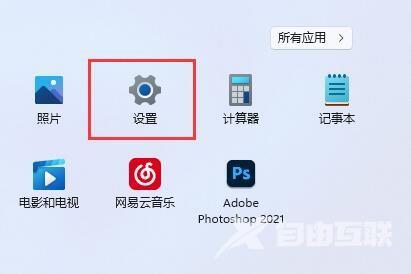
2、接着我们在系统里找到存储选项,点击进去。如图所示:
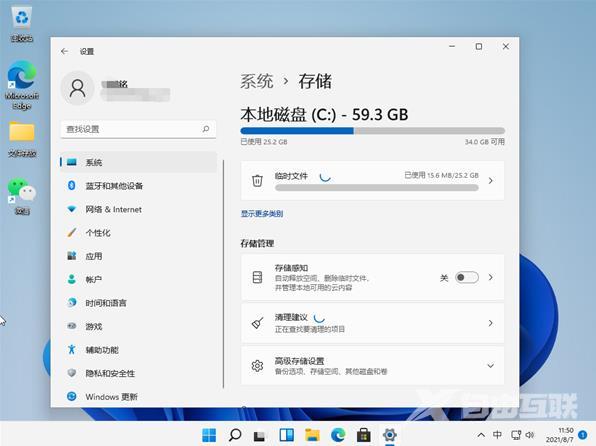
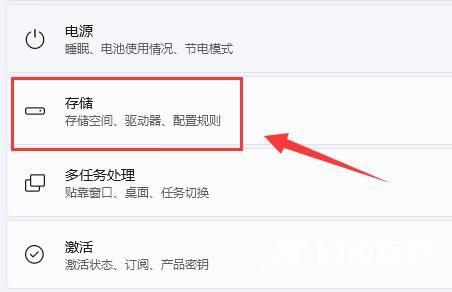
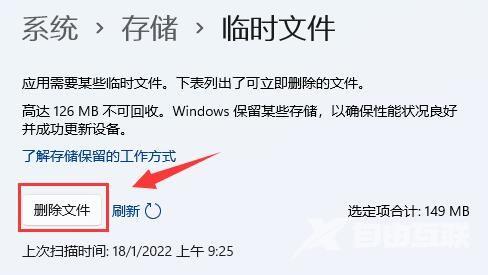
3、进入存储界面后,我们找到临时文件,点击进去准备清理。如图所示:
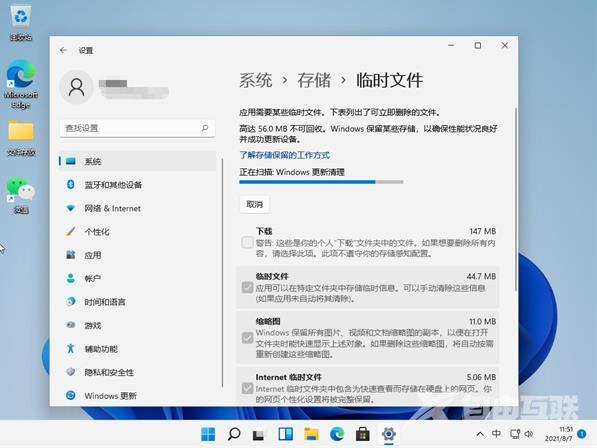
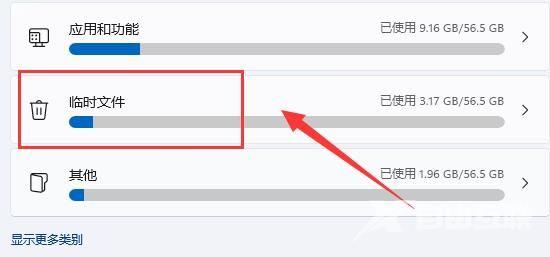
4、我们能够在这里看到这些临时文件占用的空间,点击删除文件即可释放这些空间。如图所示:
5、最后我们只需等待电脑清理完毕就可以了。
方法二
第一步,点击任务栏的“ 开始菜单 ”
第二步,打开其中的“ 设置 ”选项。
第三步,点击右边的“ 存储 ”选项。
第四步,等待系统扫描完成,进入“ 临时文件 ”
第五步,点击“ 删除文件 ”就可以清理运行内存了。
其实如果要增加运行内存,最好的办法还是升级内存条。
以上是小编为大家带来的关于win11的内容介绍,有没有帮助到你呢?喜欢的用户欢迎关注自由互联吧!