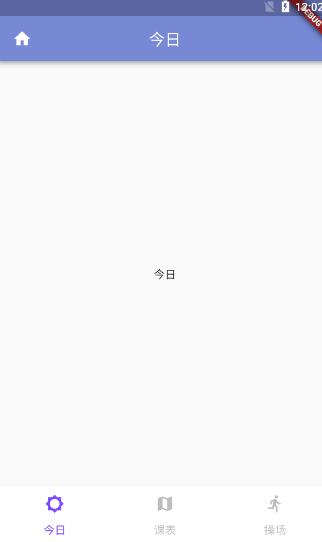
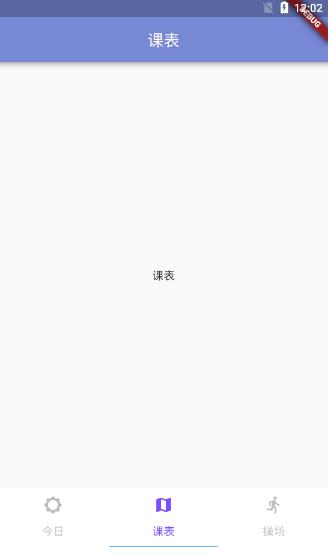
本文实例为大家分享了Flutter实现底部导航栏的具体代码,供大家参考,具体内容如下 效果 实现 先将自动生成的main.dart里面的代码删除, import 'package:flutter/material.dart';import 'package:flu
本文实例为大家分享了Flutter实现底部导航栏的具体代码,供大家参考,具体内容如下
效果


实现
先将自动生成的main.dart里面的代码删除,
import 'package:flutter/material.dart';
import 'package:flutter_guohe/pages/main.dart';

void main() {
 runApp(new Guohe());
}
创建app.dart作为首页的页面文件
class Guohe extends StatefulWidget {
 @override
 GuoheState createState() => new GuoheState();
}

class GuoheState extends State<Guohe> {
 @override
 Widget build(BuildContext context) {

 }
}
创建today.dart、kb.dart、playground.dart三个页面文件作为tabview的填充文件,这里用playground.dart为例。
import 'package:flutter/material.dart';

class Playground extends StatefulWidget {
 @override
 PlaygroundState createState() => new PlaygroundState();
}

class PlaygroundState extends State<Playground> {
 @override
 Widget build(BuildContext context) {
 return new MaterialApp(
  home: new Scaffold(
  appBar: new AppBar(
   title: new Text("操场"),
   backgroundColor: Color.fromARGB(255, 119, 136, 213), //设置appbar背景颜色
   centerTitle: true, //设置标题是否局中
  ),
  body: new Center(
   child: new Text('操场'),
  ),
  ),
 );
 }
}
app.dart的完整代码
/**
 * APP的主入口文件
 */

import 'package:flutter/material.dart';

import 'package:flutter_guohe/pages/main/today.dart';
import 'package:flutter_guohe/pages/main/playground.dart';
import 'package:flutter_guohe/pages/main/kb.dart';
import 'package:flutter_guohe/pages/main/leftmenu.dart';

import 'package:flutter_guohe/common/eventBus.dart';

//果核的主界面
class Guohe extends StatefulWidget {
 @override
 GuoheState createState() => new GuoheState();
}

class GuoheState extends State<Guohe> with SingleTickerProviderStateMixin {
 TabController controller;

 @override
 void initState() {
 controller = new TabController(length: 3, vsync: this);
 }

 @override
 void dispose() {
 controller.dispose();
 super.dispose();
 }

 @override
 Widget build(BuildContext context) {
 return new MaterialApp(
  home: new Scaffold(
  drawer: new LeftMenu(),
  body: new TabBarView(
   controller: controller,
   children: <Widget>[
   new Today(),
   new Kb(),
   new Playground(),
   ],
  ),
  bottomNavigationBar: new Material(
   color: Colors.white,
   child: new TabBar(
   controller: controller,
   labelColor: Colors.deepPurpleAccent,
   unselectedLabelColor: Colors.black26,
   tabs: <Widget>[
    new Tab(
    text: "今日",
    icon: new Icon(Icons.brightness_5),
    ),
    new Tab(
    text: "课表",
    icon: new Icon(Icons.map),
    ),
    new Tab(
    text: "操场",
    icon: new Icon(Icons.directions_run),
    ),
   ],
   ),
  ),
  ),
 );
 }
}
其中
labelColor: Colors.deepPurpleAccent,
unselectedLabelColor: Colors.black26,
第一个属性是控制标签颜色,这里我选了紫色,第二个属性是未选中标签时的颜色。
以上就是本文的全部内容,希望对大家的学习有所帮助,也希望大家多多支持自由互联。
