目录
- 前言
- 角色介绍
- 官方例子
- Quartz如何分布式?
- 跟着官方例子看源码
- Trigger的处理
- 结合起来
- 总结
前言
前几篇介绍了单体架构的定时任务解决方式,但是现代软件架构由于业务复杂度高,业务的耦合性太强,已经由单体架构拆分成了分布式架构。因此,定时任务的架构也随之修改。而Quartz是分布式定时任务解决方案中使用简单,结构清晰,且不依赖第三方分布式调度中间件的。上车,mars酱带你车里细说~
角色介绍
Quartz入门使用的角色不多,三个角色足够,分别是:
Scheduler:调度器。用来负责任务的调度;
Job:任务。这是一个接口,业务代码继承Job接口并实现它的execute方法,是业务执行的主体部分;
Trigger: 触发器。也是个接口,有两个触发器比较关键,一个是SimpleTrigger,另一个是CronTrigger。前者支持简单的定时,比如:按时、按秒等;后者直接支持cron表达式。下面我们从官方的源代码入手,看看Quartz如何做到分布式的。
官方例子
官方源代码down下来之后,有个examples文件夹:
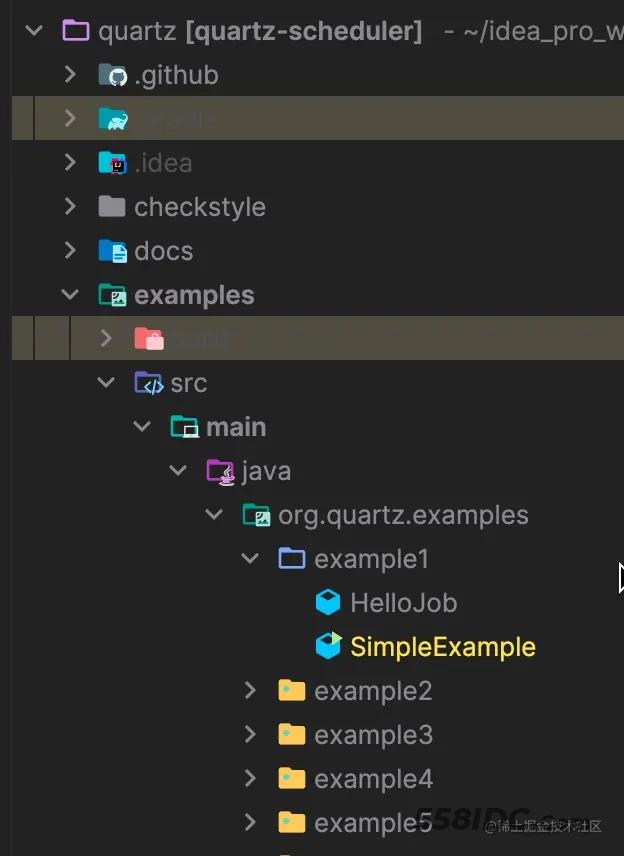
example1是入门级中最简单的。就两个java文件,一个HelloJob:
package org.quartz.examples.example1;
import java.util.Date;
import org.slf4j.Logger;
import org.slf4j.LoggerFactory;
import org.quartz.Job;
import org.quartz.JobExecutionContext;
import org.quartz.JobExecutionException;
/**
 * <p>
 * This is just a simple job that says "Hello" to the world.
 * </p>
 *
 * @author Bill Kratzer
 */
public class HelloJob implements Job {
    private static Logger _log = LoggerFactory.getLogger(HelloJob.class);
    /**
     * <p>
     * Empty constructor for job initilization
     * </p>
     * <p>
     * Quartz requires a public empty constructor so that the
     * scheduler can instantiate the class whenever it needs.
     * </p>
     */
    public HelloJob() {
    }
    /**
     * <p>
     * Called by the <code>{@link org.quartz.Scheduler}</code> when a
     * <code>{@link org.quartz.Trigger}</code> fires that is associated with
     * the <code>Job</code>.
     * </p>
     *
     * @throws JobExecutionException
     *             if there is an exception while executing the job.
     */
    public void execute(JobExecutionContext context)
        throws JobExecutionException {
        // Say Hello to the World and display the date/time
        _log.info("Hello World! - " + new Date());
    }
}
另一个SimpleExample:
 package org.quartz.examples.example1;
 import org.quartz.JobDetail;
 import org.quartz.Scheduler;
 import org.quartz.SchedulerFactory;
 import org.quartz.Trigger;
 import org.quartz.impl.StdSchedulerFactory;
 import org.slf4j.Logger;
 import org.slf4j.LoggerFactory;
 import java.util.Date;
 import static org.quartz.DateBuilder.evenMinuteDate;
 import static org.quartz.JobBuilder.newJob;
 import static org.quartz.TriggerBuilder.newTrigger;
 /**
  * This Example will demonstrate how to start and shutdown the Quartz scheduler and how to schedule a job to run in
  * Quartz.
  *
  * @author Bill Kratzer
  */
 public class SimpleExample {
     public void run() throws Exception {
         Logger log = LoggerFactory.getLogger(SimpleExample.class);
         log.info("------- Initializing ----------------------");
         // 1. 创建一个scheduler
         SchedulerFactory sf = new StdSchedulerFactory();
         Scheduler sched = sf.getScheduler();
         log.info("------- Initialization Complete -----------");
         // computer a time that is on the next round minute
         Date runTime = evenMinuteDate(new Date());
         log.info("------- Scheduling Job  -------------------");
         // 2. 指定一个job
         JobDetail job = newJob(HelloJob.class).withIdentity("job1", "group1").build();
         // 3. 指定一个trigger
         Trigger trigger = newTrigger().withIdentity("trigger1", "group1").startAt(runTime).build();
         // 4. 绑定job和trigger
         sched.scheduleJob(job, trigger);
         log.info(job.getKey() + " will run at: " + runTime);
         // 5. 执行
         sched.start();
         log.info("------- Started Scheduler -----------------");
         // wait long enough so that the scheduler as an opportunity to
         // run the job!
         log.info("------- Waiting 65 seconds... -------------");
         try {
             // wait 65 seconds to show job
             Thread.sleep(65L * 1000L);
             // executing...
         } catch (Exception e) {
             //
         }
         // shut down the scheduler
         log.info("------- Shutting Down ---------------------");
         sched.shutdown(true);
         log.info("------- Shutdown Complete -----------------");
     }
     public static void main(String[] args) throws Exception {
         SimpleExample example = new SimpleExample();
         example.run();
     }
 }
整个SimpleExample只有五个步骤:
- 创建Scheduler,这是一个调度器,例子中使用调度器工厂来创建一个调度器;
- 创建一个Job。实际上Job就是那个HelloJob,但是这里把HelloJob丢给了JobDetail对象,Job接口本身只有一个execute函数,没有其他的属性了,如果需要附加其他属性,JobDetail就支持,比如我们需要往Job中传递参数,JobDetail中提供了一个JobDataMap。当Job在运行的时候,execute函数里面的就能获取到JobDetail对象,并将设置的数据传递给Job接口的实现;
- 创建一个Trigger。Trigger对象主责是任务的执行时间,比如官方例子中的startAt函数,就指定了具体的运行时间,还有startNow(立即执行);
- 用scheduler绑定Job和Trigger;
- 执行scheduler。
Quartz的使用是不是简单又清晰?Job是任务,单一职责,不做任何其他事情。Trigger负责执行的频率等等属性。Scheduler负责按照Trigger的规则去执行Job的内容。各自部分的功能符合单一原则。
但是,到这里都不是分布式的方式,依然是单体架构的。那么,Quartz如何做到分布式的呢?
Quartz如何分布式?
Quartz的分布式实现方式并不依赖其他分布式协调管理中间件完成,而是使用数据锁来实现。使用数据做协调管理中间件的唯一的前提是:需要把集群的每台机器时间校对一致。
Quartz数据库核心表如下:
字体加粗的QRTZ_LOCKS表是一个悲观锁的存储实现,Quartz认为每条记录都可能会产生并发冲突。以上表的SQL可以在quartz目录中找到:
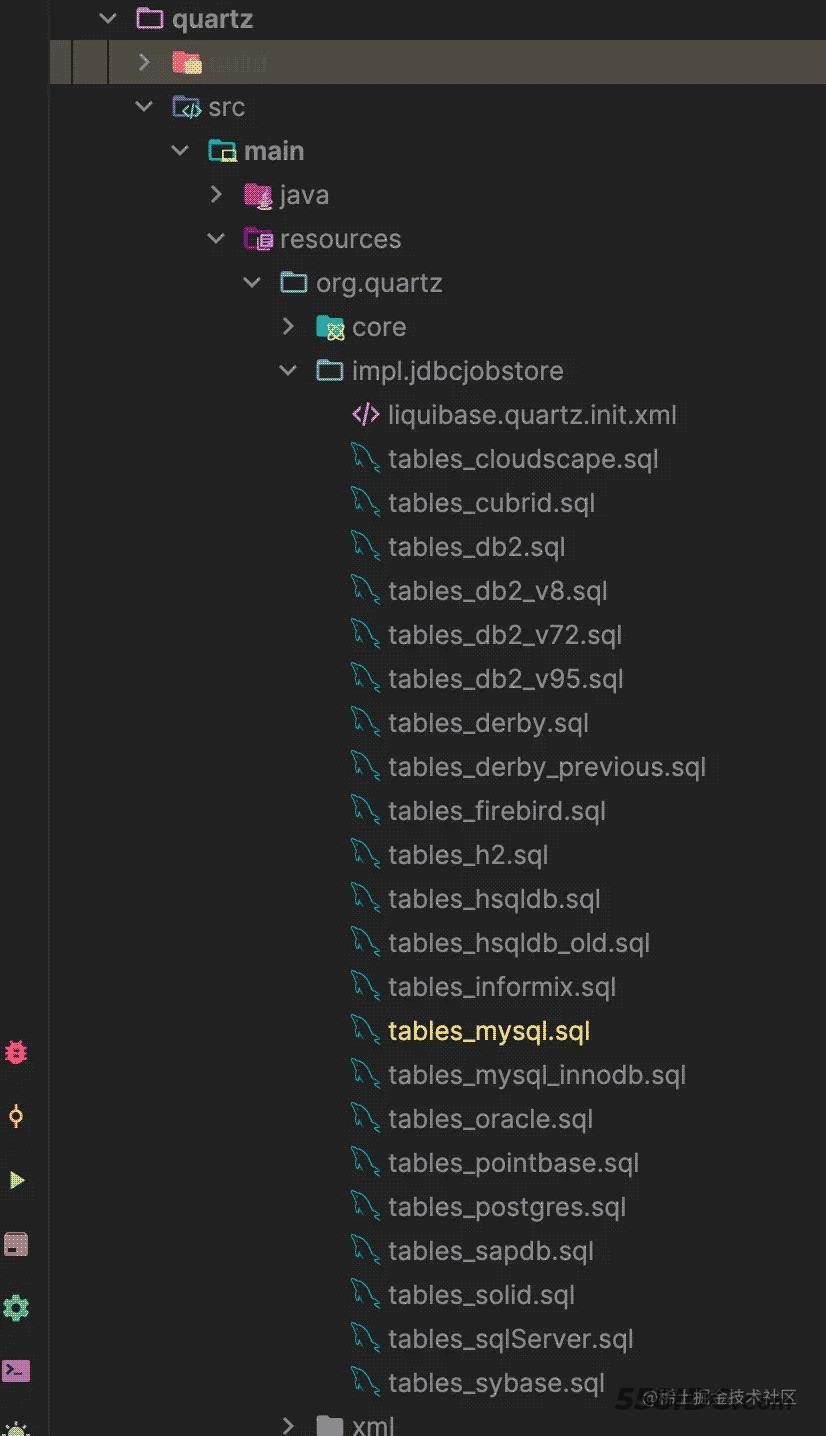
找到自己喜欢的数据库品牌,并创建好表即可。
跟着官方例子看源码
我们从Hello的execute方法开始,反着找,继续看看分布式的方式如何实现。为什么反着找呢?因为这里是我们业务实现的主体内容,Quartz框架最终必须要调用到这个execute的具体实现的。我们找到调用execute的地方有很多处:
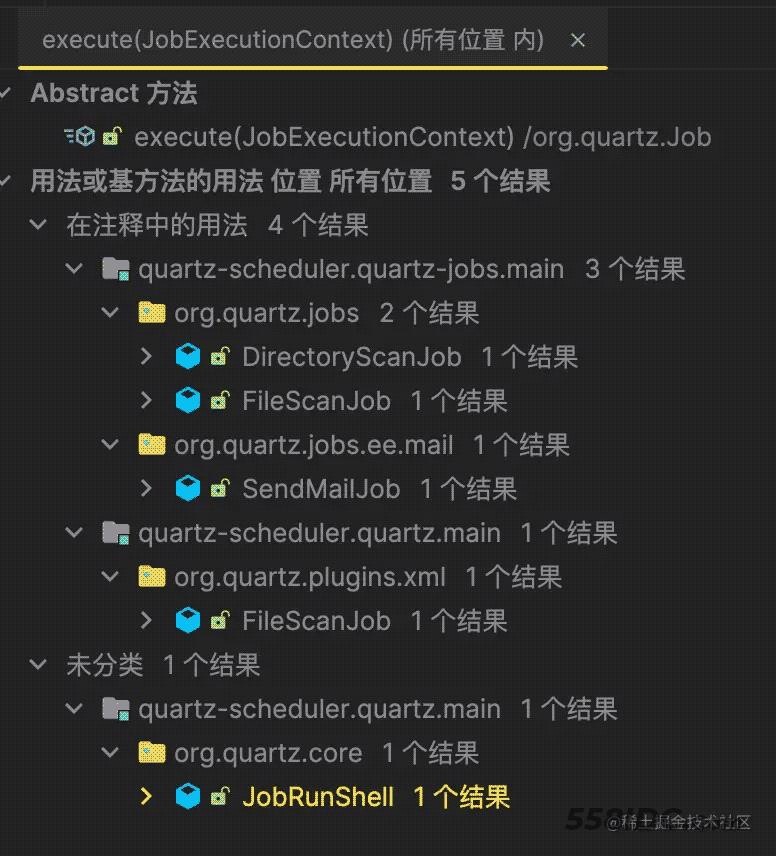
从类名来分析,DirectoryScanJob看着是目录扫描任务,FileScanJob直译是文件扫描任务,SendMailJob是发送邮件任务,最后只剩那个JobRunShell,毕竟翻译过来叫“任务运行の核心”啊。进入JobRunShell,找到调用execute函数的部分,execute函数被包裹在一个一百三十多行长又长的run函数中:
public void run() {
    qs.addInternalSchedulerListener(this);
    try {
        // ...省略很多源代码
        do {
            // ...省略很多源代码
            try {
                begin();
            } catch (SchedulerException se) {
                // ... 省略源代码
            }
            // ... 省略源代码
            try {
                log.debug("Calling execute on job " + jobDetail.getKey());
                // 这里负责执行job的execute函数
                job.execute(jec);
                endTime = System.currentTimeMillis();
            } catch (JobExecutionException jee) {
                // ... 省略源代码
            } catch (Throwable e) {
                // ... 省略源代码
            }
            // ...省略很多源代码
            try {
                complete(true);
            } catch (SchedulerException se) {
                // ... 省略源代码
            }
            // ...省略很多源代码
        } while (true);
    } finally {
        qs.removeInternalSchedulerListener(this);
    }
}
可以看到run中间的execute被夹在一个begin函数和comlete函数中,而begin和complete的实现是一个基于JTA事务的JTAJobRunShell的实现来完成的。JobRunShell是一个Runnable接口的实现,那么刚刚的run方法,必定在某处启用了线程(池)的start方法。
mars酱继续跟踪查找源代码,在QuartzSchedulerThread中的run函数中,找到JobRunShell的调用部分:
@Override
public void run() {
    int acquiresFailed = 0;
    while (!halted.get()) {
        // ...省略很多源代码
        // 源代码279行
        int availThreadCount = qsRsrcs.getThreadPool().blockForAvailableThreads();
        // ...省略很多源代码
        if(availThreadCount > 0) {
            // ...省略很多源代码
            // 取下一个trigger,周期是30秒取一次
            triggers = qsRsrcs.getJobStore().acquireNextTriggers(
                now + idleWaitTime, Math.min(availThreadCount, qsRsrcs.getMaxBatchSize()), qsRsrcs.getBatchTimeWindow());
            // ...省略很多源代码
            // 触发trigger
            List<TriggerFiredResult> res = qsRsrcs.getJobStore().triggersFired(triggers);
            // ...省略很多源代码
            // 释放trigger,当bndle的结果是null就释放trigger
            if (bndle == null) {
                qsRsrcs.getJobStore().releaseAcquiredTrigger(triggers.get(i));
                continue;
            }
            // ...省略很多源代码
            JobRunShell shell = null;
            try {
                shell = qsRsrcs.getJobRunShellFactory().createJobRunShell(bndle);
                shell.initialize(qs);
            } catch (SchedulerException se) {
                qsRsrcs.getJobStore().triggeredJobComplete(triggers.get(i), bndle.getJobDetail(), CompletedExecutionInstruction.SET_ALL_JOB_TRIGGERS_ERROR);
                continue;
            }
            // 这里调用JobRunShell
            if (qsRsrcs.getThreadPool().runInThread(shell) == false) {
                // ...省略很多源代码
            }
        }
    }
}
QuartzSchedulerThread的run函数就是核心处理流程了,qsRsrcs.getThreadPool().runInThread(shell)内部就根据具体的SimpleThreadPool或者ZeroSizeThreadPool来执行run函数,while循环基本就是不停的在轮询不断的去拿trigger,然后判断trigger的时间是不是到了,再按照时间trigger的时间规则执行Job,最后再标记为完成、释放trigger。
Trigger的处理
上面的逻辑都是通过qsRsrcs.getJobStore()得到的对象去处理Trigger的,返回对象是JobStore。任意查看qsRsrcs.getJobStore()调用的函数,比如:releaseAcquiredTriggerJobStore,它的实现有两个是比较重要的:一个是RAMJobStore,一个是JobStoreSupport。前者是RAM作为存储介质,作者还特意写上了这样一段注释:
This class implements a JobStore that utilizes RAM as its storage device.
As you should know, the ramification of this is that access is extrememly fast, but the data is completely volatile - therefore this JobStore should not be used if true persistence between program shutdowns is required.
这段英文的央视翻译:
这个类实现了一个使用RAM作为存储设备的JobStore。
您应该知道,这样做的后果是访问速度非常快,但是数据是完全不稳定的——因此,如果需要在程序关闭之间实现真正的持久性,则不应该使用这个JobStore。
而且内存存储也无法分布式处理吧?所以,mars酱选择了观看JobStoreSupport:

从import可以知道,这个玩意是连接了数据库的,所以呢,acquireNextTriggers、triggersFired、releaseAcquiredTrigger这些方法负责具体trigger的相关操作,都最终会执行到JobStoreSupport的第3844行的executeInNonManagedTXLock函数:
    /**
     * Execute the given callback having optionally acquired the given lock.
     * This uses the non-managed transaction connection.
     *
     * @param lockName The name of the lock to acquire, for example
     * "TRIGGER_ACCESS".  If null, then no lock is acquired, but the
     * lockCallback is still executed in a non-managed transaction.
     */
    protected <T> T executeInNonManagedTXLock(
            String lockName,
            TransactionCallback<T> txCallback, final TransactionValidator<T> txValidator) throws JobPersistenceException {
        boolean transOwner = false;
        Connection conn = null;
        try {
            if (lockName != null) {
                // If we aren't using db locks, then delay getting DB connection
                // until after acquiring the lock since it isn't needed.
                if (getLockHandler().requiresConnection()) {
                    conn = getNonManagedTXConnection();
                }
                transOwner = getLockHandler().obtainLock(conn, lockName);
            }
            if (conn == null) {
                conn = getNonManagedTXConnection();
            }
            final T result = txCallback.execute(conn);
            try {
                commitConnection(conn);
            } catch (JobPersistenceException e) {
                rollbackConnection(conn);
                if (txValidator == null || !retryExecuteInNonManagedTXLock(lockName, new TransactionCallback<Boolean>() {
                    @Override
                    public Boolean execute(Connection conn) throws JobPersistenceException {
                        return txValidator.validate(conn, result);
                    }
                })) {
                    throw e;
                }
            }
            Long sigTime = clearAndGetSignalSchedulingChangeOnTxCompletion();
            if(sigTime != null && sigTime >= 0) {
                signalSchedulingChangeImmediately(sigTime);
            }
            return result;
        } catch (JobPersistenceException e) {
            rollbackConnection(conn);
            throw e;
        } catch (RuntimeException e) {
            rollbackConnection(conn);
            throw new JobPersistenceException("Unexpected runtime exception: "
                    + e.getMessage(), e);
        } finally {
            try {
                releaseLock(lockName, transOwner);
            } finally {
                cleanupConnection(conn);
            }
        }
    }
整体的过程简要说明就是:获取数据库连接,给需要执行的trigger加锁,处理完之后再释放锁。
结合起来
结合前面的流程来看,一个调度器在执行前如果涉及到分布式的情况,流程如下:
- 首先要获取QUARTZ_LOCKS表中对应的锁(在
executeInNonManagedTXLock函数的getLockHandler().obtainLock(conn, lockName)中); - 获取锁后执行QuartzSchedulerThread中的JobRunShell,完成任务的执行;
- 最后QuartzSchedulerThread中调用
triggeredJobComplete函数,锁被释放,在executeInNonManagedTXLock函数的releaseLock(lockName, transOwner)中执行;
集群中的每一个调度器实例都遵循这样的操作流程。
总结
Quartz 是一款用于分布式系统的高性能调度框架,它采用了数据库作为分布式锁机制来保证同一时刻只有一个 Scheduler 实例访问数据库中的 Trigger。
在 Quartz 中,调度器线程会争抢访问数据库中的 Trigger,以确保在同一时刻只有一个调度器线程执行某个 Trigger 的操作。如果有多个调度器线程同时尝试访问同一个 Trigger,它们会相互等待对方释放锁。当一个调度器线程获得了锁,它就可以访问数据库并执行相应的操作。
另外,Quartz 还采用了悲观锁的策略来避免死锁的发生。当一个调度器线程尝试获取锁时,如果锁已经被其他线程占用,那么这个线程会等待,直到有线程释放了锁。如果在等待过程中没有其他线程释放锁,那么这个线程就会一直等待下去,直到调度器重新分配了锁。
总之,Quartz 的分布式调度原理是通过数据库锁和悲观锁来实现的,以保证同一时刻只有一个调度器线程访问数据库中的 Trigger,从而提高系统的性能和可靠性。
以上就是一分钟掌握Java Quartz定时任务的详细内容,更多关于Java Quartz定时任务的资料请关注自由互联其它相关文章!