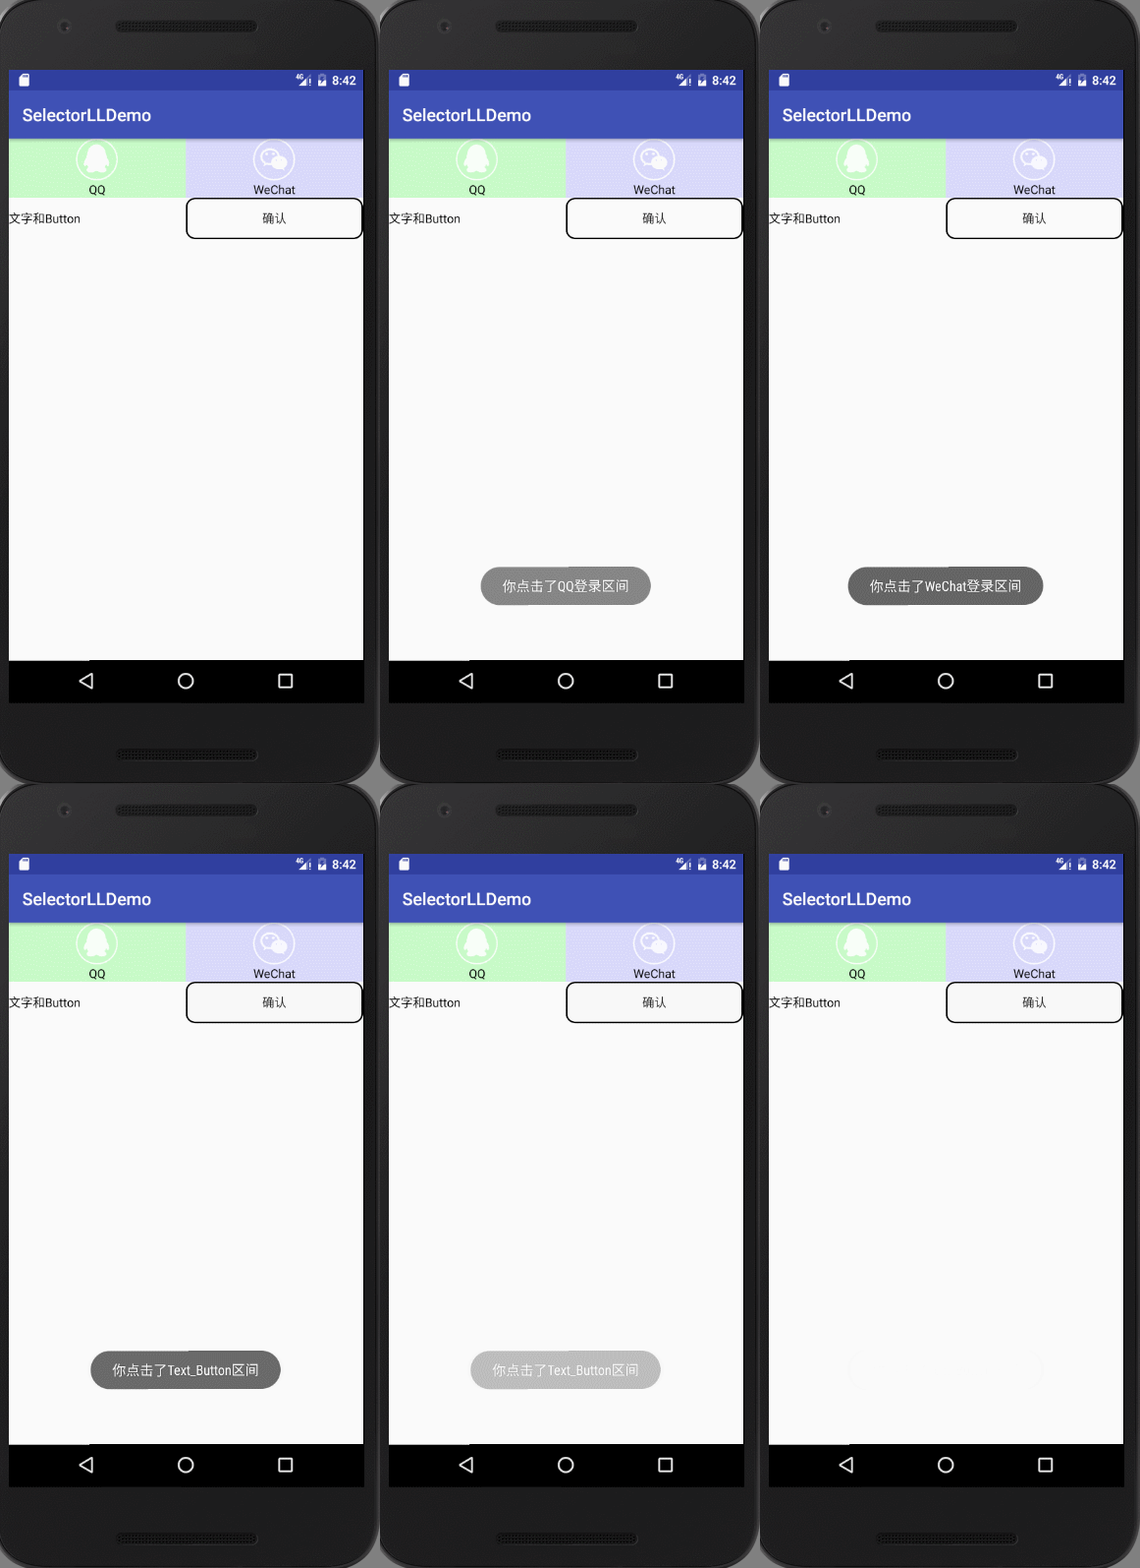
一、目的效果
越好的用户体验来源更直接更明显的事件反馈。selector可以“预存”多种响应的反馈,主要以下多种状态有:
android:state_selected是选中
android:state_focused是获得焦点
android:state_pressed是点击
android:state_enabled是设置是否响应事件,指所有事件
设置不同状态的表现形式,则会在不同场景下有不同状态。如文字:被选中状态,未被选中状态。
selector的普通使用则是为对应单个控件添加以selector为背景的资源,则能达到目的。联合使用则是基本使用一种升级。在我们的导航栏中,常使用LinearLayout或者RelativeLayout包含一个ImageView和一个TextView。图片用于直观观感,文字用于更清晰的描述。
在一个整体菜单被选中时,需要图片及文字都表现对应的状态。并为保证较大的事件响应范围,点击事件常赋予包含图片和文字的父控件。即:为LinearLayout设置点击事件,ImageView、TextView表现对应的状态。
二、具体实现
文字的selector:res添加目录color,res/color/bg_tv_selector.xml
<?xml version="1.0" encoding="utf-8"?>
<selector xmlns:android="http://schemas.android.com/apk/res/android">
  <item android:color="@color/red" android:state_pressed="true" />
  <item android:color="@color/black" />
</selector>
图片的selector:bg_qq_iv_selector.xml
<?xml version="1.0" encoding="utf-8"?>
<selector xmlns:android="http://schemas.android.com/apk/res/android">
  <item android:drawable="@mipmap/b_qq_pressed" android:state_pressed="true" />
  <item android:drawable="@mipmap/b_qq" />
</selector>
使用shape为Button的背景图,并设置selector:
bg_bt_drawable_normal.xml:
<?xml version="1.0" encoding="utf-8"?>
<shape xmlns:android="http://schemas.android.com/apk/res/android">
  <corners android:radius="10dp" />
  <stroke
    android:width="2dp"
    android:color="@color/black" />
</shape>
bg_bt_drawable_pressed.xml:
<?xml version="1.0" encoding="utf-8"?>
<shape xmlns:android="http://schemas.android.com/apk/res/android">
  <corners android:radius="5dp" />
  <stroke
    android:width="2dp"
    android:color="@color/blue"
    android:dashGap="10dp" />
  <gradient
    android:centerColor="@color/red"
    android:endColor="@color/green" />
</shape>
bg_bt_selector.xml:
<?xml version="1.0" encoding="utf-8"?>
<selector xmlns:android="http://schemas.android.com/apk/res/android">
  <item android:drawable="@drawable/bg_bt_drawable_pressed" android:state_pressed="true" />
  <item android:drawable="@drawable/bg_bt_drawable_normal" />
</selector>
activity_main.xml中使用:
<?xml version="1.0" encoding="utf-8"?>
<LinearLayout xmlns:android="http://schemas.android.com/apk/res/android"
  xmlns:tools="http://schemas.android.com/tools"
  android:layout_width="match_parent"
  android:layout_height="match_parent"
  android:orientation="vertical"
  tools:context="com.future.selectorlldemo.MainActivity">

  <LinearLayout
    android:layout_width="match_parent"
    android:layout_height="wrap_content"
    android:orientation="horizontal">

    <LinearLayout
      android:id="@+id/qq_ll"
      android:layout_width="0dp"
      android:layout_height="wrap_content"
      android:layout_weight="1"
      android:background="@color/green"
      android:clickable="true"
      android:gravity="center"
      android:orientation="vertical">

      <ImageView
        android:layout_width="wrap_content"
        android:layout_height="wrap_content"
        android:src="@drawable/bg_qq_iv_selector" />

      <TextView
        android:layout_width="wrap_content"
        android:layout_height="wrap_content"
        android:text="QQ"
        android:textColor="@color/bg_tv_selector" />

    </LinearLayout>

    <LinearLayout
      android:id="@+id/weixin_ll"
      android:layout_width="0dp"
      android:layout_height="wrap_content"
      android:layout_weight="1"
      android:background="@color/blue"
      android:clickable="true"
      android:gravity="center"
      android:orientation="vertical">

      <ImageView
        android:layout_width="wrap_content"
        android:layout_height="wrap_content"
        android:src="@drawable/bg_weixin_iv_selector" />

      <TextView
        android:layout_width="wrap_content"
        android:layout_height="wrap_content"
        android:text="WeChat"
        android:textColor="@color/bg_tv_selector" />

    </LinearLayout>
  </LinearLayout>

  <LinearLayout
    android:id="@+id/text_button_ll"
    android:layout_width="match_parent"
    android:layout_height="wrap_content"
    android:orientation="horizontal">

    <TextView
      android:layout_width="0dp"
      android:layout_height="wrap_content"
      android:layout_weight="1"
      android:text="文字和Button"
      android:textColor="@color/bg_tv_selector" />

    <Button
      android:layout_width="0dp"
      android:layout_height="wrap_content"
      android:layout_weight="1"
      android:background="@drawable/bg_bt_selector"
      android:clickable="false"
      android:text="确认" />

  </LinearLayout>
</LinearLayout>
MainActivity.Java中应用效果:
public class MainActivity extends AppCompatActivity implements View.OnClickListener {
  /**
   * qq登录按钮
   */
  private LinearLayout qqLoginLL;
  /**
   * 微信登录按钮
   */
  private LinearLayout weixinLoginLL;
  /**
   * 文字和Button一起
   */
  private LinearLayout textButtonLL;

  @Override
  protected void onCreate(Bundle savedInstanceState) {
    super.onCreate(savedInstanceState);
    setContentView(R.layout.activity_main);

    qqLoginLL = (LinearLayout) findViewById(R.id.qq_ll);
    weixinLoginLL = (LinearLayout) findViewById(R.id.weixin_ll);
    textButtonLL = (LinearLayout) findViewById(R.id.text_button_ll);

    qqLoginLL.setOnClickListener(this);
    weixinLoginLL.setOnClickListener(this);
    textButtonLL.setOnClickListener(this);
  }

  @Override
  public void onClick(View v) {
    switch (v.getId()) {
      case R.id.qq_ll:
        Toast.makeText(MainActivity.this, "你点击了QQ登录区间", Toast.LENGTH_SHORT).show();
        break;
      case R.id.weixin_ll:
        Toast.makeText(MainActivity.this, "你点击了WeChat登录区间", Toast.LENGTH_SHORT).show();
        break;
      case R.id.text_button_ll:
        Toast.makeText(MainActivity.this, "你点击了Text_Button区间", Toast.LENGTH_SHORT).show();
        break;
    }
  }
}
展示效果:

三、注意细节
1.默认状态放在selector的最后
<?xml version="1.0" encoding="utf-8"?>
<selector xmlns:android="http://schemas.android.com/apk/res/android">
  <item android:drawable="@mipmap/b_qq" />
  <item android:drawable="@mipmap/b_qq_pressed" android:state_pressed="true" />
</selector>
不能实现对应效果!!!
2.TextView selector需要放置在 res/corlor目录下
3.Button的点击事件优先级高于包含他的父控件,需要将他只为不可点击状态,才能保证状态的一致性。
以上就是本文的全部内容,希望对大家的学习有所帮助,也希望大家多多支持自由互联。
