使用酷家乐的时候,很多小伙伴不知道怎么做地台,下面小编就给大家带来酷家乐做地台方法,有需要的小伙伴不要错过哦。 酷家乐怎么做地台?酷家乐做地台方法 1、首先打开酷家乐
使用酷家乐的时候,很多小伙伴不知道怎么做地台,下面小编就给大家带来酷家乐做地台方法,有需要的小伙伴不要错过哦。
酷家乐怎么做地台?酷家乐做地台方法
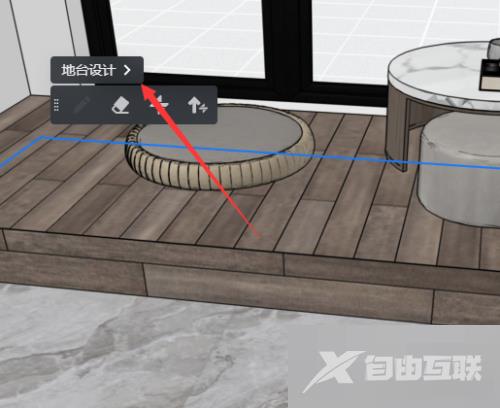
1、首先打开酷家乐,点击地面,进入“地台设计”。
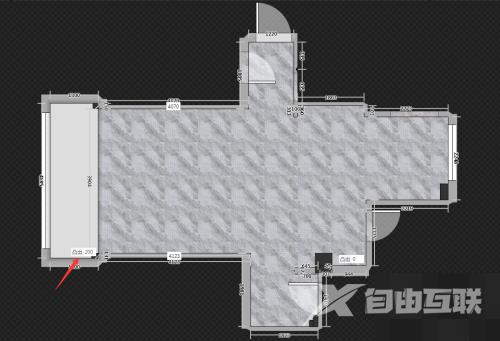
2、然后用“矩形”工具,选择想要加地台的范围。

3、选择完成后按一下“Esc键”,将凸出改成200。
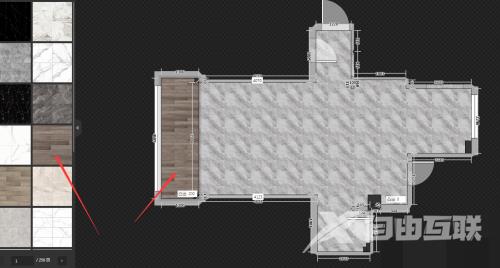
4、接着在左侧选择素材,然后在绘制的区域点击填充。
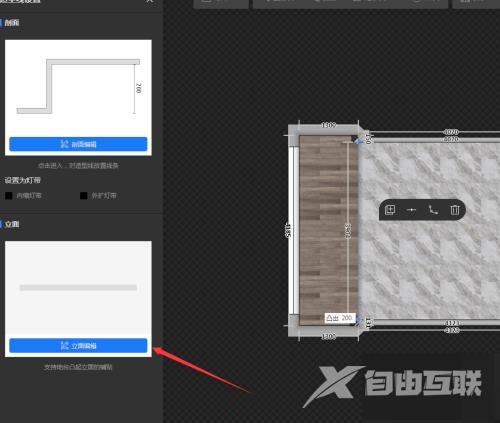
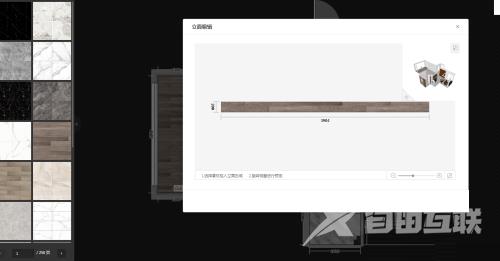
5、最后点击绘制区域的侧边线条,进入“立面编辑”,填充相同材质后点击确定即可。
以上这篇文章就是酷家乐做地台方法,更多教程尽在自由互联。