该项目为了方便开发者更快监控多个远程主机jvm,如果你的项目是Spring boot那么很方便集成,jar包引入即可,不是Spring boot也不用气馁,你可以快速自行初始化一个Spirng boot程序引入jar包即可
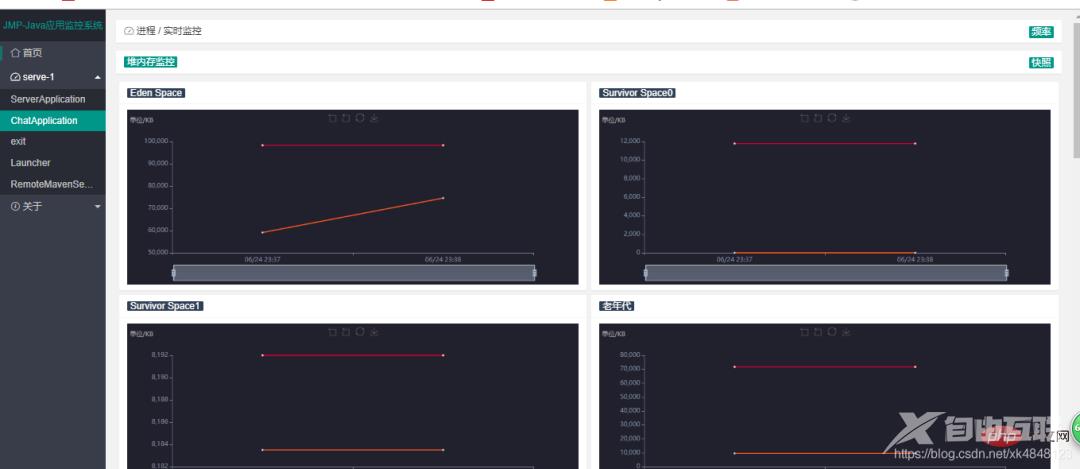
效果展示

https://github.com/xk4848123/monitor
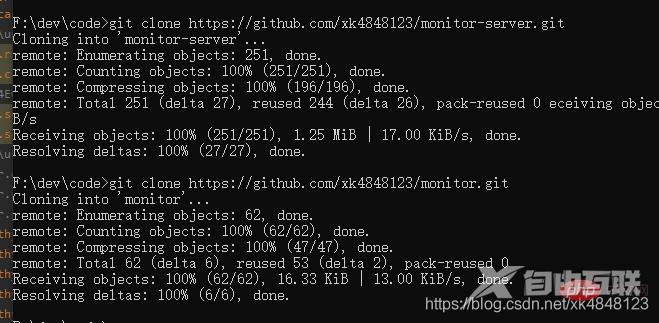
https://github.com/xk4848123/monitor-server
需要机器中有JDK,不仅仅是JRE,配置好java path,程序中依靠ExcuteCmd找寻jdk基本命令
手把手教你用克隆monitor-servergit clone https://github.com/xk4848123/monitor-server.git
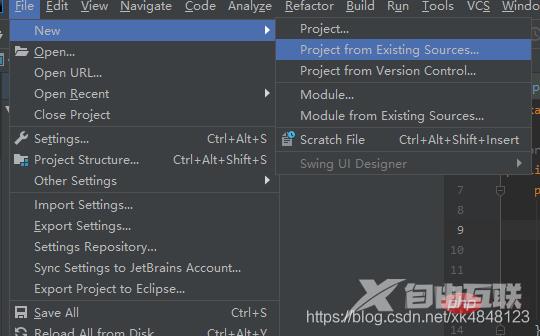
idea -> Project from Existing Sources…
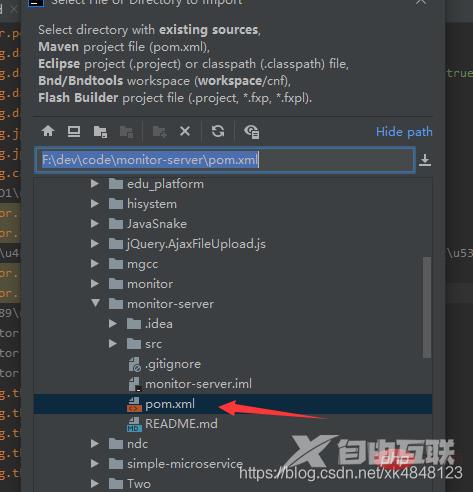
选中项目pom.xml
修改resources/application.properties
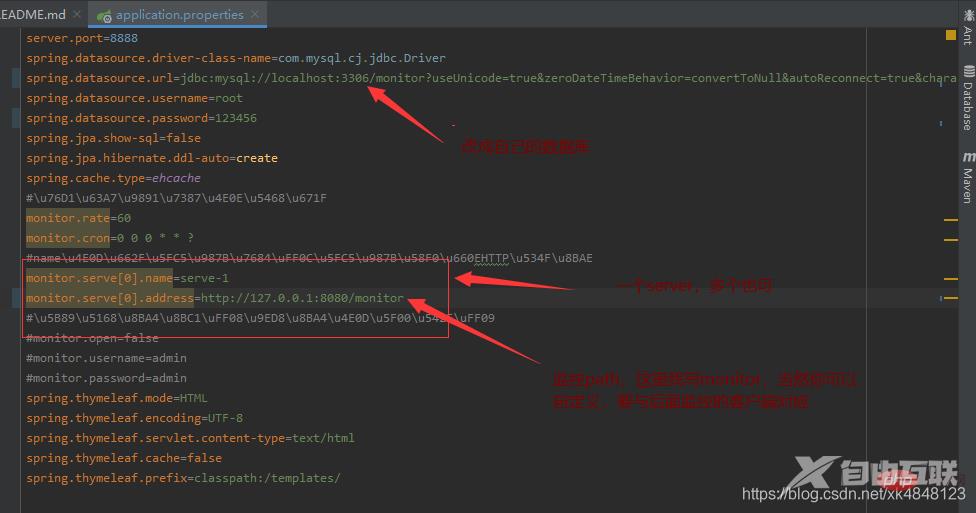
monitor.serve[0].name=serve-1
monitor.serve[0].address=http://127.0.0.1:8081/monitor(这里需要与客户端的monitor.path对应)
monitor.serve[1].name=serve-2
monitor.serve[1].address=http://127.0.0.1:8082(同上)
....
这里可以配置多个监控主机,格式注意下
address=http://ip:port/xxx(xxx是你在monitor上配置的,下文中会有)name=server-1(每个monitor不同即可,便于显示时区分)
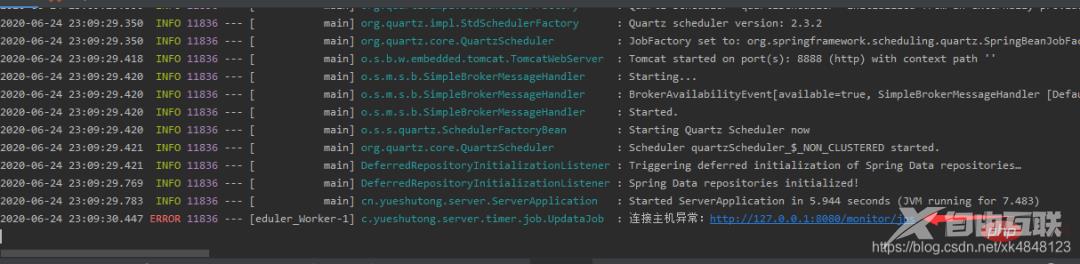
有异常没关系,我们把监控客户端也部起来就好了
说在前面一个操作系统内部署一个监控客户端就好,当你有个多个jvm程序时,只要有一个部署就可以监控
下载Release
https://github.com/xk4848123/monitor
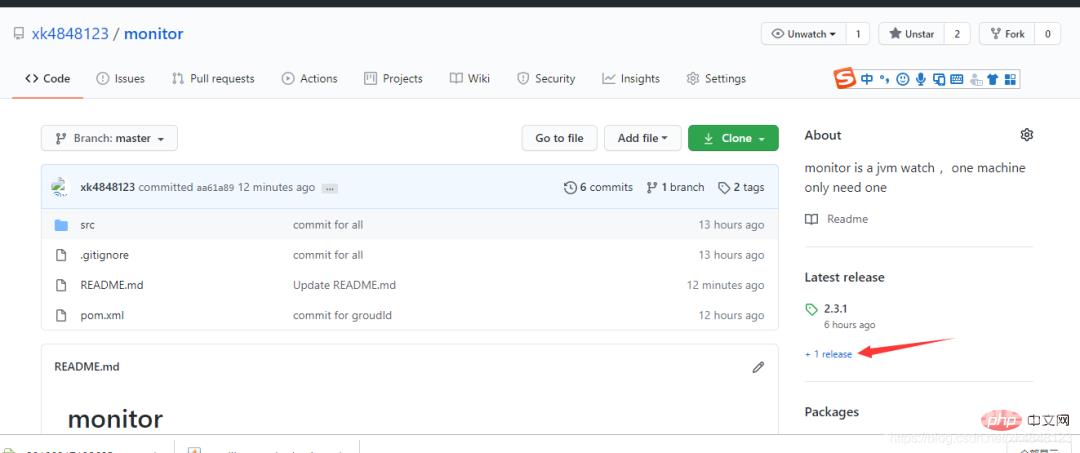
进入Release列表,下载jar
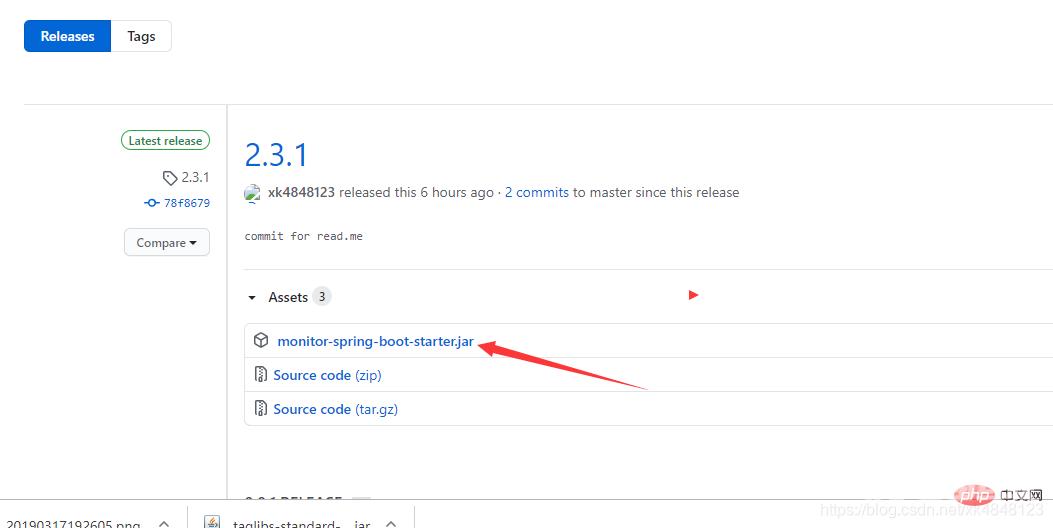
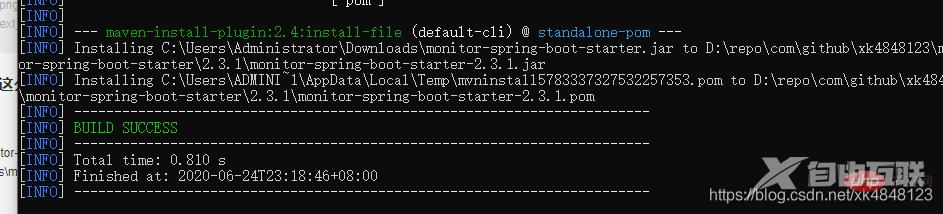
本地mvn install(等到博主把jar传到中心仓库就不用这么么麻烦了)
cmd执行以下命令
mvn install:install-file -DgroupId=com.github.xk4848123 -DartifactId=monitor-spring-boot-starter -Dversion=2.3.1 -Dpackaging=jar -Dfile=C:\Users\Administrator\Downloads\monitor-spring-boot-starter.jar
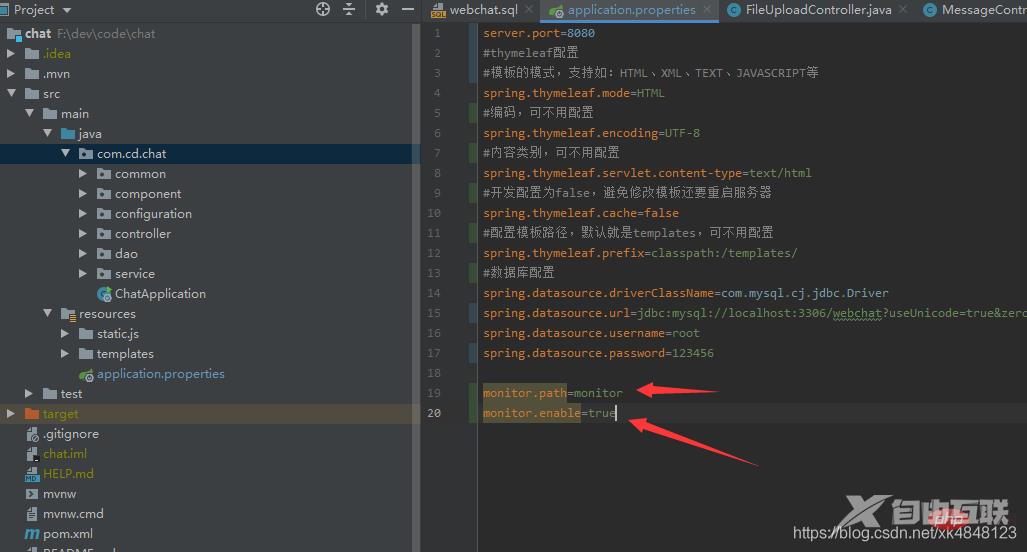
在任意一个Spring boot项目中使用,我这里打开我本地一个叫chat的项目

在resources/application.properties增加属性
#决定访问路径,可以自行定义
monitor.path=monitor
#决定是否启动监控客户端
monitor.enable=true
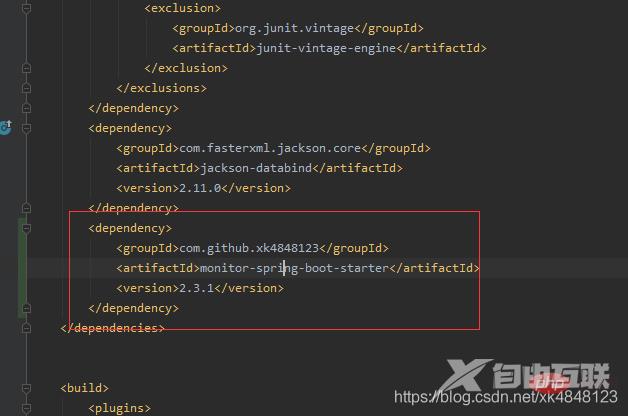
pom.xml引入
跑起项目
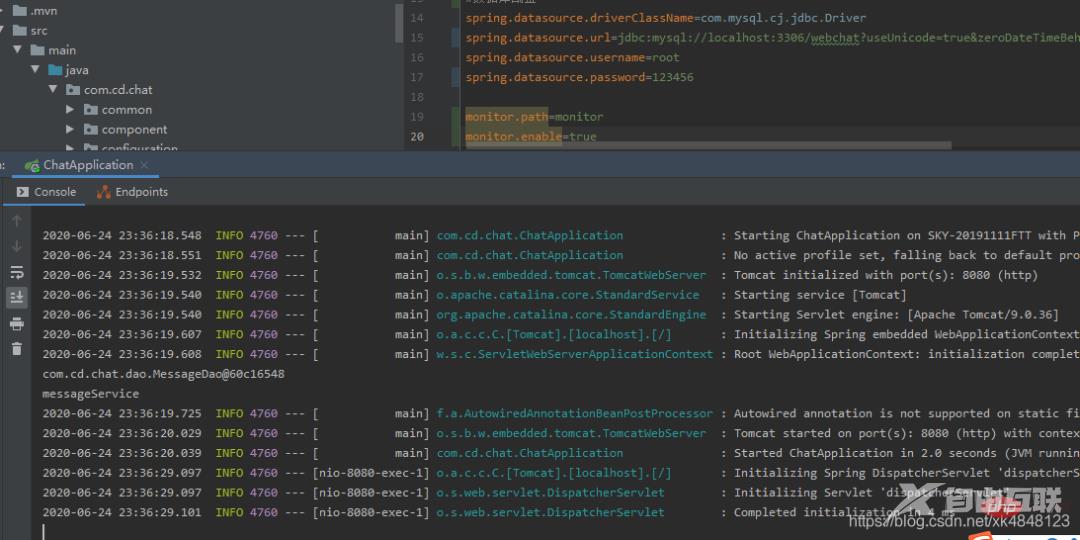
OK!
我们现在访问monitor-server(我当下部署的在http://127.0.0.1:8888,大家根据自己的配置访问)