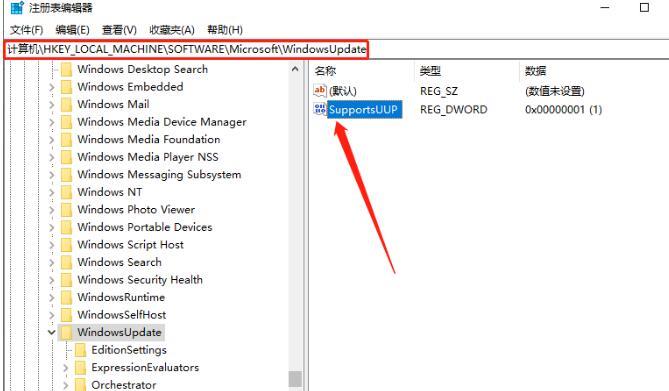
win10如何关闭UUP推送 1、win+R快捷键开启运行,输入regedit回车打开。 2、进入到注册表编辑器后,依次点击左侧栏中的HKEY_LOCAL_MACHINESOFTWAREMicrosoftWindowsCurrentVersionWindowsUpdateOrchestrator,找到
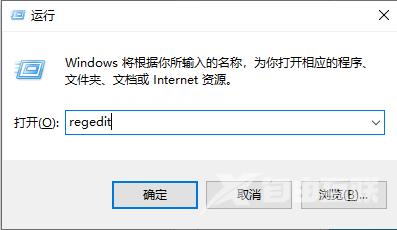
1、"win+R"快捷键开启运行,输入"regedit"回车打开。
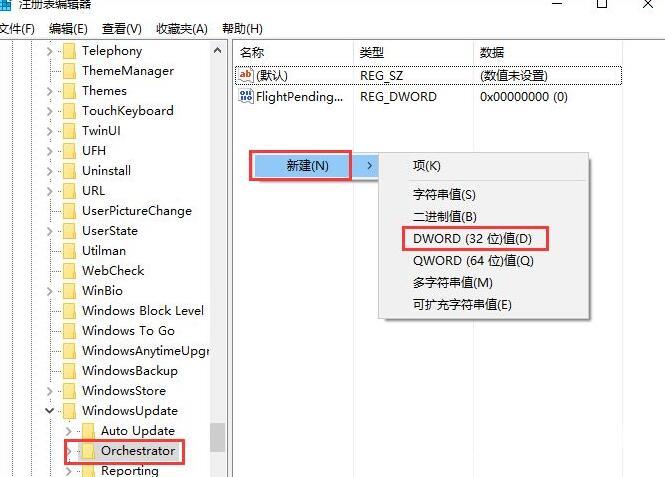
2、进入到注册表编辑器后,依次点击左侧栏中的"HKEY_LOCAL_MACHINESOFTWAREMicrosoftWindowsCurrentVersionWindowsUpdateOrchestrator",找到右侧中的"EnableUUPScan",如果没有,则右击右侧空白处,选择"新建"一个"DWORD值",将其命名为"EnableUUPScan"。
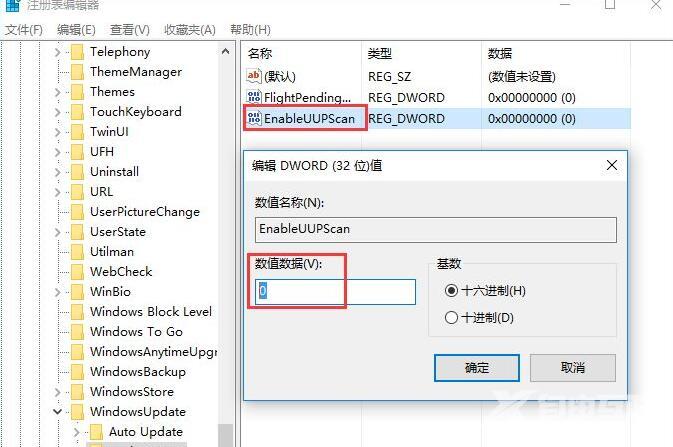
3、然后双击打开"EnableUUPScan",将其"数值数据"设置为"0",点击"确定"保存。
4、之后即可定位"HKEY_LOCAL_MACHINESOFTWAREMicrosoftWindowsUpdate",如果没有"WindowsUpdate"和"SupportsUU"可以新建一个。
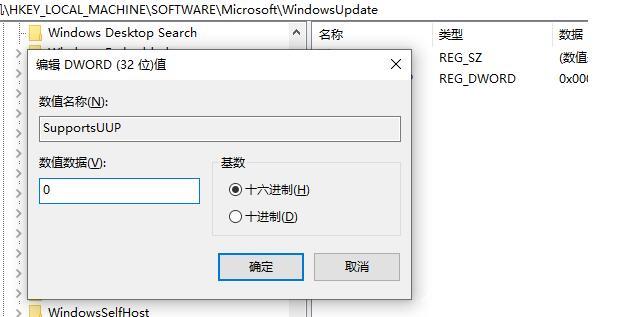
5、最后双击打开"SupportsUU",将窗口中的"数值数据"修改为"0",并点击确定保存,随后将电脑重新启动就可以了。
以上,文中的操作步骤大家都学会了吗?按照上述步骤,你也能轻松操作成功,更多操作教程,大家要继续关注我们哦,帮助你轻松获得操作技巧!
注:文中插图与内容无关,图片来自网络,如有侵权联系删除。
【本文转自:美国服务器 https://www.68idc.cn 复制请保留原URL】