u盘不仅可以拿来存储各种文件资料等,还可以制作成启动盘重装系统等。有网友想用u盘安装win10系统,自己不知道u盘怎么安装win10。下面小编就教下大家简单的win10u盘安装系统教程步骤
u盘不仅可以拿来存储各种文件资料等,还可以制作成启动盘重装系统等。有网友想用u盘安装win10系统,自己不知道u盘怎么安装win10。下面小编就教下大家简单的win10u盘安装系统教程步骤。
工具/原料
系统版本:windows10
品牌版型:联想ThinkPad
软件版本:装机吧一键安装系统
方法一:用装机吧系统安装
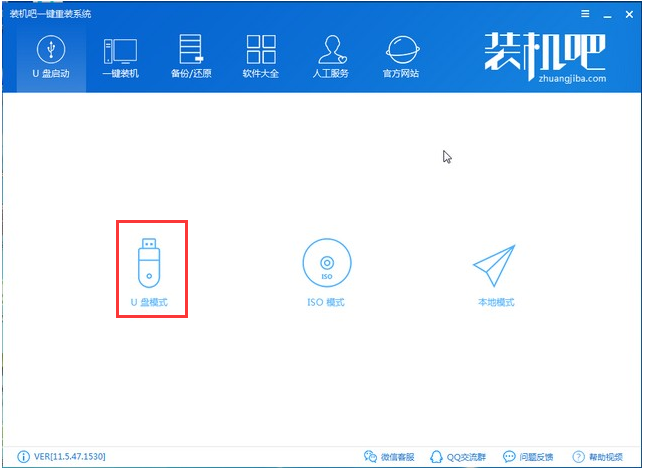
1、首先将U盘插到正常上网电脑上,关闭杀毒工具后双击打开装机吧工具。选择U盘启动菜单,接着点击“U盘模式”。
2、然后勾选U盘的选项,然后点击“一键制作启动U盘”

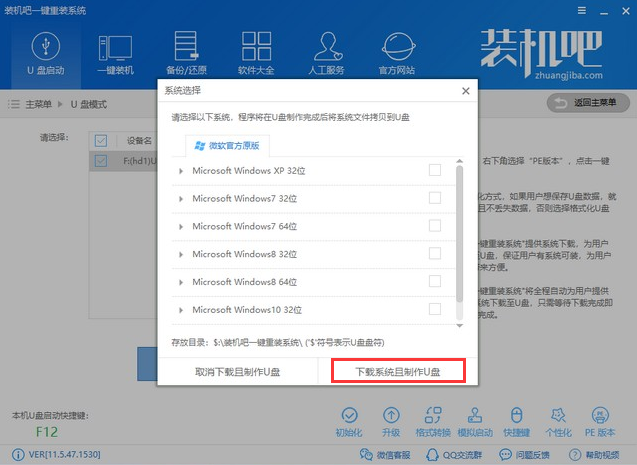
3、然后勾选需要下载的win10系统,接着点击“下载系统且制作U盘”
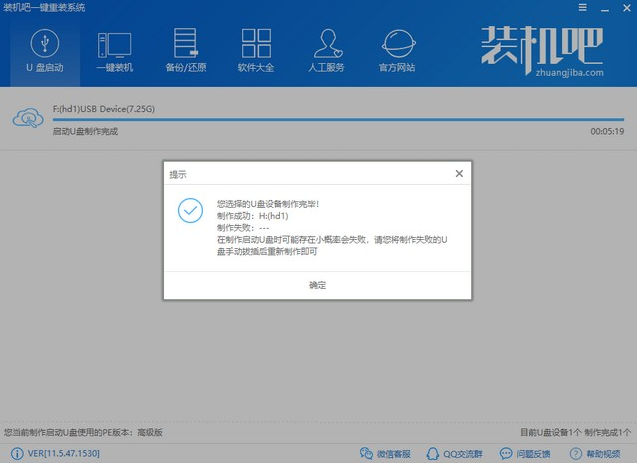
4、出现的界面选择“高级版”,然后等待制作成功,拔掉U盘插到需要重装的电脑上面。
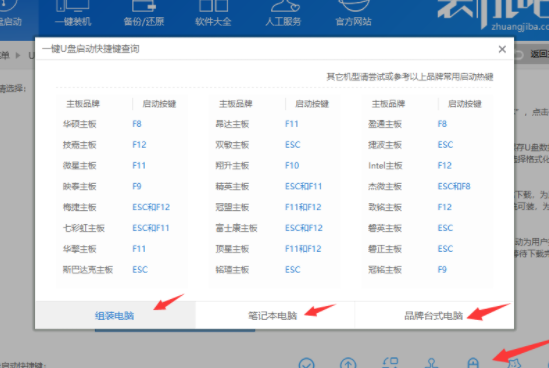
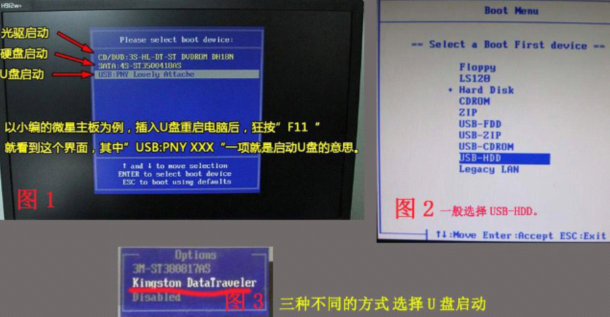
5、重启电脑按启动热键F12,常见的是F8、F12、Esc、F10、F11。
6、进入到启动选项界面,使用方向键选择USB字样的或者U盘品牌选项,点击回车进入PE选择。
7、通过键盘方向键选择【02】WindowsPE/RamOS(新机型),点击回车进入。

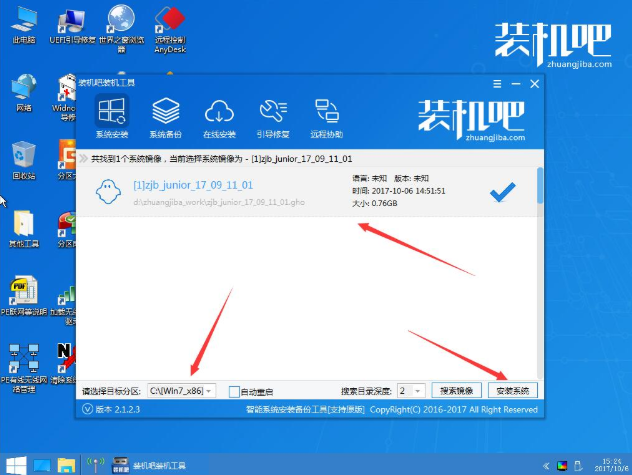
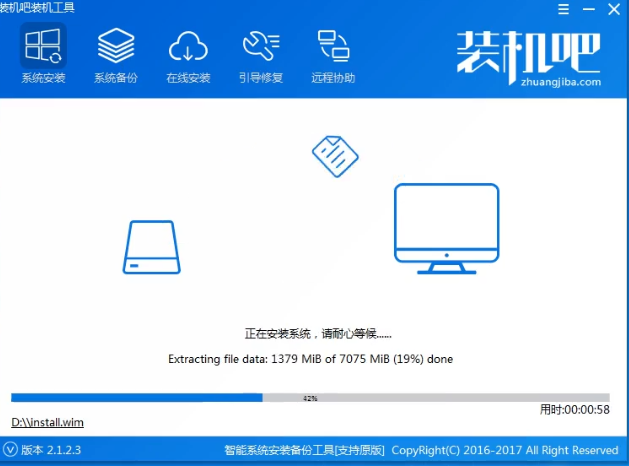
8、几分钟加载进入到PE界面,出现装机工具。我们选择目标分区C盘,选择系统,然后点击安装系统。
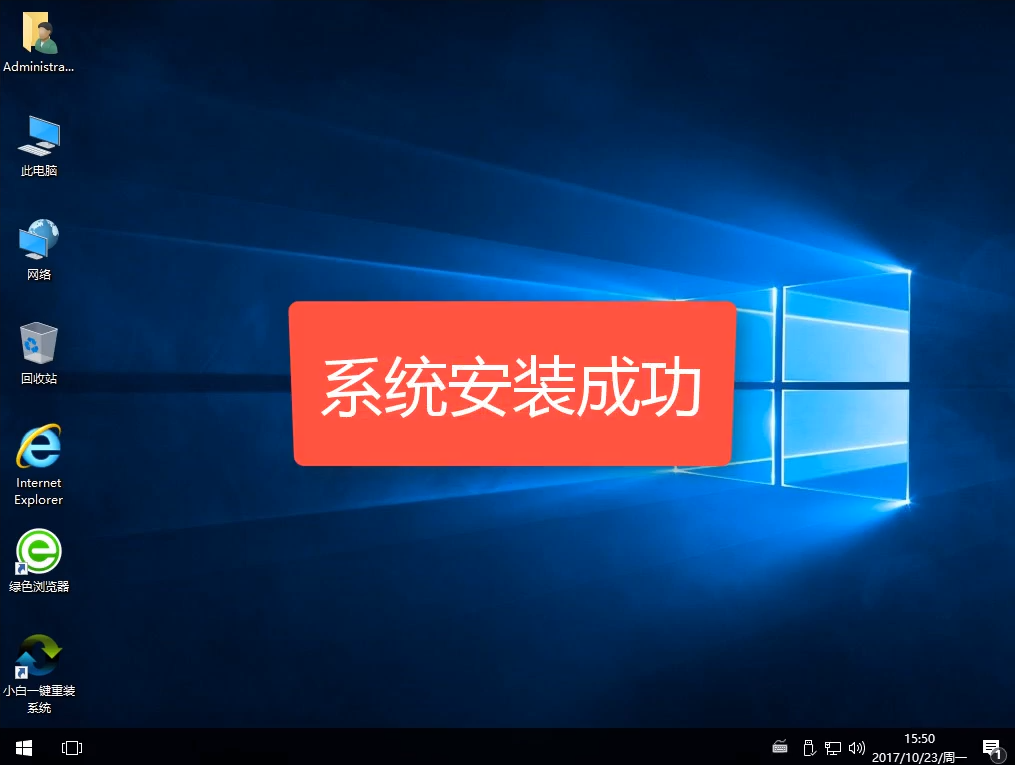
9、安装成功后提示拔掉U盘重启电脑。
10、最后安装完成进入win10系统界面,这就完成了U盘安装系统。
总结:以上就是关于电脑u盘重装win10系统教程,希望可以帮助到大家。