先来准备下环境:
-
创建一个Maven项目
-
pom.xml添加Spring的依赖
<dependencies> <dependency> <groupId>org.springframework</groupId> <artifactId>spring-context</artifactId> <version>5.2.10.RELEASE</version> </dependency> </dependencies> -
resources下添加applicationContext.xml
<?xml version="1.0" encoding="UTF-8"?> <beans xmlns="http://www.springframework.org/schema/beans" xmlns:xsi="http://www.w3.org/2001/XMLSchema-instance" xsi:schemaLocation=" http://www.springframework.org/schema/beans http://www.springframework.org/schema/beans/spring-beans.xsd"> <bean id="bookDao" class="com.itheima.dao.impl.BookDaoImpl"/> </beans> -
添加BookDao、BookDaoImpl、BookService、BookServiceImpl类
public interface BookDao { public void save(); } public class BookDaoImpl implements BookDao { public void save() { System.out.println("book dao save ..." ); } } public interface BookService { public void save(); } public class BookServiceImpl implements BookService { public void save() { System.out.println("book service save ..."); } } -
创建运行类App
public class App {
    public static void main(String[] args) {
        ApplicationContext ctx = new ClassPathXmlApplicationContext("applicationContext.xml");
        BookDao bookDao = (BookDao) ctx.getBean("bookDao");
        bookDao.save();
    }
}
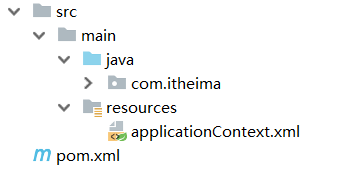
最终创建好的项目结构如下:
在上述环境的基础上,我们来看一看Spring是如何通过注解实现bean的定义开发?
步骤1:删除原XML配置将配置文件中的<bean>标签删除掉
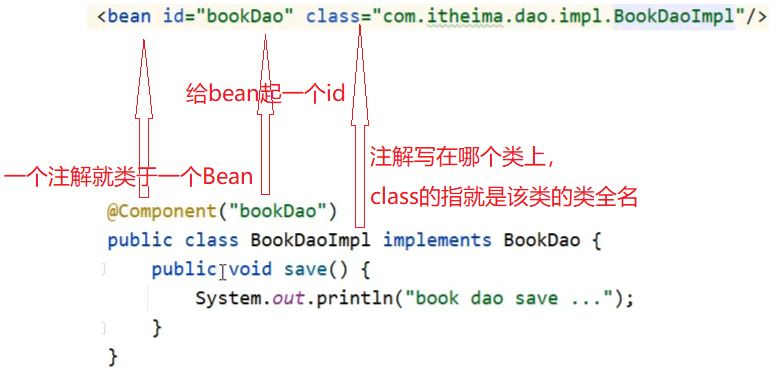
<bean id="bookDao" class="com.itheima.dao.impl.BookDaoImpl"/>在BookDaoImpl类上添加@Component注解
@Component("bookDao")
public class BookDaoImpl implements BookDao {
    public void save() {
        System.out.println("book dao save ..." );
    }
}
注意:@Component注解不可以添加在接口上,因为接口是无法创建对象的。
XML与注解配置的对应关系:
为了让Spring框架能够扫描到写在类上的注解,需要在配置文件上进行包扫描
<?xml version="1.0" encoding="UTF-8"?>
<beans xmlns="http://www.springframework.org/schema/beans"
       xmlns:xsi="http://www.w3.org/2001/XMLSchema-instance"
       xsi:schemaLocation="
            http://www.springframework.org/schema/beans http://www.springframework.org/schema/beans/spring-beans.xsd">
    <context:component-scan base-package="com.itheima"/>
</beans>
说明:
component-scan
-
component:组件,Spring将管理的bean视作自己的一个组件
-
scan:扫描
base-package指定Spring框架扫描的包路径,它会扫描指定包及其子包中的所有类上的注解。
-
包路径越多[如:com.itheima.dao.impl],扫描的范围越小速度越快
-
包路径越少[如:com.itheima],扫描的范围越大速度越慢
-
一般扫描到项目的组织名称即Maven的groupId下[如:com.itheima]即可。
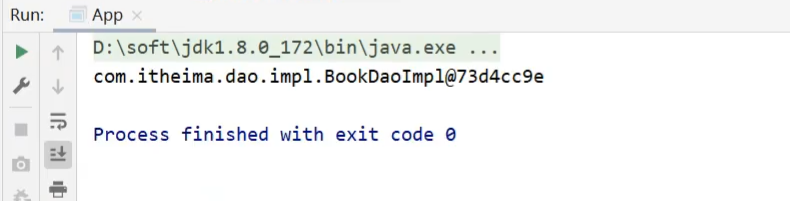
运行App类查看打印结果
在BookServiceImpl类上也添加@Component交给Spring框架管理
@Component
public class BookServiceImpl implements BookService {
private BookDao bookDao;
public void setBookDao(BookDao bookDao) {
this.bookDao = bookDao;
}
public void save() {
System.out.println("book service save ...");
bookDao.save();
}
}在App类中,从IOC容器中获取BookServiceImpl对应的bean对象,打印
public class App {
public static void main(String[] args) {
ApplicationContext ctx = new ClassPathXmlApplicationContext("applicationContext.xml");
BookDao bookDao = (BookDao) ctx.getBean("bookDao");
System.out.println(bookDao);
//按类型获取bean
BookService bookService = ctx.getBean(BookService.class);
System.out.println(bookService);
}
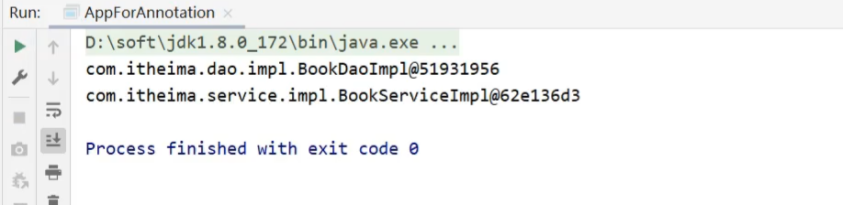
}打印观察结果,两个bean对象都已经打印到控制台

说明:
-
BookServiceImpl类没有起名称,所以在App中是按照类型来获取bean对象
-
@Component注解如果不起名称,会有一个默认值就是
当前类名首字母小写,所以也可以按照名称获取,如BookService bookService = (BookService)ctx.getBean("bookServiceImpl"); System.out.println(bookService);
对于@Component注解,还衍生出了其他三个注解@Controller、@Service、@Repository
通过查看源码会发现:

这三个注解和@Component注解的作用是一样的,为什么要衍生出这三个呢?
方便我们后期在编写类的时候能很好的区分出这个类是属于表现层、业务层还是数据层的类。
上面已经可以使用注解来配置bean,但是依然有用到配置文件,在配置文件中对包进行了扫描,Spring在3.0版已经支持纯注解开发
-
Spring3.0开启了纯注解开发模式,使用Java类替代配置文件,开启了Spring快速开发赛道
具体如何实现?
3.1 思路分析实现思路为:
-
将配置文件applicationContext.xml删除掉,使用类来替换。
创建一个配置类SpringConfig
public class SpringConfig {
}
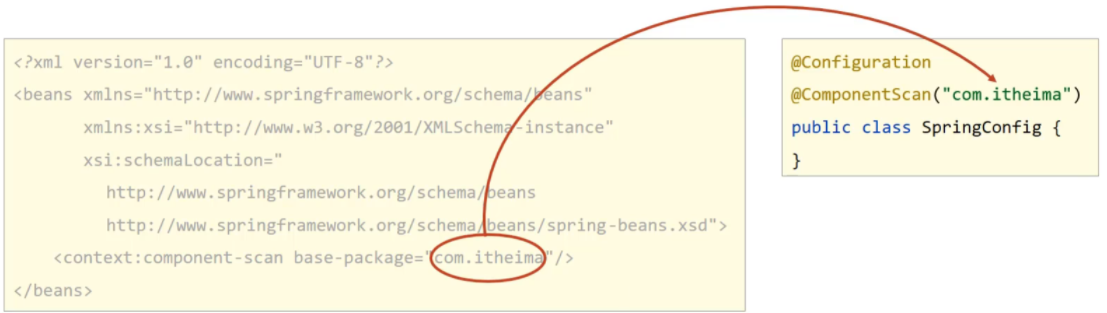
在配置类上添加@Configuration注解,将其标识为一个配置类,替换applicationContext.xml
@Configuration
public class SpringConfig {
}在配置类上添加包扫描注解@ComponentScan替换<context:component-scan base-package=""/>
@Configuration
@ComponentScan("com.itheima")
public class SpringConfig {
}创建一个新的运行类AppForAnnotation
public class AppForAnnotation {
public static void main(String[] args) {
ApplicationContext ctx = new AnnotationConfigApplicationContext(SpringConfig.class);
BookDao bookDao = (BookDao) ctx.getBean("bookDao");
System.out.println(bookDao);
BookService bookService = ctx.getBean(BookService.class);
System.out.println(bookService);
}
}运行AppForAnnotation,可以看到两个对象依然被获取成功
至此,纯注解开发的方式就已经完成了,主要内容包括:
-
Java类替换Spring核心配置文件
-
@Configuration注解用于设定当前类为配置类
-
@ComponentScan注解用于设定扫描路径,此注解只能添加一次,多个数据请用数组格式
@ComponentScan({com.itheima.service","com.itheima.dao"}) -
读取Spring核心配置文件初始化容器对象切换为读取Java配置类初始化容器对象
//加载配置文件初始化容器
ApplicationContext ctx = new ClassPathXmlApplicationContext("applicationContext.xml");
//加载配置类初始化容器
ApplicationContext ctx = new AnnotationConfigApplicationContext(SpringConfig.class);
-
@Component、@Controller、@Service、@Repository这四个注解
-
applicationContext.xml中
<context:component-san/>的作用是指定扫描包路径,注解为@ComponentScan -
@Configuration标识该类为配置类,使用类替换applicationContext.xml文件
-
ClassPathXmlApplicationContext是加载XML配置文件
-
AnnotationConfigApplicationContext是加载配置类