目录
- 前言
- 一、手写初级轮播图
- 功能分析
- 实现思路
- 二、优化轮播图
- 增加的功能
- 实现要点
- 三、继续优化思路
本文实例为大家分享了JS原生手写轮播图效果的具体代码,供大家参考,具体内容如下
前言
本系列主要整理前端面试中需要掌握的知识点。本节介绍如何用原生JS手写轮播图。
一、手写初级轮播图
功能分析
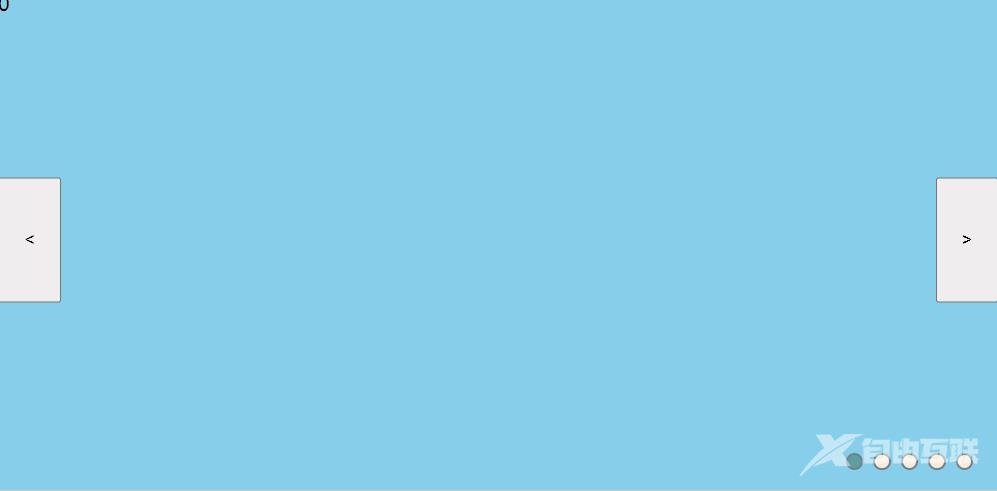
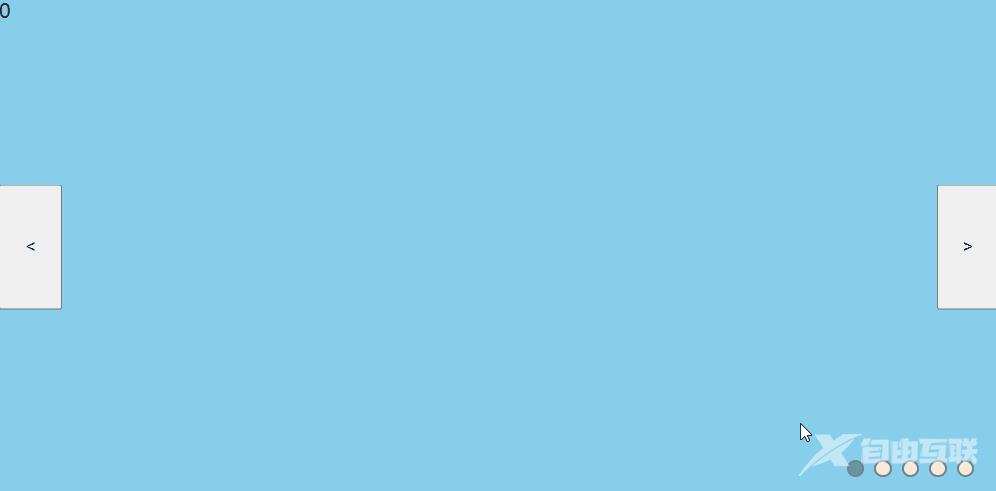
1、初级轮播图功能介绍:①左右两端有左右按钮;②下方有小球指示当前是第几张图片;③无切换效果;④如果两秒中用户没有点击轮播图,则从左到右自动播放。
2、功能展示:
实现思路
HTML中需要包括一个大盒子class=wrap,为轮播图的盒子。一张一张的图片可以用无序列表存储,左右按钮使用button,下方圆点也用无序列表,并为每一个圆点设置计数器data-index。HTML的代码如下:
<div class="wrap">
    <ul class="list">
        <li class="item active">0</li>
        <li class="item">1</li>
        <li class="item">2</li>
        <li class="item">3</li>
        <li class="item">4</li>
    </ul>
    <ul class="pointList">
        <li class="point active" data-index="0"></li>
        <li class="point" data-index="1"></li>
        <li class="point" data-index="2"></li>
        <li class="point" data-index="3"></li>
        <li class="point" data-index="4"></li>
    </ul>
    <button class="btn" id="leftBtn"><</button>
    <button class="btn" id="rightBtn">></button>
</div>
CSS中,给wrap盒子一个宽高。list盒子和它同宽同高。每一张图片充满盒子,并且都用绝对定位固定在wrap盒子里,让他们有不同的颜色,初始透明度都是0即全透明,并且,哪个需要展示,哪个的z-index就变大,并且透明度改为1。左右按钮直接使用定位固定在左右两端,小圆点内部使用浮动,再用定位固定在下端。
* {
    margin: 0;
    padding: 0;
    list-style: none;
}
/* 轮播图大盒子 */
.wrap {
    width: 800px;
    height: 400px;
    position: relative;
}
.list{
    width: 800px;
    height: 400px;
    position: relative;
}
/* 每一张图片 */
.item {
    width: 100%;
    height: 100%;
    position: absolute;
    left: 0;
    opacity: 0;
}
/* 不同的图片不同的颜色 */
.item:nth-child(1){
    background-color: skyblue;
}
.item:nth-child(2){
    background-color: yellowgreen
}
.item:nth-child(3){
    background-color: rebeccapurple;
}
.item:nth-child(4){
    background-color: pink;
}
.item:nth-child(5){
    background-color: orange;
}
.item.active {
    opacity: 1;
    z-index: 20;
}
/* 按钮的设置 */
.btn {
    width: 50px;
    height: 100px;
    position: absolute;
    top: 50%;
    transform:translate(0,-50%);
    z-index: 200;
}
#leftBtn {
    left: 0;
}
#rightBtn {
    right: 0;
}
/* 小圆点的设置 */
.pointList {
    height: 10px;
    position: absolute;
    bottom: 20px;
    right: 20px;
    z-index: 200;
}
.point {
    width: 10px;
    height: 10px;
    background-color: antiquewhite;
    float: left;
    margin-left: 8px;
    border-style: solid;
    border-radius: 100%;
    border-width: 2px;
    border-color: slategray;
}
.point.active {
    background-color: cadetblue;
}
JS的实现思路如下:
1.获取元素:包括图片、圆点、按钮、轮播图大盒子
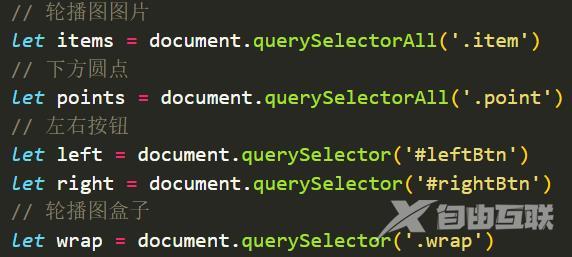
2.需要一个变量index记录当前图片的索引,并且在每次点击的时候要先将样式清空,再根据索引重新赋值(排他思想)
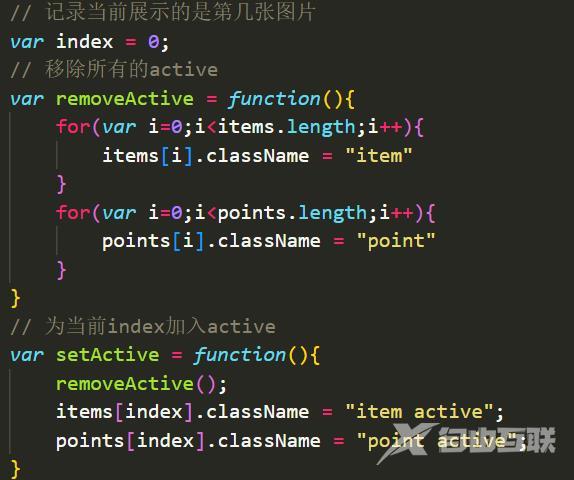
3.点击左右按钮的时候,只需要判断是否为第一张或者最后一张,然后进行+1 -1操作即可。
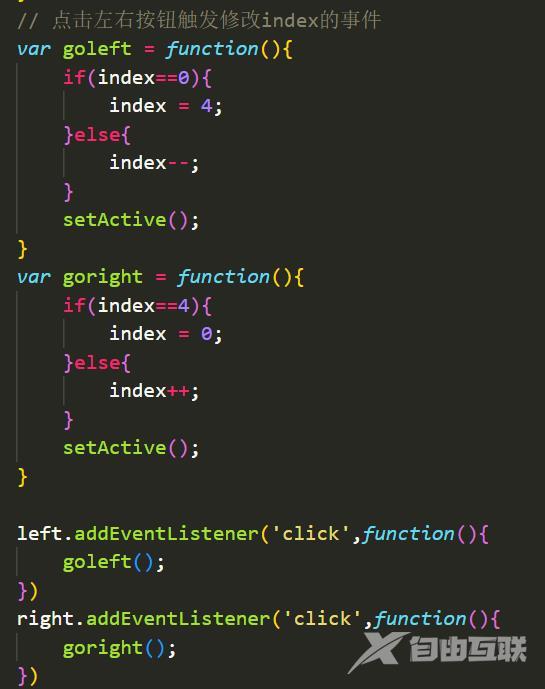
4.点击小圆点时,需要记录点击的圆点的data-index,赋值给Index,然后再执行
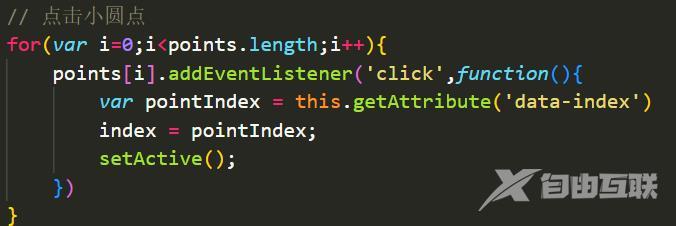
5.定义计时器,当鼠标在wrap内,就取消计时,不在wrap内,就开始计时,两秒以后自动播放。
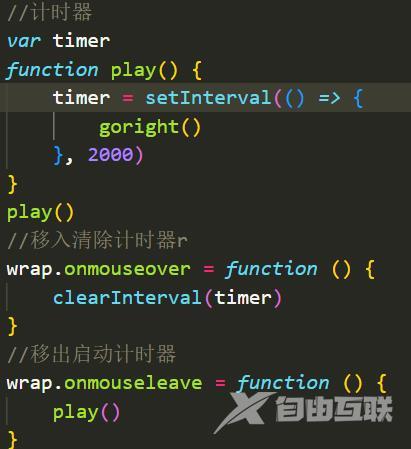
JS整体代码:
// 轮播图图片
let items = document.querySelectorAll('.item')
// 下方圆点
let points = document.querySelectorAll('.point')
// 左右按钮
let left = document.querySelector('#leftBtn')
let right = document.querySelector('#rightBtn')
// 轮播图盒子
let wrap = document.querySelector('.wrap')
// 记录当前展示的是第几张图片
var index = 0;
// 移除所有的active
var removeActive = function(){
    for(var i=0;i<items.length;i++){
        items[i].className = "item"
    }
    for(var i=0;i<points.length;i++){
        points[i].className = "point"
    }
}
// 为当前index加入active
var setActive = function(){
    removeActive();
    items[index].className = "item active";
    points[index].className = "point active";
}
// 点击左右按钮触发修改index的事件
var goleft = function(){
    if(index==0){
        index = 4;
    }else{
        index--;
    }
    setActive();
}
var goright = function(){
    if(index==4){
        index = 0;
    }else{
        index++;
    }
    setActive();
}

left.addEventListener('click',function(){
    goleft();
})
right.addEventListener('click',function(){
    goright();
})
// 点击小圆点
for(var i=0;i<points.length;i++){
    points[i].addEventListener('click',function(){
        var pointIndex = this.getAttribute('data-index')
        index = pointIndex;
        setActive();
    })
}
//计时器
var timer
function play() {
    timer = setInterval(() => {
        goright()
    }, 2000)
}
play()
//移入清除计时器r
wrap.onmouseover = function () {
    clearInterval(timer)
}
//移出启动计时器
wrap.onmouseleave = function () {
    play()
}
二、优化轮播图
增加的功能
1、鼠标经过轮播图再出现左右按钮;
2、图片有左右滚动的效果,看起来是连续的。
3、功能展示:
实现要点
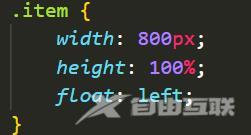
1.所有的图片不应该叠放,而是应该拼接起来,这个可以在CSS中修改。
2.因为是连续播放,需要拷贝第一张图片到轮播图的最后,这样最后一张到第一张的效果才会连续。

3.连续移动的效果是通过缓动动画实现的:移动的步长由大到小,最后慢慢停下来。

最后完整的代码如下:
<!DOCTYPE html>
<html lang="en">
<head>
    <meta charset="UTF-8">
    <meta http-equiv="X-UA-Compatible" content="IE=edge">
    <meta name="viewport" content="width=device-width, initial-scale=1.0">
    <script src="animate.js"></script>
    <title>Document</title>
    <style>
        * {
            margin: 0;
            padding: 0;
            list-style: none;
        }
        .wrap {
            width: 800px;
            height: 400px;
            background-color: pink;
            position: relative;
            overflow: hidden;
        }
        .list{
            width: 600%;
            height: 400px;
            position: absolute;
            left:0;
        }
        .item {
            width: 800px;
            height: 100%;
            float: left;
        }
        .item:nth-child(1){
            background-color: skyblue;
        }
        .item:nth-child(2){
            background-color: yellowgreen
        }
        .item:nth-child(3){
            background-color: rebeccapurple;
        }
        .item:nth-child(4){
            background-color: pink;
        }
        .item:nth-child(5){
            background-color: orange;
        }
        .item:nth-child(6){
            background-color: skyblue;
        }
        /* .item.active {
            opacity: 1;
            z-index: 20;
        } */
        .btn {
            width: 50px;
            height: 100px;
            position: absolute;
            top: 50%;
            transform:translate(0,-50%);
            z-index: 200;
            display: none;
        }
        #leftBtn {
            left: 0;
        }
        #rightBtn {
            right: 0;
        }

        .pointList {
            height: 10px;
            position: absolute;
            bottom: 20px;
            right: 20px;
            z-index: 200;
        }
        .point {
            width: 10px;
            height: 10px;
            background-color: antiquewhite;
            float: left;
            margin-left: 8px;
            border-style: solid;
            border-radius: 100%;
            border-width: 2px;
            border-color: slategray;
        }
        .point.active {
            background-color: cadetblue;
        }
    </style>
</head>
<body>
    <div class="wrap">
        <ul class="list">
            <li class="item">0</li>
            <li class="item">1</li>
            <li class="item">2</li>
            <li class="item">3</li>
            <li class="item">4</li>
        </ul>
        <ul class="pointList">
            <li class="point active" data-index="0"></li>
            <li class="point" data-index="1"></li>
            <li class="point" data-index="2"></li>
            <li class="point" data-index="3"></li>
            <li class="point" data-index="4"></li>
        </ul>
        <button class="btn" id="leftBtn"><</button>
        <button class="btn" id="rightBtn">></button>
    </div>
    <script>
        /* 1.获取元素 */
        // 整个轮播图范围
        let wrap = document.querySelector('.wrap')
        let ul = document.querySelector('.list')
        // 轮播图图片
        let items = document.querySelectorAll('.item')
        // 下方圆点
        let points = document.querySelectorAll('.point')
        // 左右按钮
        let left = document.querySelector('#leftBtn')
        let right = document.querySelector('#rightBtn')
        var focusWidth = wrap.offsetWidth;
        /* 2.鼠标经过轮播图,左右按钮出现,离开则按钮消失 */
        wrap.addEventListener('mouseenter',function(){
            left.style.display = 'block'
            right.style.display = 'block'
        });
        wrap.addEventListener('mouseleave',function(){
            left.style.display = 'none'
            right.style.display = 'none'
        })
         /* 3.克隆第一张图片放到ul最后面 */
         var first = ul.children[0].cloneNode(true)
         ul.appendChild(first)
         items = document.querySelectorAll('.item')

        /* 4. 记录当前展示的是第几张图片 */
        var index = 0;
        /* 5.移除所有的active */
        var removeActive = function(){
            for(var i=0;i<items.length;i++){
                items[i].className = "item"
            }
            for(var i=0;i<points.length;i++){
                points[i].className = "point"
            }
        }
        /* 6.为当前index加入active */
        var setActive = function(){
            removeActive();
            // ul.style.left = -(index*focusWidth) + 'px'
            animate(ul, -index * focusWidth);
            // console.log(index);
            // console.log(ul.style.left);
            if(index==5) {
                points[0].className = "point active";
            }else{
                points[index].className = "point active";
            }
        }
        /* 7.点击左右按钮触发修改index的事件 */
        var goleft = function(){
            if(index==0){
                index = 5;
                ul.style.left = "-4000px";
            }
            index--;
            setActive();
        }
        var goright = function(){
            if(index==5){
                index = 0;
                ul.style.left = 0;
            }
            index++;
            setActive();
        }

        left.addEventListener('click',function(){
            goleft();
        })
        right.addEventListener('click',function(){
            goright();
        })
        /* 8.点击圆点更改轮播图 */
        for(var i=0;i<points.length;i++){
            points[i].addEventListener('click',function(){
                var pointIndex = this.getAttribute('data-index')
                index = pointIndex;
                setActive();
            })
        }
        /* 9.计时器 */
        var timer
        function play() {
            timer = setInterval(() => {
                goright()
            }, 2000)
        }
        play()
        //移入清除计时器r
        wrap.onmouseover = function () {
            clearInterval(timer)
        }
        //移出启动计时器
        wrap.onmouseleave = function () {
            play()
        }

    </script>
</body>
</html>
三、继续优化思路
1、下方小圆点根据图片个数自动生成;
2、利用节流控制左右切换的速度。
以上就是本文的全部内容,希望对大家的学习有所帮助,也希望大家多多支持自由互联。
