目录 添加 recycler 依赖 设置单个列表项布局 主布局中添加 recyclerview RecyclerAdapter 主 activity 注册 成果图 添加 recycler 依赖 前往 build.gradle 下,添加以下依赖: implementation androidx.recyclerv
目录
- 添加 recycler 依赖
- 设置单个列表项布局
- 主布局中添加 recyclerview
- RecyclerAdapter
- 主 activity 注册
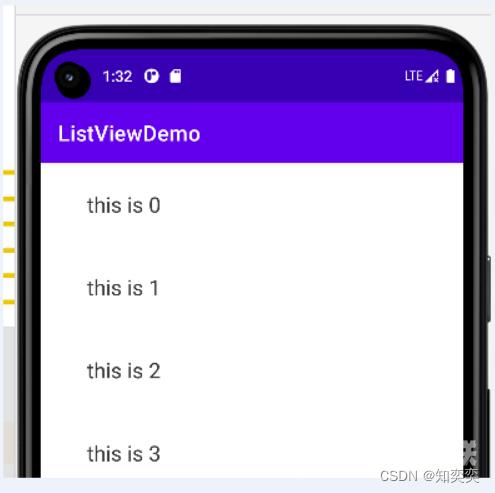
- 成果图
添加 recycler 依赖
前往 build.gradle 下,添加以下依赖:
implementation 'androidx.recyclerview:recyclerview:1.2.1'
设置单个列表项布局
众所周知,一个完整的列表是由多个列表项组成的,而列表项可以使用布局文件进行定义;
我们简单的使用线性布局+一个 tv 组件定义列表项;
下方为布局文件 items.xml
<?xml version="1.0" encoding="utf-8"?>
<LinearLayout xmlns:android="http://schemas.android.com/apk/res/android"
    xmlns:app="http://schemas.android.com/apk/res-auto"
    android:layout_width="match_parent"
    android:layout_height="wrap_content"
    android:paddingTop="10dp"
    android:paddingBottom="10dp"
    android:paddingRight="20dp"
    android:paddingLeft="20dp">
    <TextView
        android:id="@+id/item_text"
        android:layout_width="match_parent"
        android:layout_height="wrap_content"
        android:layout_marginStart="8dp"
        android:layout_marginEnd="8dp"
        android:padding="15dp"
        android:text="tools"
        android:textColor="#353434"
        android:textSize="20sp"/>
</LinearLayout>
主布局中添加 recyclerview
添加方式和 listview 基本一致,很简单:
<?xml version="1.0" encoding="utf-8"?>
<LinearLayout xmlns:android="http://schemas.android.com/apk/res/android"
    android:layout_width="match_parent"
    android:layout_height="match_parent">
    <androidx.recyclerview.widget.RecyclerView
        android:id="@+id/recyclerView"
        android:layout_width="match_parent"
        android:layout_height="match_parent" />
</LinearLayout>
RecyclerAdapter
我们同样需要编写一个适配器来配置其对象关系;
新建适配器文件 RecyclerAdapter.kt
基本原理以及完善过程:
- 首先让主类继承
RecyclerView.Adapter,泛型使用本类中的我们自建的 viewholder 方法 - 我们自创的 viewholder 方法需要继承
RecyclerView.ViewHolder - 我们在
MyViewHolder中直接获取列表项中的TextView组件 - 与此同时,我们还需要实现三个方法
onCreateViewHolder:选择使用哪一个 layout 作为 viewholder,并放回该 layout 组成的 viewholder
onBindViewHolder:针对 viewholder 内部组件的一些赋值与处理操作
getItemCount:列表项需要渲染几个?
class RecyclerAdapter(val context: Context) : RecyclerView.Adapter<RecyclerAdapter.MyViewHolder>() {
    inner class MyViewHolder(view: View) : RecyclerView.ViewHolder(view) {
        val textView: TextView = view.findViewById(R.id.item_text)
    }
    override fun onCreateViewHolder(parent: ViewGroup, viewType: Int): MyViewHolder {
        val itemView = LayoutInflater.from(context).inflate(R.layout.items, parent, false)
        return MyViewHolder(itemView)
    }
    override fun onBindViewHolder(holder: MyViewHolder, position: Int) {
        holder.textView.text = "this is $position"
    }
    override fun getItemCount(): Int {
        return 40
    }
}
主 activity 注册
初始化 recyclerview 的方式和 listview 差不多,只不过这里多设置了一个 layoutManager
依葫芦画瓢即可!
class MainActivity : AppCompatActivity() {
    override fun onCreate(savedInstanceState: Bundle?) {
        super.onCreate(savedInstanceState)
        setContentView(R.layout.activity_main)
        initRecycler()
    }
    fun initRecycler() {
        val adapter = RecyclerAdapter(this)
        val recyclerView = findViewById<RecyclerView>(R.id.recyclerView)
        recyclerView.adapter = adapter
        val layoutManager = LinearLayoutManager(this)
        layoutManager.orientation = RecyclerView.VERTICAL
        recyclerView.layoutManager = layoutManager
    }
}
成果图
到此这篇关于Android RecyclerView使用入门介绍的文章就介绍到这了,更多相关Android RecyclerView内容请搜索自由互联以前的文章或继续浏览下面的相关文章希望大家以后多多支持自由互联!