本文实例为大家分享了vue实现导航栏下拉菜单的具体代码,供大家参考,具体内容如下 先看效果: 下拉菜单铺满全屏 div class="nav".../divdiv class="dropdown-content".../div .nav { position: rel
本文实例为大家分享了vue实现导航栏下拉菜单的具体代码,供大家参考,具体内容如下
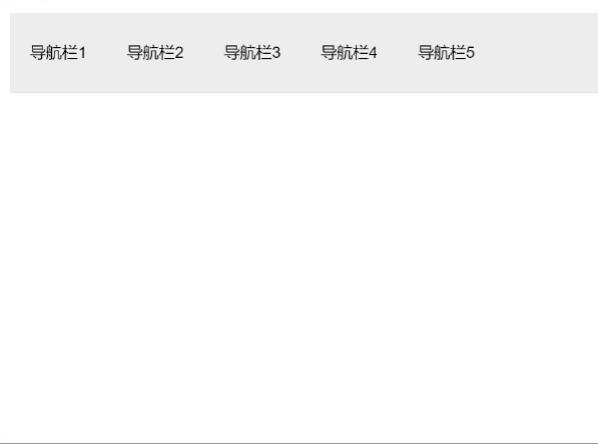
先看效果:

下拉菜单铺满全屏
<div class="nav">...</div>
<div class="dropdown-content">...</div>
.nav {
    position: relative;
}
.dropdown-content {
    position: absolute;
    width: 100%;  // 拉满
}
下拉动画
方法一:鼠标移入移出事件
使用的是vue的 transition组件以及鼠标事件@mouseenter 和 @mouseleave
.dropdown-enter-active {
  animation: expand-contract 1s ease;
}
.dropdown-leave-active {
  animation: expand-contract 1s ease reverse;
}
@keyframes expand-contract {
  0% {
    overflow: hidden;
    opacity: 0;
    max-height: 0;
  }
  100% {
    max-height: 300px;  // 大于等于下拉菜单的高度
    opacity: 1;
  }
}
优点:
1、结构层次清楚
2、多个导航需要下拉菜单,且结构相似内容不同,只需要重新渲染数据即可。
缺点:
1、使用了事件处理相对复杂
案例代码
<template>
  <div class="app-container">
    <!-- 导航栏 -->
    <div class="nav" ref="navRef">
      <div class="nav-item" @mouseenter="isShow = false">导航栏1</div>
      <div class="nav-item" @mouseenter="showDropDown('2')">导航栏2</div>
      <div class="nav-item" @mouseenter="showDropDown('3')">导航栏3</div>
      <div class="nav-item" @mouseenter="isShow = false">导航栏4</div>
      <div class="nav-item" @mouseenter="isShow = false">导航栏5</div>
    </div>
    <!-- 下拉菜单 -->
    <transition name="dropdown">
      <div v-show="isShow" class="dropdown-content" @mouseleave="hideDropDown">
        <div class="dropdown-menu">
          <div class="menuItem" v-for="(item, index) in analog" :key="index">
            {{ item }}
          </div>
        </div>
      </div>
    </transition>
  </div>
</template>

<script>
export default {
  data() {
    return {
      isShow: false,
      navTop: 0,
      // 模拟下拉菜单内容
      analog: [],
    };
  },
  mounted() {
    // 导航栏距页面高度 = 元素顶部距页面距离 + 元素本身高度
    this.navTop =
      this.$refs.navRef.getBoundingClientRect().top +
      this.$refs.navRef.offsetHeight;
  },
  methods: {
    showDropDown(val) {
      if (!this.isShow) this.isShow = true;
      if (val === "2") {
        this.analog = ["菜单1", "菜单1", "菜单1", "菜单1", "菜单1"];
      } else {
        this.analog = ["菜单22", "菜单22", "菜单22", "菜单22", "菜单22"];
      }
    },
    hideDropDown(e) {
      // e.pageY:鼠标指针相对页面的偏移量
      if (this.isShow && e.pageY >= this.navTop) this.isShow = false;
    },
  },
};
</script>

<style lang="scss" scoped>
// 下拉菜单收缩展开
@keyframes expand-contract {
  0% {
    opacity: 0;
    height: 0;
    // max-height: 0;
  }
  100% {
    opacity: 1;
    height: 300px;
    // max-height: 300px;  // 大于等于下拉菜单的高度
  }
}
.dropdown-enter-active {
  animation: expand-contract 0.6s;
}
.dropdown-leave-active {
  animation: expand-contract 0.6s reverse;
}

// 内容变化
@keyframes menu {
  0% {
    opacity: 0;
  }
  100% {
    opacity: 1;
  }
}

// 导航栏
.nav {
  position: relative;
  display: flex;
  width: 100%;
  height: 80px;
  line-height: 80px;
  background-color: #eee;
  border-bottom: 1px solid #ccc;
  .nav-item {
    position: relative;
    margin: 0 20px;
    cursor: pointer;
    transition: all 0.3s linear;
    &::before {
      content: "";
      position: absolute;
      bottom: 0;
      left: 0;
      height: 2px;
      width: 100%;
      background-color: #1678e9;
      transform: scale(0);
      transition: all 0.4s linear;
    }
    &:hover {
      color: #1678e9;
      &::before {
        transform: scale(1);
      }
    }
  }
}
.dropdown-content {
  position: absolute;
  width: 100%; // 拉满
  overflow: hidden;
  .dropdown-menu {
    padding: 10px 8px 15px;
    color: white;
    background-color: rgba($color: #ccc, $alpha: 0.5);
    border-radius: 4px;
    /* animation: menu 0.6s; */
    .menuItem {
      width: 100%;
      white-space: nowrap;
      padding: 10px 16px;
      font-size: 16px;
      color: #000;
      cursor: pointer;
      transition: all 0.3s;
      border-radius: 4px;
      &:hover {
        background-color: #ccc;
      }
    }
  }
}
</style>
方法二:hover
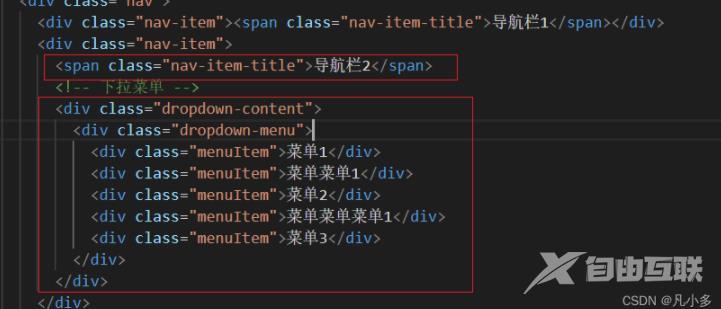
将下拉菜单需要下拉的导航栏下一级下,使用hover 控制元素,nav-item不要设置相对定位,以免定位时下拉菜单宽度不能100%铺满导航栏宽度。

将菜单初始高度设为0

优点:
1、简单明了,不需要事件,js等操作
缺点:
1、每个下拉菜单独立,也就是说切换导航栏,下拉菜单显示隐藏也会动画堆叠
2、每个导航标题都需要单独写下拉菜单,结构层次变多
案例代码
<template>
  <div class="app-container">
    <!-- 导航栏 -->
    <div class="nav">
      <div class="nav-item"><span class="nav-item-title">导航栏1</span></div>
      <div class="nav-item">
        <span class="nav-item-title">导航栏2</span>
        <!-- 下拉菜单 -->
        <div class="dropdown-content">
          <div class="dropdown-menu">
            <div class="menuItem">菜单1</div>
            <div class="menuItem">菜单菜单1</div>
            <div class="menuItem">菜单2</div>
            <div class="menuItem">菜单菜单菜单1</div>
            <div class="menuItem">菜单3</div>
          </div>
        </div>
      </div>
      <div class="nav-item"><span class="nav-item-title">导航栏3</span></div>
      <div class="nav-item">
        <span class="nav-item-title">导航栏4</span>
        <!-- 下拉菜单 -->
        <div class="dropdown-content">
          <div class="dropdown-menu">
            <div class="menuItem">菜单1</div>
            <div class="menuItem">菜单菜单1</div>
            <div class="menuItem">菜单2</div>
            <div class="menuItem">菜单菜单菜单1</div>
            <div class="menuItem">菜单3</div>
          </div>
        </div>
      </div>
      <div class="nav-item"><span class="nav-item-title">导航栏5</span></div>
    </div>
  </div>
</template>

<script>
export default {
  data() {
    return {
      isShow: false,
    };
  },
  mounted() {},
  methods: {},
};
</script>

<style lang="scss" scoped>
.nav {
  position: relative;
  display: flex;
  width: 100%;
  height: 80px;
  line-height: 80px;
  background-color: #eee;
  border-bottom: 1px solid #ccc;
  .nav-item {
    // position: relative;
    margin: 0 20px;
    cursor: pointer;
    transition: all 0.3s linear;
    .nav-item-title {
      position: relative;
      display: block;
      height: inherit;
      width: inherit;
      &::before {
        content: "";
        position: absolute;
        bottom: 0;
        left: 0;
        height: 2px;
        width: 100%;
        background-color: #1678e9;
        transform: scale(0);
        transition: all 0.4s linear;
      }
      &:hover {
        color: #1678e9;
        &::before {
          transform: scale(1);
        }
      }
    }
    &:hover .dropdown-content {
      height: 300px;
    }
  }
  // 下拉菜单
  .dropdown-content {
    position: absolute;
    top: 80px; // 为导航栏高度
    left: 0; // 设置为0, 不然会直接定位到父元素下方
    width: 100%;
    height: 0; // 下拉初始高度
    overflow: hidden;
    transition: 0.6s;
    .dropdown-menu {
      padding: 10px 8px 15px;
      color: white;
      background-color: rgba($color: #ccc, $alpha: 0.5);
      border-radius: 4px;
      .menuItem {
        width: 100%;
        height: 42px;
        white-space: nowrap;
        padding: 0 16px;
        font-size: 16px;
        line-height: 42px;
        color: #000;
        cursor: pointer;
        transition: all 0.3s ease-in-out;
        border-radius: 4px;
        &:hover {
          background-color: #ccc;
        }
      }
    }
  }
}
</style>
以上就是本文的全部内容,希望对大家的学习有所帮助,也希望大家多多支持易盾网络。
