目录 创建项目 创建弹窗组件 创建DialogManage类 基本使用弹窗 执行效果 对于使用 avalonia 的时候某些功能需要到一些提示,比如异常或者成功都需要对用户进行提示,所以需要单独实现弹
目录
- 创建项目
- 创建弹窗组件
- 创建DialogManage类
- 基本使用弹窗
- 执行效果
对于使用avalonia的时候某些功能需要到一些提示,比如异常或者成功都需要对用户进行提示,所以需要单独实现弹窗功能,并且可以自定义内部组件,这一期将手动实现一个简单的小弹窗,并且很容易自定义
创建项目
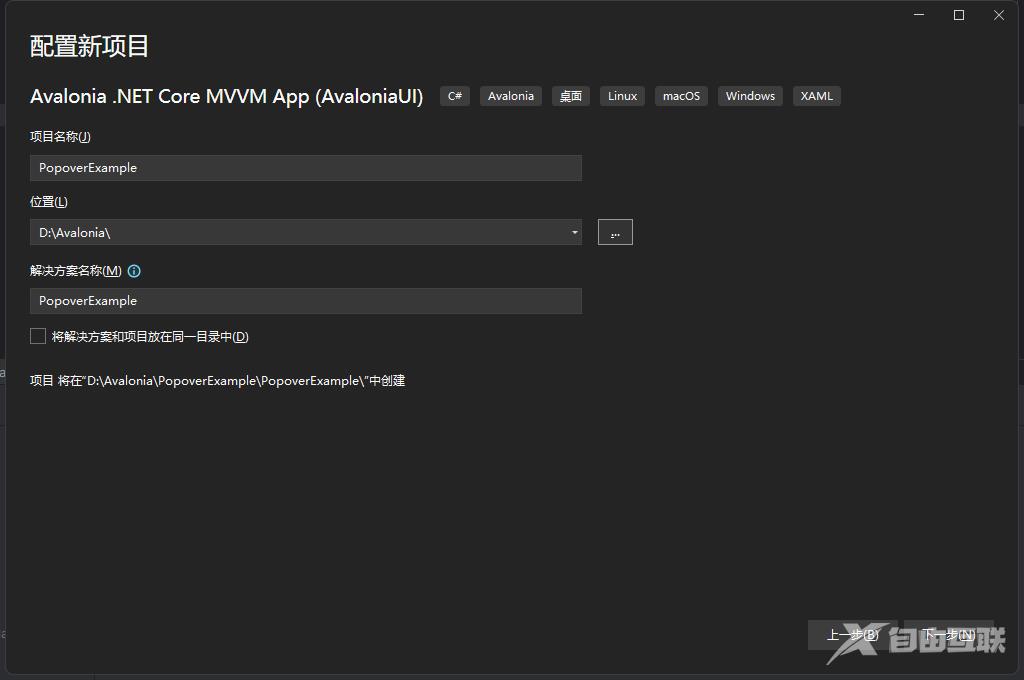
实现我们需要创建一个avaloniaMVVM的项目模板

并且取名PopoverExample

然后一直默认创建。
创建弹窗组件
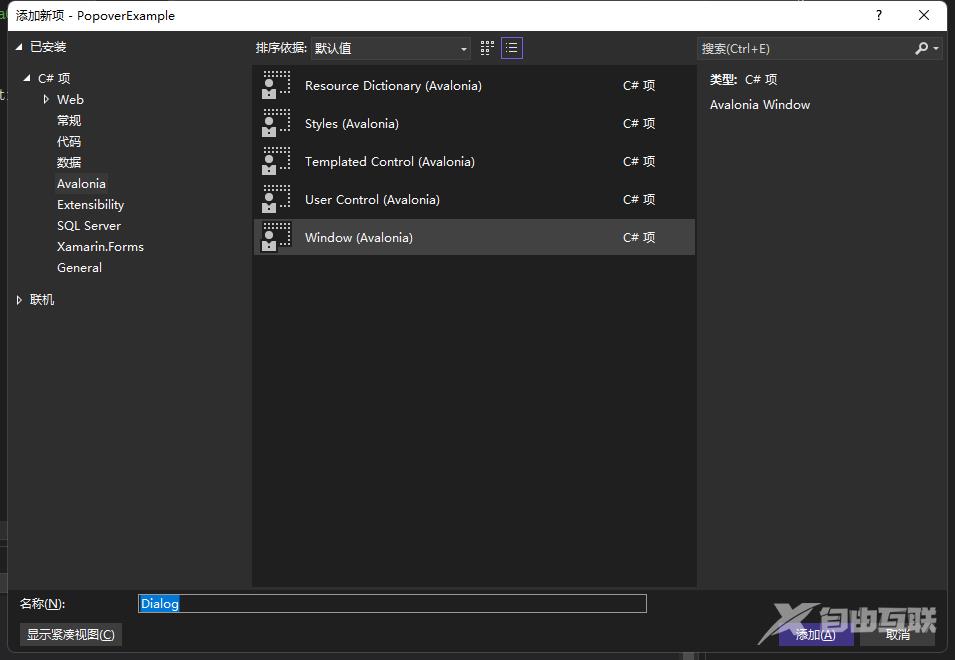
在Views文件夹中创建一个组件,选择Window模板,创建名称Dialog

然后打开Dialog.axaml文件,修改相关代码,
<Window xmlns="https://github.com/avaloniaui"
        xmlns:x="http://schemas.microsoft.com/winfx/2006/xaml"
        xmlns:d="http://schemas.microsoft.com/expression/blend/2008"
        xmlns:mc="http://schemas.openxmlformats.org/markup-compatibility/2006"
        mc:Ignorable="d" d:DesignWidth="800" d:DesignHeight="450"
        x:Class="Dialog.Views.DialogBase"
        ExtendClientAreaToDecorationsHint="True"
        ExtendClientAreaChromeHints="NoChrome"
        ExtendClientAreaTitleBarHeightHint="-1"
        Title="DialogBase">
    <StackPanel>
        <Grid>
            <Grid HorizontalAlignment="Left">
                <TextBlock>标题</TextBlock>
            </Grid>
            <Grid HorizontalAlignment="Right">
                <Button Click="Close_OnClick" Name="Close">关闭</Button>
            </Grid>
        </Grid>
        <Grid>
            <TextBlock Name="Content"></TextBlock>
        </Grid>
    </StackPanel>
</Window>
以下代码是用于隐藏默认的标题栏的
ExtendClientAreaToDecorationsHint="True"
ExtendClientAreaChromeHints="NoChrome"
ExtendClientAreaTitleBarHeightHint="-1"
打开DialogBase.axaml.cs ,修改修改代码
using Avalonia;
using Avalonia.Controls;
using Avalonia.Interactivity;
using Avalonia.Markup.Xaml;

namespace Dialog.Views;

public partial class DialogBase : Window
{
    public DialogBase()
    {
        InitializeComponent();
#if DEBUG
        this.AttachDevTools();
#endif
    }

    private void InitializeComponent()
    {
        AvaloniaXamlLoader.Load(this);
    }

    private void Close_OnClick(object? sender, RoutedEventArgs e)
    {
        Close();
    }
}
创建DialogManage类
创建DialogManage类,用于管理Dialog 创建DialogManage.cs,添加以下代码
using System;
using System.Collections.Generic;
using System.Threading.Tasks;
using Avalonia;
using Avalonia.Controls;
using Avalonia.Threading;

namespace Dialog.Views;

public static class DialogManage
{
    private static readonly Dictionary<DialogType, DialogBase> _dialogBases = new();

    public static void Show(DialogType type, string content, int height = 100, int width = 200, int timing = 3000)
    {
        DialogBase dialog;
        // 防止并发可自行修改
        lock (_dialogBases)
        {
            if (_dialogBases.Remove(type, out var dialogBase))
            {
                try
                {
                    dialogBase.Close();
                }
                catch
                {
                }
            }

            dialog = new DialogBase
            {
                Height = height,
                Width = width,
                WindowStartupLocation = WindowStartupLocation.Manual // 不设置的话无法修改窗口位置
            };

            if (timing > 0)
            {
                // 弹窗定时关闭
                _ = Task.Run(async () =>
                {
                    await Task.Delay(timing);
                    // 先删除并且拿到删除的value
                    if (_dialogBases.Remove(type, out var dialogBase))
                    {
                        // 操作组件需要使用ui线程
                        _ = Dispatcher.UIThread.InvokeAsync(() =>
                        {
                            try
                            {
                                // 关闭弹窗组件
                                dialogBase.Close();
                            }
                            // 可能已经被关闭所以可能会出现异常
                            catch
                            {
                            }
                        });
                    }
                });
            }

            // 添加到字典中
            _dialogBases.TryAdd(type, dialog);
        }

        // 获取当前屏幕
        var bounds = dialog.Screens.ScreenFromVisual(dialog).Bounds;

        // 偏移
        int skewing = 20;
        // window的任务栏高度
        int taskbar = 50;
        int x, y;
        switch (type)
        {
            case DialogType.topLeft:
                x = skewing;
                y = skewing;
                break;
            case DialogType.topCenter:
                x = (int)((bounds.Width - dialog.Width) / 2);
                y = skewing;
                break;
            case DialogType.topRight:
                x = (int)((bounds.Width - dialog.Width) - skewing);
                y = skewing;
                break;
            case DialogType.leftLower:
                x = 20;
                y = (int)(bounds.Height - dialog.Height) - taskbar - skewing;
                break;
            case DialogType.centerLower:
                x = (int)((bounds.Width - dialog.Width) / 2);
                y = (int)(bounds.Height - dialog.Height) - taskbar - skewing;
                break;
            case DialogType.rightLower:
                x = (int)(bounds.Width - dialog.Width - skewing);
                y = (int)(bounds.Height - dialog.Height) - taskbar - skewing;
                break;
            default:
                throw new ArgumentOutOfRangeException(nameof(type), type, null);
        }

        // 设置弹窗的位置
        dialog.Position = new PixelPoint(x, y);

        // 获取内容显示的组件并且将内容显示上去
        var contentBox = dialog.Find<TextBlock>("Content");
        contentBox.Text = content;
        dialog.Show();
    }
}

public enum DialogType
{
    /// <summary>
    /// 左上
    /// </summary>
    topLeft,

    /// <summary>
    /// 居中靠上
    /// </summary>
    topCenter,

    /// <summary>
    /// 右上
    /// </summary>
    topRight,

    /// <summary>
    /// 左下
    /// </summary>
    leftLower,

    /// <summary>
    /// 居中靠下
    /// </summary>
    centerLower,

    /// <summary>
    /// 右下
    /// </summary>
    rightLower
}
对于弹窗组件已经完成,
基本使用弹窗
打开MainWindow.axaml文件修改代码
<Window xmlns="https://github.com/avaloniaui"
        xmlns:x="http://schemas.microsoft.com/winfx/2006/xaml"
        xmlns:vm="using:Dialog.ViewModels"
        xmlns:d="http://schemas.microsoft.com/expression/blend/2008"
        xmlns:mc="http://schemas.openxmlformats.org/markup-compatibility/2006"
        mc:Ignorable="d" d:DesignWidth="800" d:DesignHeight="450"
        x:Class="Dialog.Views.MainWindow"

        Height="400"
        Width="400"
        Icon="/Assets/avalonia-logo.ico"
        Title="Dialog">

    <Design.DataContext>
        <!-- This only sets the DataContext for the previewer in an IDE,
             to set the actual DataContext for runtime, set the DataContext property in code (look at App.axaml.cs) -->
        <vm:MainWindowViewModel/>
    </Design.DataContext>

    <StackPanel HorizontalAlignment="Center">
        <Button Height="40" Name="OpenDialog" Click="OpenDialog_OnClick">打开新弹窗</Button>
    </StackPanel>
</Window>
打开 MainWindow.axaml.cs修改相关代码
using Avalonia.Controls;
using Avalonia.Interactivity;

namespace Dialog.Views;

public partial class MainWindow : Window
{
    public MainWindow()
    {
        InitializeComponent();
    }

    // 定义枚举开始的值
    private int i = 0;

    private void OpenDialog_OnClick(object? sender, RoutedEventArgs e)
    {
        // 弹窗新窗口
        DialogManage.Show((DialogType)i++, "弹窗内容:" + i);
        // 超过枚举值重新赋值
        if (i == 6)
        {
            i = 0;
        }
    }
}
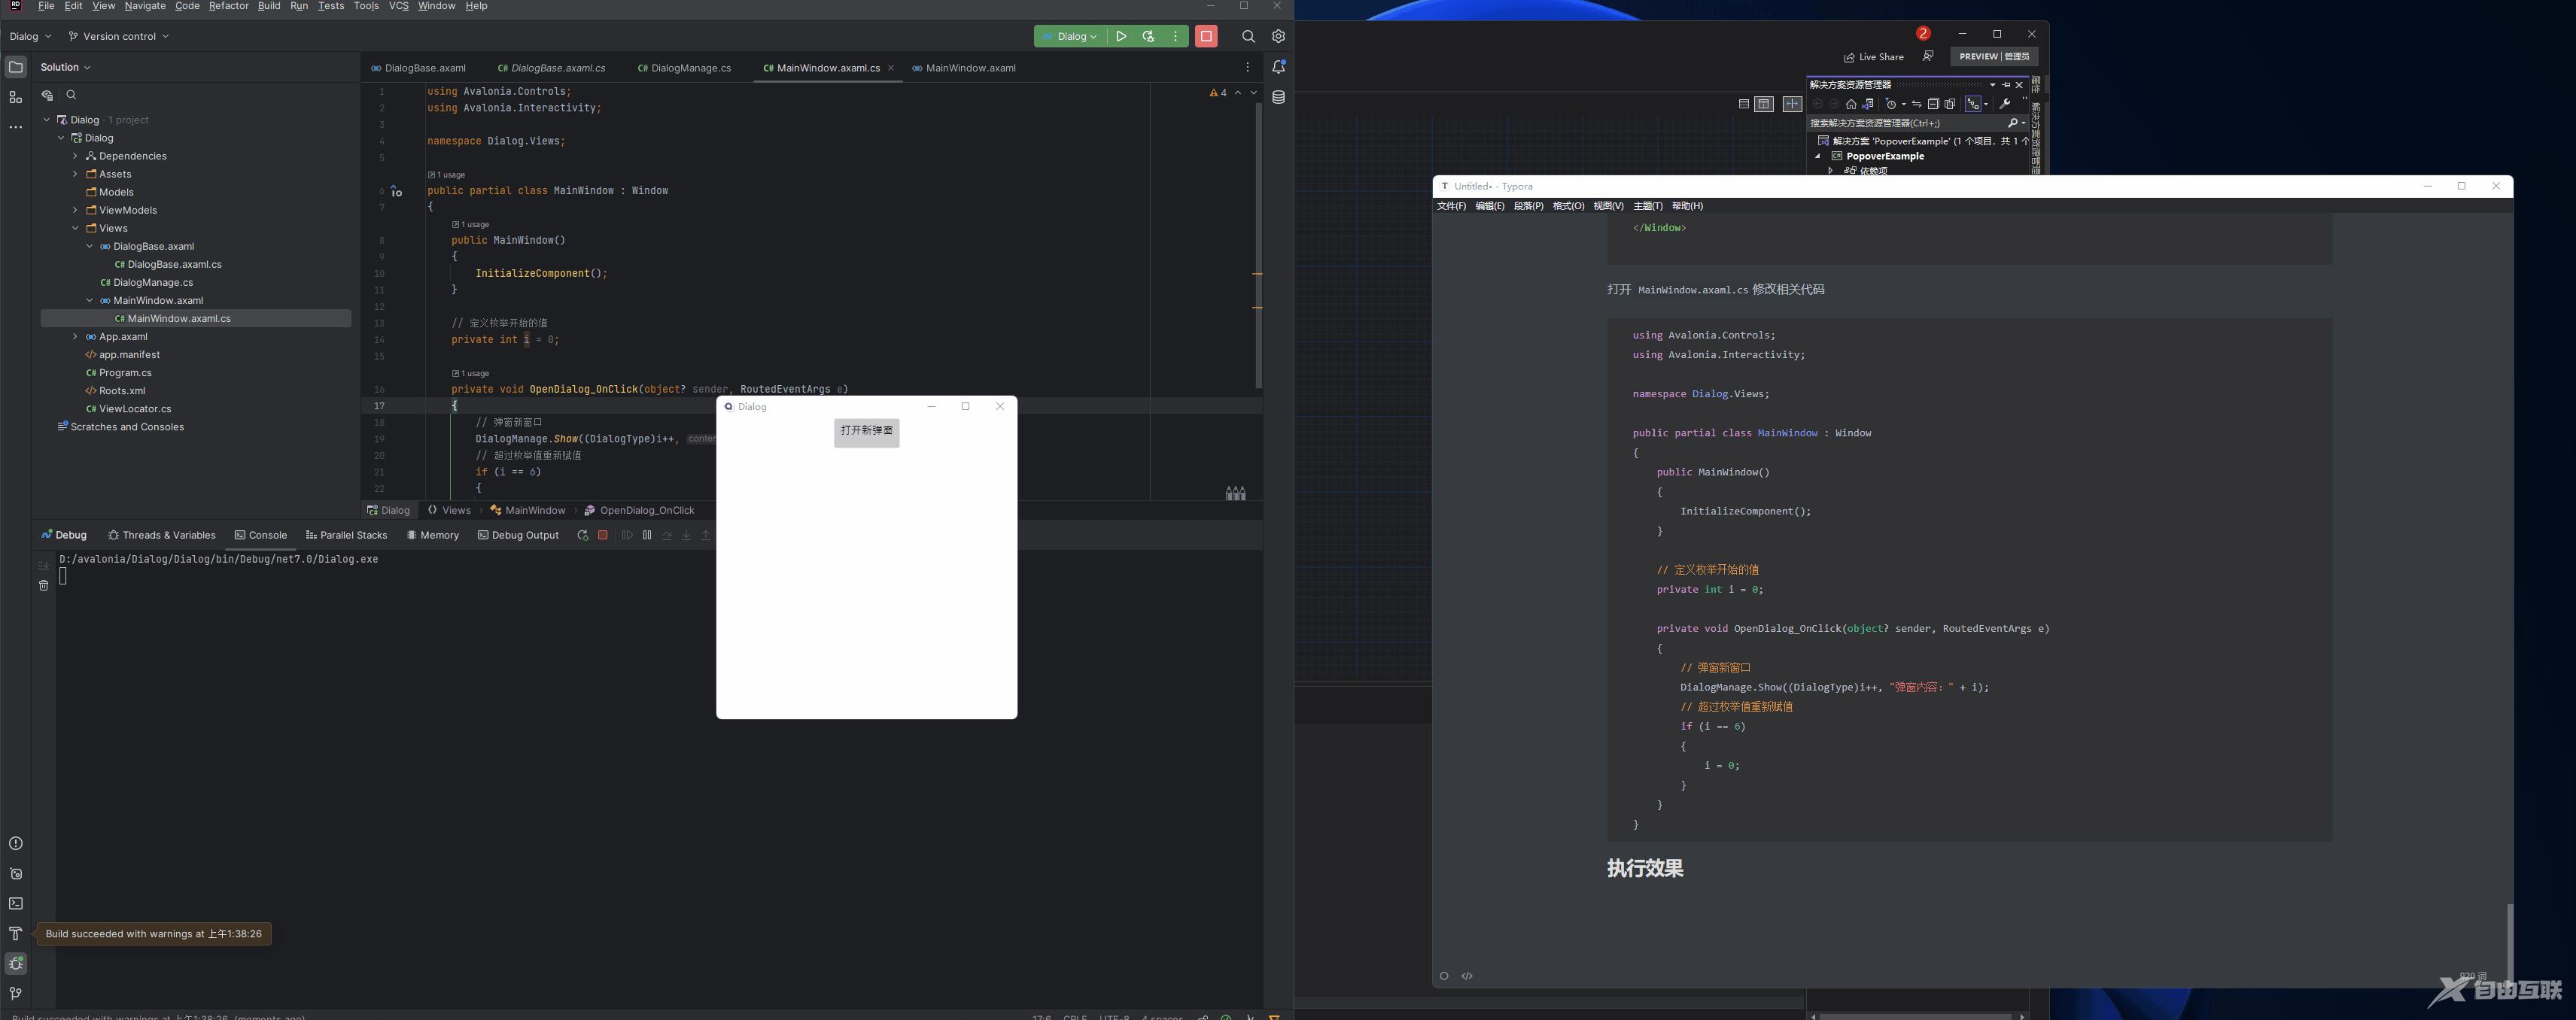
执行效果

到此这篇关于基于Avalonia实现自定义弹窗的示例详解的文章就介绍到这了,更多相关Avalonia自定义弹窗内容请搜索自由互联以前的文章或继续浏览下面的相关文章希望大家以后多多支持自由互联!
