在使用驱动精灵的时候有的用户不知道怎么更改备份路径,今天小编就为大家带来了驱动精灵更改备份路径教程,一起来看看吧。 驱动精灵怎么更改备份路径?驱动精灵更改备份路径教
在使用驱动精灵的时候有的用户不知道怎么更改备份路径,今天小编就为大家带来了驱动精灵更改备份路径教程,一起来看看吧。
驱动精灵怎么更改备份路径?驱动精灵更改备份路径教程
1、首先,咱们在驱动精灵中点击打开这个驱动备份和还原窗口。

2、然后,咱们就能单机这个修改文件路径按钮。

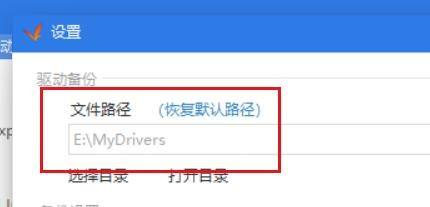
3、接着,我们就能够看到这里的文件备份驱动的路径属性。

4、最后,通过这个路径的更改即可完成设置。
以上这篇文章就是驱动精灵更改备份路径的步骤内容,有需要的小伙伴快来学习一下吧!