目录
- 一、kotlin-android-extensions
- 二、ViewBinding使用
- 1.gradle配置
- 2.在Activity 使用
- 3.在Fragment使用
- 4.在Adapter中使用
- 5.在Dialog中使用
- 6.Include中使用
- 三、ViewBinding封装
- 1.在BaseActivity中封装
- 2.通过反射的方式封装
- 3.反射+基类
- 1.在Activity 中使用
- 2.在Fragment中使用
- 4.委托的方式
一、kotlin-android-extensions
在使用ViewBinding之前,我们一直使用的是kotlin-android-extensions,使用kotlin-android-extensions可以节约很多写findViewById的时间。不过这个kotlin-android-extensions插件已经废弃了,简单说一下kotlin-android-extensions存在的问题:
1.通过反编译kotlin-android-extensions的代码,发现会创建一个HashMap,用来存放所有的id和对应的View的缓存,如果缓存中没有View,那么就通过findViewById去创建并存入缓存,否则就直接获取。所以会存在内存问题。
private HashMap _$_findViewCache;
public View _$_findCachedViewById(int var1) {
   if (this._$_findViewCache == null) {
      this._$_findViewCache = new HashMap();
   }
   View var2 = (View)this._$_findViewCache.get(var1);
   if (var2 == null) {
      View var10000 = this.getView();
      if (var10000 == null) {
         return null;
      }
      var2 = var10000.findViewById(var1);
      this._$_findViewCache.put(var1, var2);
   }
   return var2;
}
public void _$_clearFindViewByIdCache() {
   if (this._$_findViewCache != null) {
      this._$_findViewCache.clear();
   }
}
// $FF: synthetic method
public void onDestroyView() {
   super.onDestroyView();
   this._$_clearFindViewByIdCache();
}
2.由于kotlin-android-extensions是通过view的id名直接引用的,如果多个布局间的同名id,就需要手动对import进行重命名处理,如果引用错误的布局文件,就会出现crash。所以存在资源重名的问题。
3.只有Kotlin才可以使用。
所以ViewBinding优势有:java,kotlin都可以使用,可以有效避免NullPointerException。
二、ViewBinding使用
1.gradle配置
buildFeatures {
viewBinding true
}
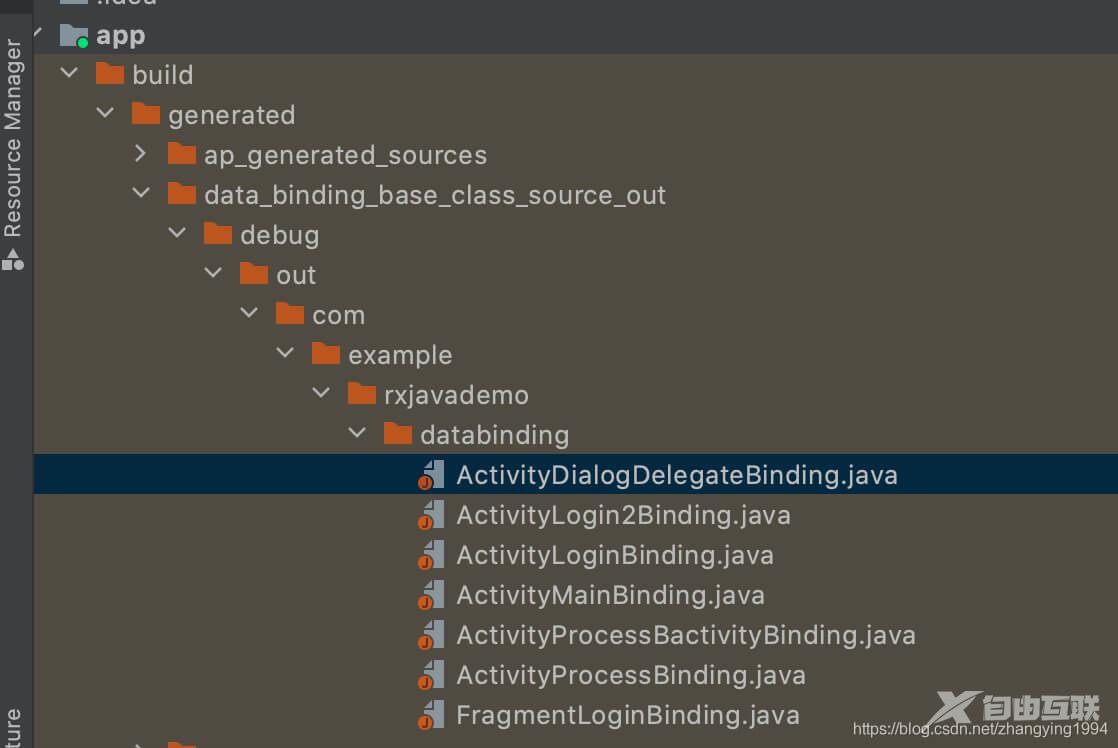
开启ViewBinding之后,在编译时,AGP会自动帮我们给每个xml布局创建一个Binding类,位于build/generated/data_binding_base_class_source_out/目录下。
public final class FragmentLoginBinding implements ViewBinding {
  @NonNull
  private final ConstraintLayout rootView;
  @NonNull
  public final ConstraintLayout container;
  @NonNull
  public final ProgressBar loading;
  @NonNull
  public final Button login;
  @NonNull
  public final EditText password;
  @NonNull
  public final EditText username;
  private FragmentLoginBinding(@NonNull ConstraintLayout rootView,
      @NonNull ConstraintLayout container, @NonNull ProgressBar loading, @NonNull Button login,
      @NonNull EditText password, @NonNull EditText username) {
    this.rootView = rootView;
    this.container = container;
    this.loading = loading;
    this.login = login;
    this.password = password;
    this.username = username;
  }
  @Override
  @NonNull
  public ConstraintLayout getRoot() {
    return rootView;
  }
  @NonNull
  public static FragmentLoginBinding inflate(@NonNull LayoutInflater inflater) {
    return inflate(inflater, null, false);
  }
  @NonNull
  public static FragmentLoginBinding inflate(@NonNull LayoutInflater inflater,
      @Nullable ViewGroup parent, boolean attachToParent) {
    View root = inflater.inflate(R.layout.fragment_login, parent, false);
    if (attachToParent) {
      parent.addView(root);
    }
    return bind(root);
  }
  @NonNull
  public static FragmentLoginBinding bind(@NonNull View rootView) {
    // The body of this method is generated in a way you would not otherwise write.
    // This is done to optimize the compiled bytecode for size and performance.
    int id;
    missingId: {
      ConstraintLayout container = (ConstraintLayout) rootView;
      id = R.id.loading;
      ProgressBar loading = rootView.findViewById(id);
      if (loading == null) {
        break missingId;
      }
      id = R.id.login;
      Button login = rootView.findViewById(id);
      if (login == null) {
        break missingId;
      }
      id = R.id.password;
      EditText password = rootView.findViewById(id);
      if (password == null) {
        break missingId;
      }
      id = R.id.username;
      EditText username = rootView.findViewById(id);
      if (username == null) {
        break missingId;
      }
      return new FragmentLoginBinding((ConstraintLayout) rootView, container, loading, login,
          password, username);
    }
    String missingId = rootView.getResources().getResourceName(id);
    throw new NullPointerException("Missing required view with ID: ".concat(missingId));
  }
}
注意:
1.因为这些类编译时就生成了,就不会占用运行时内存。
2.未使用的Binding文件会在混淆时被删除,所以对包大小影响很小。
3.编译器生成Binding文件是增量更新的。
那么如何不生成Binding类呢?tools:viewBindingIgnore="true"
<androidx.constraintlayout.widget.ConstraintLayout xmlns:android="http://schemas.android.com/apk/res/android"
    xmlns:app="http://schemas.android.com/apk/res-auto"
    xmlns:tools="http://schemas.android.com/tools"
    android:layout_width="match_parent"
    android:layout_height="match_parent"
    tools:viewBindingIgnore="true"
    tools:context=".MainActivity">
2.在Activity 使用
class TestViewBindingActivity : AppCompatActivity() {
private lateinit var bindding: ActivityTestViewBindingBinding
override fun onCreate(savedInstanceState: Bundle?) {
super.onCreate(savedInstanceState)
bindding = ActivityTestViewBindingBinding.inflate(layoutInflater)
setContentView(bindding.root)
changeText()
}
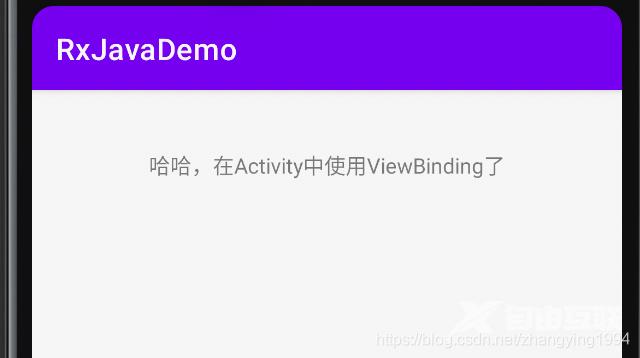
private fun changeText() {
bindding.titleTv.text = "哈哈,在Activity中使用ViewBinding了"
}
}
<?xml version="1.0" encoding="utf-8"?>
<androidx.constraintlayout.widget.ConstraintLayout xmlns:android="http://schemas.android.com/apk/res/android"
    xmlns:app="http://schemas.android.com/apk/res-auto"
    xmlns:tools="http://schemas.android.com/tools"
    android:layout_width="match_parent"
    android:layout_height="match_parent"
    tools:context=".testviewbinding.TestViewBindingActivity">
    <TextView
        android:id="@+id/titleTv"
        android:layout_width="match_parent"
        android:layout_height="100dp"
        android:gravity="center"
        android:text="在Activity中使用ViewBinding"
        app:layout_constraintStart_toStartOf="parent"
        app:layout_constraintTop_toTopOf="parent" />
</androidx.constraintlayout.widget.ConstraintLayout>
3.在Fragment使用
class TextViewBindingFragment : Fragment() {
private var param1: String? = null
private var param2: String? = null
private var _binding: FragmentTextViewBindingBinding? = null
private val binding get() = _binding!!
override fun onCreate(savedInstanceState: Bundle?) {
super.onCreate(savedInstanceState)
arguments?.let {
param1 = it.getString(ARG_PARAM1)
param2 = it.getString(ARG_PARAM2)
}
}
override fun onCreateView(
inflater: LayoutInflater, container: ViewGroup?,
savedInstanceState: Bundle?
): View? {
_binding = FragmentTextViewBindingBinding.inflate(layoutInflater, container, false)
return binding.root
}
override fun onViewCreated(view: View, savedInstanceState: Bundle?) {
super.onViewCreated(view, savedInstanceState)
changeText()
}
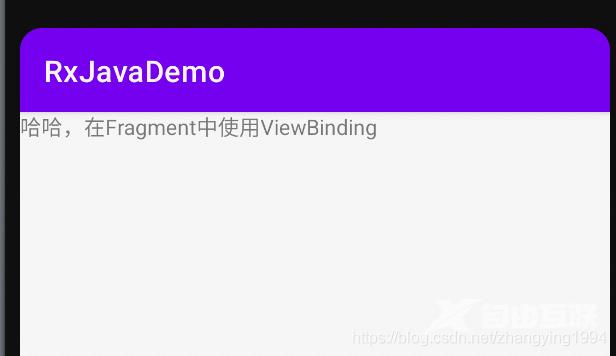
private fun changeText() {
binding.tvTitle.text = "哈哈,在Fragment中使用ViewBinding"
}
override fun onDestroyView() {
super.onDestroyView()
_binding = null
}
companion object {
@JvmStatic
fun newInstance(param1: String, param2: String) =
TextViewBindingFragment().apply {
arguments = Bundle().apply {
putString(ARG_PARAM1, param1)
putString(ARG_PARAM2, param2)
}
}
@JvmStatic
fun newInstance() = TextViewBindingFragment()
}
}
class TestViewBindingActivity : AppCompatActivity() {
    private lateinit var bindding: ActivityTestViewBindingBinding
    override fun onCreate(savedInstanceState: Bundle?) {
        super.onCreate(savedInstanceState)
        bindding = ActivityTestViewBindingBinding.inflate(layoutInflater)
        setContentView(bindding.root)
        val newInstance = TextViewBindingFragment.newInstance()
        addFragment(
            supportFragmentManager,
            newInstance,
            isAllowStateLoss = true,
            frameId = R.id.fragmentFrame
        )
    }
}
<?xml version="1.0" encoding="utf-8"?>
<FrameLayout xmlns:android="http://schemas.android.com/apk/res/android"
    xmlns:tools="http://schemas.android.com/tools"
    android:layout_width="match_parent"
    android:layout_height="match_parent"
    tools:context=".testviewbinding.TextViewBindingFragment">
    <TextView
        android:id="@+id/tvTitle"
        android:layout_width="match_parent"
        android:layout_height="match_parent"
        android:text="在Fragment中" />
</FrameLayout>
4.在Adapter中使用
class TestAdapterActivity : AppCompatActivity() {
private lateinit var binding: ActivityTestAdapterBinding
override fun onCreate(savedInstanceState: Bundle?) {
super.onCreate(savedInstanceState)
binding = ActivityTestAdapterBinding.inflate(layoutInflater)
setContentView(binding.root)
initView()
}
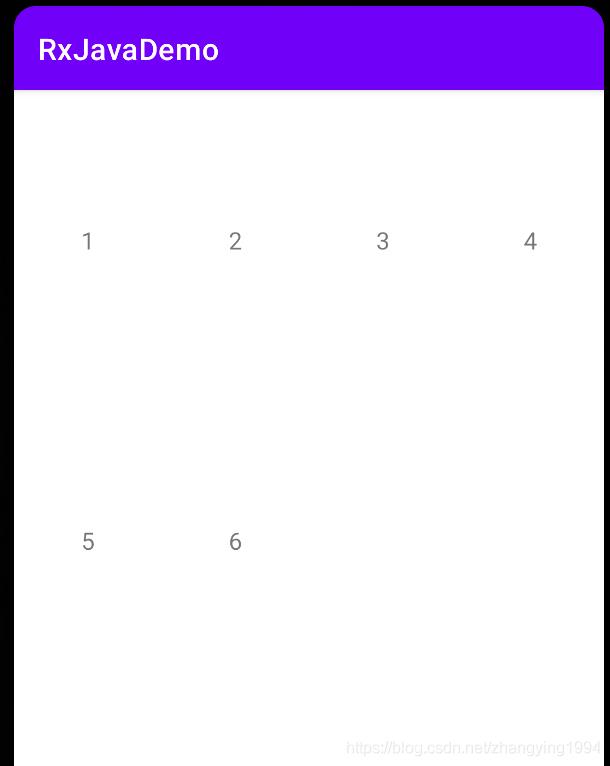
companion object {
val ITEMS = mutableListOf<String>("1", "2", "3", "4", "5", "6")
}
private fun initView() {
with(binding.contentRcycler) {
layoutManager = GridLayoutManager(context, 4)
adapter = TestRecyclerViewAdapter(ITEMS)
}
}
}
<?xml version="1.0" encoding="utf-8"?>
<androidx.constraintlayout.widget.ConstraintLayout xmlns:android="http://schemas.android.com/apk/res/android"
    xmlns:tools="http://schemas.android.com/tools"
    android:layout_width="match_parent"
    android:layout_height="match_parent"
    tools:context=".testviewbinding.TestAdapterActivity">
    <androidx.recyclerview.widget.RecyclerView
        android:id="@+id/contentRcycler"
        android:layout_width="match_parent"
        android:layout_height="match_parent" />
</androidx.constraintlayout.widget.ConstraintLayout>
class TestRecyclerViewAdapter(private val values: List<String>) :
    RecyclerView.Adapter<TestRecyclerViewAdapter.ViewHolder>() {
    inner class ViewHolder(binding: RecyclerItemLayoutBinding) :
        RecyclerView.ViewHolder(binding.root) {
        val textTv = binding.contentTv
    }
    override fun onCreateViewHolder(parent: ViewGroup, viewType: Int): ViewHolder {
        return ViewHolder(
            RecyclerItemLayoutBinding.inflate(
                LayoutInflater.from(parent.context),
                parent,
                false
            )
        )
    }
    override fun onBindViewHolder(holder: ViewHolder, position: Int) {
        val item = values[position]
        holder.textTv.text = item
    }
    override fun getItemCount(): Int = values.size
}
<?xml version="1.0" encoding="utf-8"?>
<androidx.constraintlayout.widget.ConstraintLayout xmlns:android="http://schemas.android.com/apk/res/android"
    xmlns:tools="http://schemas.android.com/tools"
    android:layout_width="match_parent"
    android:layout_height="200dp">
    <TextView
        android:id="@+id/contentTv"
        android:layout_width="match_parent"
        android:layout_height="match_parent"
        android:gravity="center"
        android:textSize="16dp"
        tools:text="99" />
</androidx.constraintlayout.widget.ConstraintLayout>
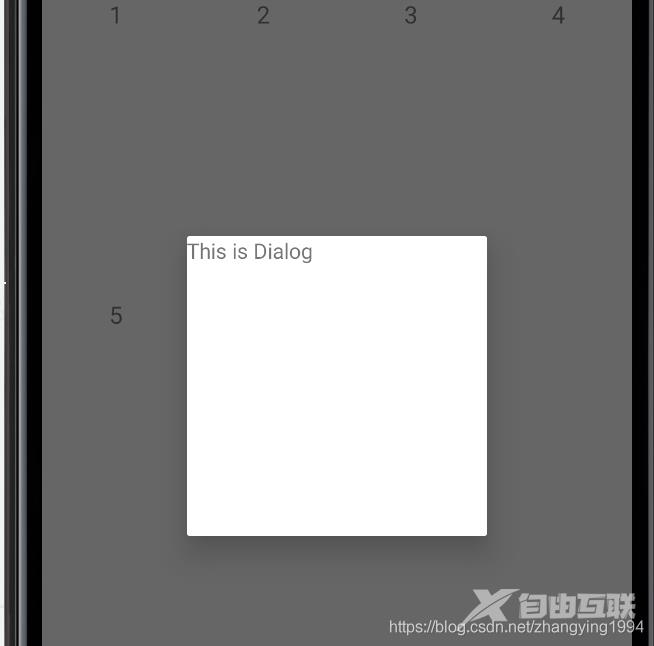
5.在Dialog中使用
class CommonDialog(context: Context) : Dialog(context) {
    override fun onCreate(savedInstanceState: Bundle?) {
        super.onCreate(savedInstanceState)
        setContentView(DialogLayoutBinding.inflate(layoutInflater).root)
    }
}
<?xml version="1.0" encoding="utf-8"?>
<androidx.constraintlayout.widget.ConstraintLayout xmlns:android="http://schemas.android.com/apk/res/android"
    xmlns:app="http://schemas.android.com/apk/res-auto"
    android:layout_width="match_parent"
    android:layout_height="match_parent">
    <TextView
        android:id="@+id/dialogContent"
        android:layout_width="200dp"
        android:layout_height="200dp"
        android:text="This is Dialog"
        app:layout_constraintBottom_toBottomOf="parent"
        app:layout_constraintEnd_toEndOf="parent"
        app:layout_constraintStart_toStartOf="parent"
        app:layout_constraintTop_toTopOf="parent" />
</androidx.constraintlayout.widget.ConstraintLayout>
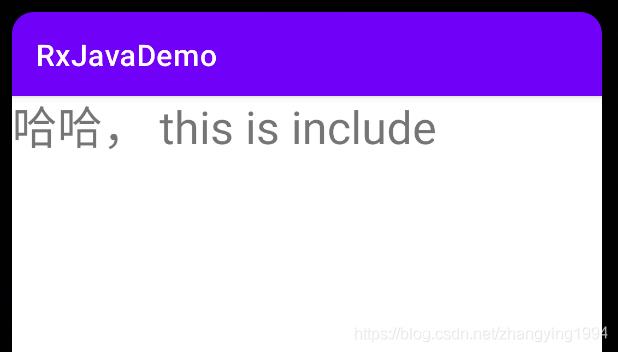
6.Include中使用
class TestIncludeActivity : AppCompatActivity() {
    private lateinit var binding: ActivityTestIncludeBinding
    override fun onCreate(savedInstanceState: Bundle?) {
        super.onCreate(savedInstanceState)
        binding = ActivityTestIncludeBinding.inflate(layoutInflater)
        setContentView(binding.root)
        initView()
    }
    private fun initView() {
        binding.itemInclude.itemContentTv.text = "哈哈, this is include"
    }
}
<?xml version="1.0" encoding="utf-8"?>
<androidx.constraintlayout.widget.ConstraintLayout xmlns:android="http://schemas.android.com/apk/res/android"
    xmlns:tools="http://schemas.android.com/tools"
    android:layout_width="match_parent"
    android:layout_height="match_parent"
    tools:context=".testviewbinding.TestIncludeActivity">
    <include
        android:id="@+id/itemInclude"
        layout="@layout/item_layout" />
</androidx.constraintlayout.widget.ConstraintLayout>
<?xml version="1.0" encoding="utf-8"?>
<androidx.constraintlayout.widget.ConstraintLayout xmlns:android="http://schemas.android.com/apk/res/android"
    xmlns:app="http://schemas.android.com/apk/res-auto"
    android:layout_width="match_parent"
    android:layout_height="match_parent">
    <TextView
        android:id="@+id/itemContentTv"
        android:layout_width="match_parent"
        android:layout_height="200dp"
        android:text="Test include"
        android:textSize="30sp"
        app:layout_constraintStart_toStartOf="parent"
        app:layout_constraintTop_toTopOf="parent" />
</androidx.constraintlayout.widget.ConstraintLayout>
三、ViewBinding封装
1.在BaseActivity中封装
abstract class BaseViewBindingActivity<T : ViewBinding> : AppCompatActivity() {
    protected val binding by lazy {
        getViewBinding()
    }
    override fun onCreate(savedInstanceState: Bundle?) {
        super.onCreate(savedInstanceState)
        setContentView(binding.root)
    }
    protected abstract fun getViewBinding(): T
}
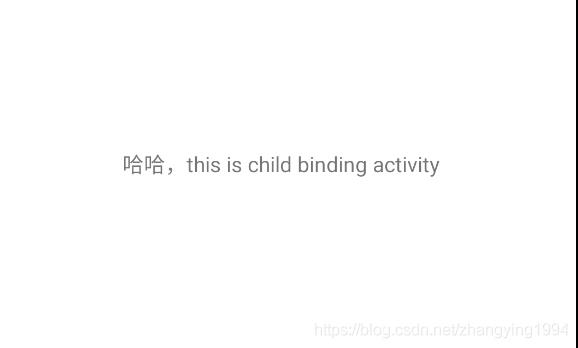
class ChildViewBindingMainActivity :
    BaseViewBindingActivity<ActivityChildViewBindingMainBinding>() {
    override fun onCreate(savedInstanceState: Bundle?) {
        super.onCreate(savedInstanceState)
        binding.titleTv.text = "哈哈,this is child binding activity"
    }
    override fun getViewBinding(): ActivityChildViewBindingMainBinding {
        return ActivityChildViewBindingMainBinding.inflate(layoutInflater)
    }
}
<?xml version="1.0" encoding="utf-8"?>
<androidx.constraintlayout.widget.ConstraintLayout xmlns:android="http://schemas.android.com/apk/res/android"
    xmlns:app="http://schemas.android.com/apk/res-auto"
    xmlns:tools="http://schemas.android.com/tools"
    android:layout_width="match_parent"
    android:layout_height="match_parent"
    tools:context=".encapsulatviewbinding.ChildViewBindingMainActivity">
    <TextView
        android:id="@+id/titleTv"
        android:layout_width="match_parent"
        android:layout_height="match_parent"
        android:gravity="center"
        android:text="36sp" />
</androidx.constraintlayout.widget.ConstraintLayout>
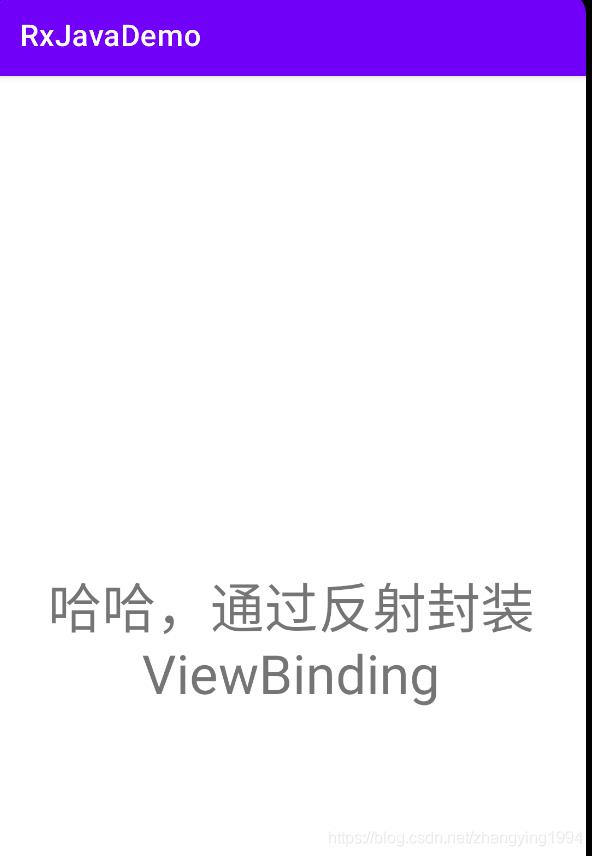
2.通过反射的方式封装
class TestViewBindingMainActivity : AppCompatActivity() {
    private val binding by inflate<ActivityTestViewBindingMainBinding>()
    override fun onCreate(savedInstanceState: Bundle?) {
        super.onCreate(savedInstanceState)
        binding.titleTv.text = "哈哈,通过反射封装ViewBinding"
    }
}
inline fun <reified T : ViewBinding> inflateByViewBinding(layoutInflater: LayoutInflater) =
    T::class.java.getMethod("inflate", LayoutInflater::class.java).invoke(null, layoutInflater) as T
inline fun <reified T : ViewBinding> Activity.inflate() = lazy {
    inflateByViewBinding<T>(layoutInflater).apply {
        setContentView(root)
    }
}
<?xml version="1.0" encoding="utf-8"?>
<androidx.constraintlayout.widget.ConstraintLayout xmlns:android="http://schemas.android.com/apk/res/android"
    xmlns:app="http://schemas.android.com/apk/res-auto"
    xmlns:tools="http://schemas.android.com/tools"
    android:layout_width="match_parent"
    android:layout_height="match_parent"
    tools:context=".encapsulatviewbinding.TestViewBindingMainActivity">
    <TextView
        android:id="@+id/titleTv"
        android:layout_width="match_parent"
        android:layout_height="match_parent"
        android:gravity="center"
        android:textSize="36sp" />
</androidx.constraintlayout.widget.ConstraintLayout>
3.反射+基类
1.在Activity 中使用
abstract class BaseBindingMainActivity2<T : ViewBinding> : AppCompatActivity() {
    protected lateinit var binding: T
    override fun onCreate(savedInstanceState: Bundle?) {
        super.onCreate(savedInstanceState)
        val type = javaClass.genericSuperclass
        if (type is ParameterizedType) {
            val clazz = type.actualTypeArguments[0] as Class<T>
            val method = clazz.getMethod("inflate", LayoutInflater::class.java)
            binding = method.invoke(null, layoutInflater) as T
        }
        setContentView(binding.root)
    }
}
class ChildViewBindingMainActivity2 :
BaseBindingMainActivity2<ActivityChildViewBindingMain2Binding>() {
override fun onCreate(savedInstanceState: Bundle?) {
super.onCreate(savedInstanceState)
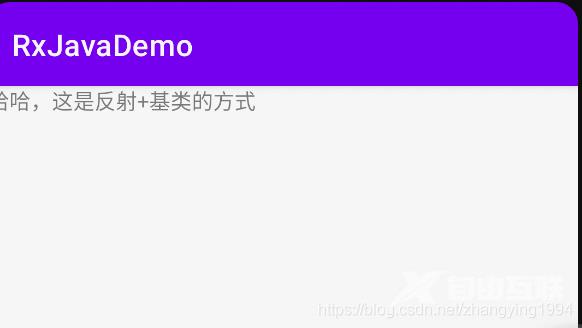
binding.titleTv.text = "哈哈,这是反射+基类的方式"
}
}
<?xml version="1.0" encoding="utf-8"?>
<androidx.constraintlayout.widget.ConstraintLayout xmlns:android="http://schemas.android.com/apk/res/android"
    xmlns:tools="http://schemas.android.com/tools"
    android:layout_width="match_parent"
    android:layout_height="match_parent"
    tools:context=".encapsulatviewbinding.ChildViewBindingMainActivity2">
    <TextView
        android:id="@+id/titleTv"
        android:layout_width="match_parent"
        android:layout_height="match_parent" />
</androidx.constraintlayout.widget.ConstraintLayout>
2.在Fragment中使用
abstract class BaseBindingViewFragment<T : ViewBinding> : Fragment() {
    private var _binding: T? = null
    protected val binding get() = _binding!!
    override fun onCreateView(
        inflater: LayoutInflater, container: ViewGroup?,
        savedInstanceState: Bundle?
    ): View? {
        val type = javaClass.genericSuperclass
        val clazz = (type as ParameterizedType).actualTypeArguments[0] as Class<T>
        val method = clazz.getMethod(
            "inflate",
            LayoutInflater::class.java,
            ViewGroup::class.java,
            Boolean::class.java
        )
        _binding = method.invoke(null, layoutInflater, container, false) as T
        this.viewLifecycleOwner.lifecycle.addObserver(object : LifecycleEventObserver {
            override fun onStateChanged(source: LifecycleOwner, event: Lifecycle.Event) {
                if (event == Lifecycle.Event.ON_DESTROY) {
                    Log.v(TAG, "onDestroy binding be null")
                    _binding = null
                }
            }
        })
        return binding.root
    }
    companion object {
        const val TAG = "BaseBindingViewFragment"
    }
}
class ChildBindingFragment : BaseBindingViewFragment<FragmentChildBindingBinding>() {
    override fun onCreateView(
        inflater: LayoutInflater, container: ViewGroup?,
        savedInstanceState: Bundle?
    ): View? {
        return super.onCreateView(inflater, container, savedInstanceState)
    }
    companion object {
        @JvmStatic
        fun newInstance() = ChildBindingFragment()
    }
}
class TestBindingMainActivity3 : BaseBindingMainActivity2<ActivityTestBindingMain3Binding>() {
    override fun onCreate(savedInstanceState: Bundle?) {
        super.onCreate(savedInstanceState)
        val newInstance = ChildBindingFragment.newInstance()
        addFragment(
            supportFragmentManager,
            newInstance,
            isAllowStateLoss = true,
            frameId = R.id.frame
        )
    }
}
<?xml version="1.0" encoding="utf-8"?>
<FrameLayout xmlns:android="http://schemas.android.com/apk/res/android"
xmlns:tools="http://schemas.android.com/tools"
android:layout_width="match_parent"
android:layout_height="match_parent"
tools:context=".encapsulatviewbinding.ChildBindingFragment">
<TextView
android:layout_width="match_parent"
android:layout_height="match_parent"
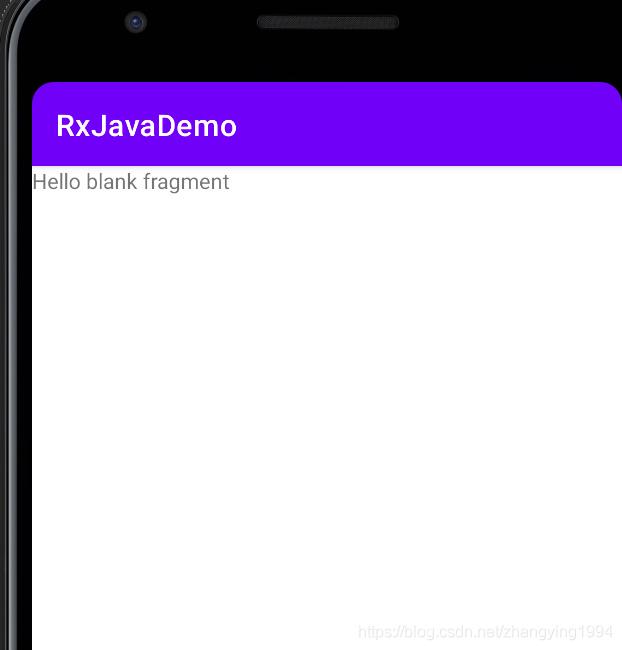
android:text="@string/hello_blank_fragment" />
</FrameLayout>
4.委托的方式
class TestViewBindingFragment2 : Fragment(R.layout.fragment_test_view_binding2) {
    private val binding by inflate<FragmentTestViewBinding2Binding>()
    override fun onViewCreated(view: View, savedInstanceState: Bundle?) {
        super.onViewCreated(view, savedInstanceState)
        binding.root
    }
    companion object {
        @JvmStatic
        fun newInstance() = TestViewBindingFragment2()
    }
}
inline fun <reified T : ViewBinding> Fragment.inflate() =
    FragmentViewBindingDelegate(T::class.java)
class FragmentViewBindingDelegate<T : ViewBinding>(private val clazz: Class<T>) :
    ReadOnlyProperty<Fragment, T> {
    private var binding: T? = null
    override fun getValue(thisRef: Fragment, property: KProperty<*>): T {
        if (binding == null) {
            binding =
                clazz.getMethod("bind", View::class.java).invoke(null, thisRef.requireView()) as T
            thisRef.viewLifecycleOwner.lifecycle.addObserver(object : LifecycleEventObserver {
                override fun onStateChanged(source: LifecycleOwner, event: Lifecycle.Event) {
                    if (event == Lifecycle.Event.ON_DESTROY) {
                        binding = null
                    }
                }
            })
        }
        return binding!!
    }
}
<?xml version="1.0" encoding="utf-8"?>
<FrameLayout xmlns:android="http://schemas.android.com/apk/res/android"
    xmlns:tools="http://schemas.android.com/tools"
    android:layout_width="match_parent"
    android:layout_height="match_parent"
    tools:context=".encapsulatviewbinding.TestViewBindingFragment2">
    <TextView
        android:layout_width="match_parent"
        android:layout_height="match_parent"
        android:text="8888888" />
</FrameLayout>

到此这篇关于Android ViewBinding使用介绍的文章就介绍到这了,更多相关Android ViewBinding内容请搜索自由互联以前的文章或继续浏览下面的相关文章希望大家以后多多支持自由互联!