本文实例为大家分享了Android实现秒表功能的具体代码,供大家参考,具体内容如下 今天为了给师弟们讲安卓,花了10分钟写了一个简易的秒表app,现贴出代码,供各位刚入门以及还未入
本文实例为大家分享了Android实现秒表功能的具体代码,供大家参考,具体内容如下
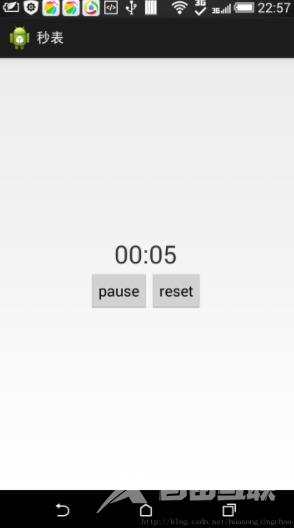
今天为了给师弟们讲安卓,花了10分钟写了一个简易的秒表app,现贴出代码,供各位刚入门以及还未入门的同学们参考
第一步:布局activity_main.xml:
<RelativeLayout xmlns:android="http://schemas.android.com/apk/res/android"
    xmlns:tools="http://schemas.android.com/tools"
    android:layout_width="match_parent"
    android:layout_height="match_parent"
    android:paddingBottom="@dimen/activity_vertical_margin"
    android:paddingLeft="@dimen/activity_horizontal_margin"
    android:paddingRight="@dimen/activity_horizontal_margin"
    android:paddingTop="@dimen/activity_vertical_margin"
    tools:context=".MainActivity" >

    <RelativeLayout
        android:layout_width="wrap_content"
        android:layout_height="wrap_content"
        android:layout_centerInParent="true" >

        <LinearLayout
            android:id="@+id/top"
            android:layout_width="wrap_content"
            android:layout_height="wrap_content"
            android:layout_centerHorizontal="true"
            android:orientation="horizontal" >

            <TextView
                android:id="@+id/mint"
                android:layout_width="wrap_content"
                android:layout_height="wrap_content"
                android:text="00"
                android:textSize="30dp" />

            <TextView
                android:layout_width="wrap_content"
                android:layout_height="wrap_content"
                android:text=":"
                android:textSize="30dp" />

            <TextView
                android:id="@+id/sec"
                android:layout_width="wrap_content"
                android:layout_height="wrap_content"
                android:text="00"
                android:textSize="30dp" />
        </LinearLayout>

        <LinearLayout
            android:layout_width="wrap_content"
            android:layout_height="wrap_content"
            android:layout_below="@+id/top"
            android:layout_centerHorizontal="true"
            android:orientation="horizontal" >

            <Button
                android:id="@+id/start"
                android:layout_width="wrap_content"
                android:layout_height="wrap_content"
                android:text="start" />

            <Button
                android:id="@+id/reset"
                android:layout_width="wrap_content"
                android:layout_height="wrap_content"
                android:text="reset" />
        </LinearLayout>
    </RelativeLayout>

</RelativeLayout>
第二步:实现秒表功能
package com.example.second;
import android.os.Bundle;
import android.os.Handler;
import android.os.Message;
import android.app.Activity;
import android.view.Menu;
import android.view.View;
import android.view.View.OnClickListener;
import android.widget.Button;
import android.widget.TextView;
public class MainActivity extends Activity {
    private TextView mint;
    private TextView sec;
    private Button start;
    private Button reset;
    private long timeusedinsec;
    private boolean isstop = false;
    private Handler mHandler = new Handler() {
        /*
         * edit by yuanjingchao 2014-08-04 19:10
         */
        @Override
        public void handleMessage(Message msg) {
            // TODO Auto-generated method stub
            super.handleMessage(msg);
            switch (msg.what) {
            case 1:
                // 添加更新ui的代码
                if (!isstop) {
                    updateView();
                    mHandler.sendEmptyMessageDelayed(1, 1000);
                }
                break;
            case 0:
                break;
            }
        }

    };

    @Override
    protected void onCreate(Bundle savedInstanceState) {
        super.onCreate(savedInstanceState);
        setContentView(R.layout.activity_main);
        initViews();
    }
    private void initViews() {
        mint = (TextView) findViewById(R.id.mint);
        sec = (TextView) findViewById(R.id.sec);
        reset = (Button) findViewById(R.id.reset);
        start = (Button) findViewById(R.id.start);
        reset.setOnClickListener(new OnClickListener() {
            @Override
            public void onClick(View arg0) {
                // TODO Auto-generated method stub

                mint.setText("00");
                sec.setText("00");
                start.setText("start");
                timeusedinsec=0;
                isstop=true;
            }
        });
        start.setOnClickListener(new OnClickListener() {
            @Override
            public void onClick(View arg0) {
                // TODO Auto-generated method stub
                mHandler.removeMessages(1);
                String aaa=start.getText().toString();
                if(aaa.equals("start")){
                    mHandler.sendEmptyMessage(1);
                    isstop = false;
                    start.setText("pause");
                }else {
                    mHandler.sendEmptyMessage(0);
                    isstop = true;
                    start.setText("start");
                }

            }
        });
    }
    private void updateView() {
        timeusedinsec += 1;
        int minute = (int) (timeusedinsec / 60)%60;
        int second = (int) (timeusedinsec % 60);
        if (minute < 10)
            mint.setText("0" + minute);
        else
            mint.setText("" + minute);
        if (second < 10)
            sec.setText("0" + second);
        else
            sec.setText("" + second);
    }
}
以上就是本文的全部内容,希望对大家的学习有所帮助,也希望大家多多支持自由互联。