剪切代码: Rectangle{ id:idRectRound width: 250 height: 250 radius: width/2 anchors.centerIn: parent color: "#ff00ff" visible: false } Image { id: idRectImg width: 250 height: 250 anchors.centerIn: parent source: "qrc:/res/demo.png" visi
剪切代码:
Rectangle{
                    id:idRectRound
                    width: 250
                    height: 250
                    radius: width/2
                    anchors.centerIn: parent
                    color: "#ff00ff"
                    visible: false
                }
                Image {
                    id: idRectImg
                    width: 250
                    height: 250
                    anchors.centerIn: parent
                    source: "qrc:/res/demo.png"
                    visible: false
                    smooth: true
                }
                OpacityMask {
                    anchors.fill: idRectRound
                    source: idRectImg
                    maskSource: idRectRound
               }
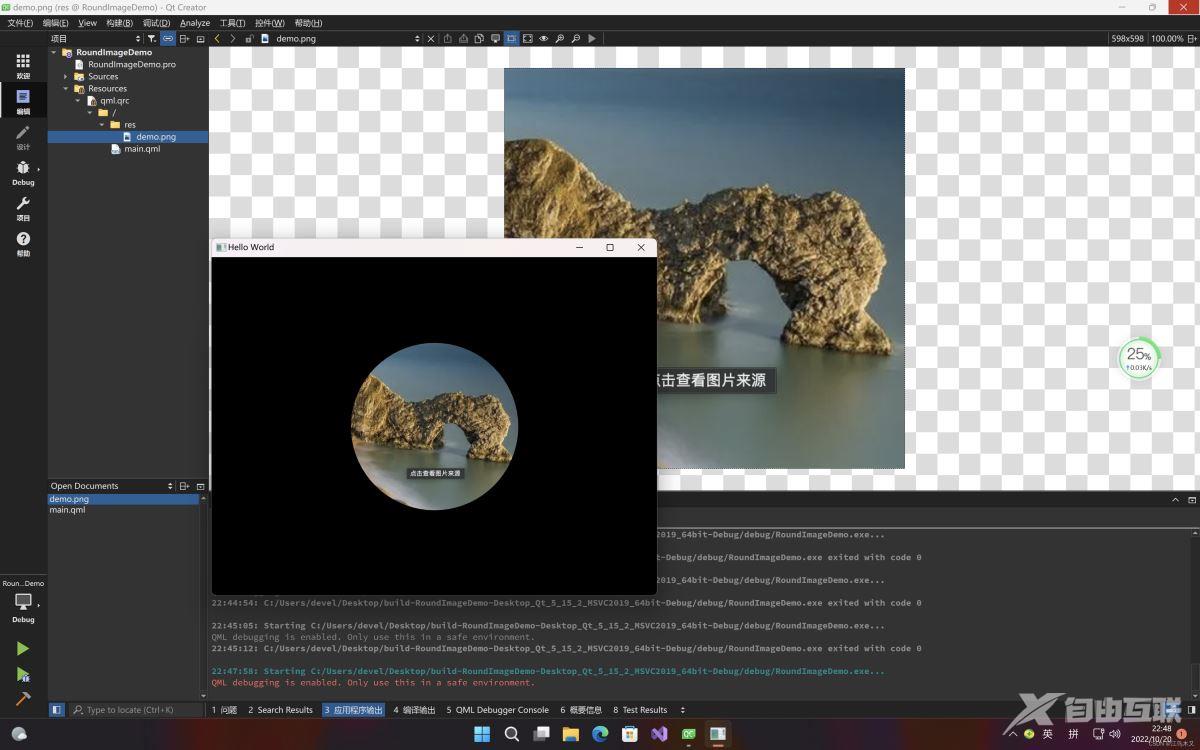
完整QML源码
import QtQuick 2.12
import QtQuick.Window 2.12
import QtGraphicalEffects 1.0

Window {
    width: 640
    height: 480
    visible: true
    title: qsTr("Hello World")
    color:"black"
    Rectangle{
                        id:idRectRound
                        width: 250
                        height: 250
                        radius: width/2
                        anchors.centerIn: parent
                        color: "#ff00ff"
                        visible: false
                        border.color: "yellow"
                        border.width: 2
                    }
                    Image {
                        id: idRectImg
                        anchors.centerIn: parent
                        source: "qrc:/res/demo.png"
                        visible: false
                        smooth: true
                    }
                    OpacityMask {
                        anchors.fill: idRectRound
                        source: idRectImg
                        maskSource: idRectRound
                   }
}
C++代码:
#include <QGuiApplication>
#include <QQmlApplicationEngine>


int main(int argc, char *argv[])
{
#if QT_VERSION < QT_VERSION_CHECK(6, 0, 0)
    QCoreApplication::setAttribute(Qt::AA_EnableHighDpiScaling);
#endif
    QGuiApplication app(argc, argv);

    QQmlApplicationEngine engine;
    const QUrl url(QStringLiteral("qrc:/main.qml"));
    QObject::connect(&engine, &QQmlApplicationEngine::objectCreated,
                     &app, [url](QObject *obj, const QUrl &objUrl) {
        if (!obj && url == objUrl)
            QCoreApplication::exit(-1);
    }, Qt::QueuedConnection);
    engine.load(url);

    return app.exec();
}
到此这篇关于QT圆形图像剪切的文章就介绍到这了,更多相关qt图像剪切内容请搜索自由互联以前的文章或继续浏览下面的相关文章希望大家以后多多支持自由互联!