目录
- 一、开发工具
- 1、软件介绍
- 2、Android JDK配置
- 3、Android Gradle配置
- 4、Android API配置
- 5、项目依赖配置
- 二、项目细节详情
- 1、andriodmanifest.xml配置详情
- 2、ExampleInstrumentedTest配置详情
- 3、ExampleUnitTest配置详情
- 4、Utils配置详情
- 5、activity_main.xml配置详情
- 6、Gradle Scripts配置详情
- build.gradle(Project)
- build.gradle(Module)
- 总结
提示:以下是本篇文章正文内容,下面案例可供参考
一、开发工具
使用软件Android Studio 4.1版本
1、软件介绍
Android Studio 是基于 IntelliJ IDEA 的官方 Android 应用开发集成开发环境 (IDE)。除了 IntelliJ 强大的代码编辑器和开发者工具,Android Studio 提供了更多可提高 Android 应用构建效率的功能,例如:
基于 Gradle 的灵活构建系统
快速且功能丰富的模拟器
可针对所有 Android 设备进行开发的统一环境
Instant Run,可将变更推送到正在运行的应用,无需构建新的 APK
可帮助您构建常用应用功能和导入示例代码的代码模板和 GitHub 集成
丰富的测试工具和框架
可捕捉性能、易用性、版本兼容性以及其他问题的 Lint 工具
C++ 和 NDK 支持
内置对 Google 云端平台的支持,可轻松集成 Google Cloud Messaging 和 App 引擎
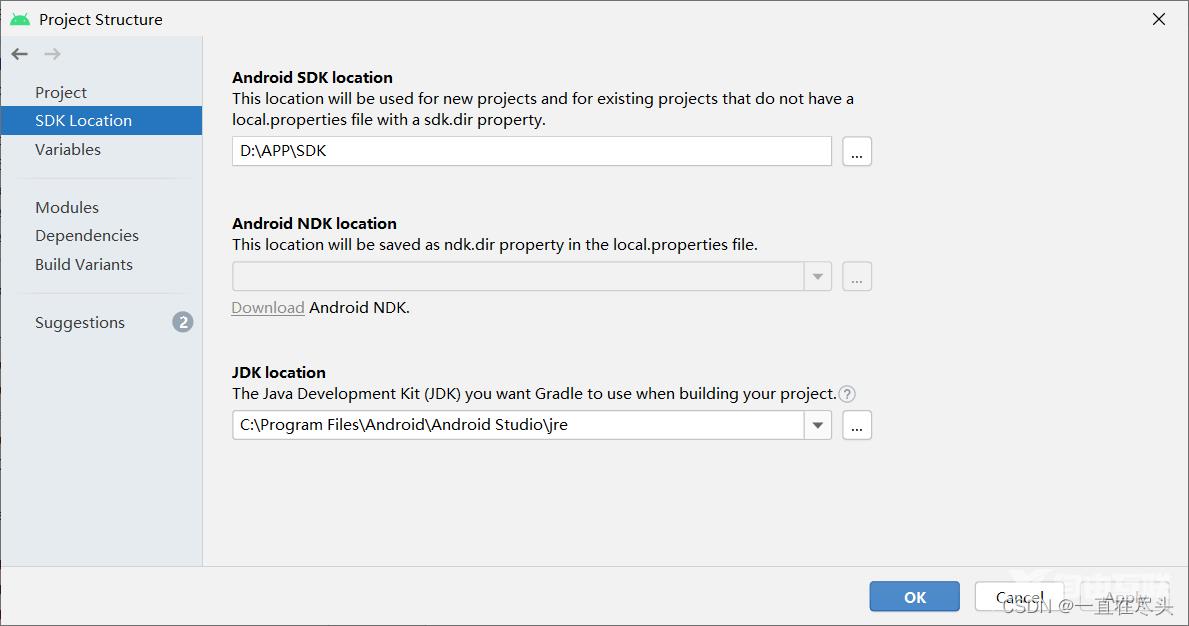
2、Android JDK配置
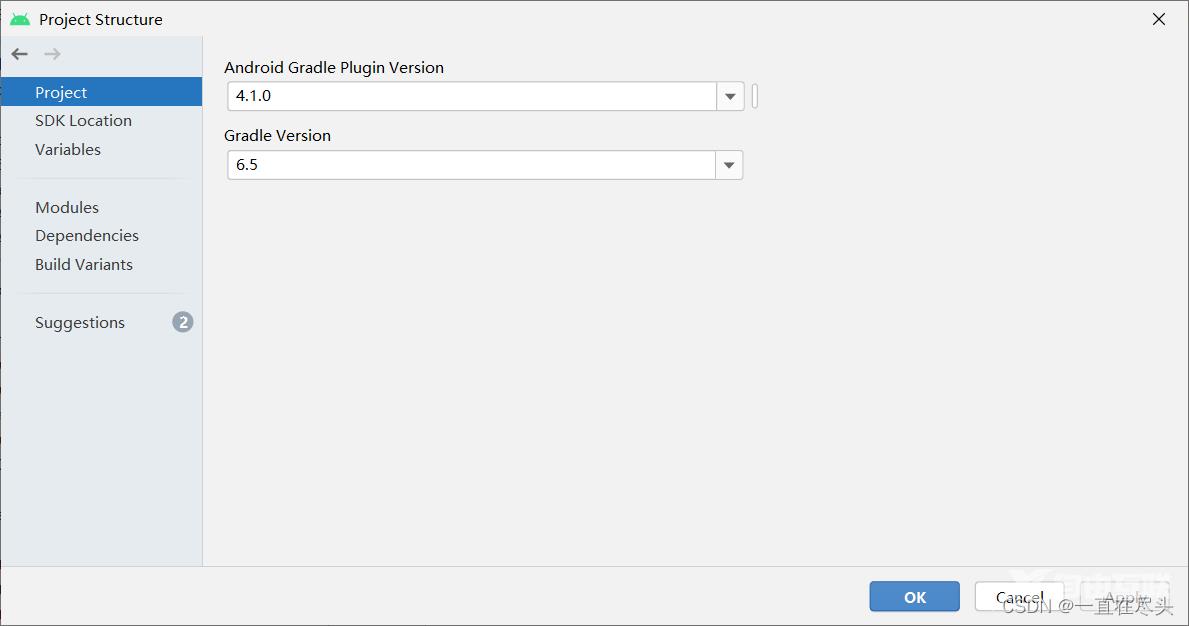
3、Android Gradle配置
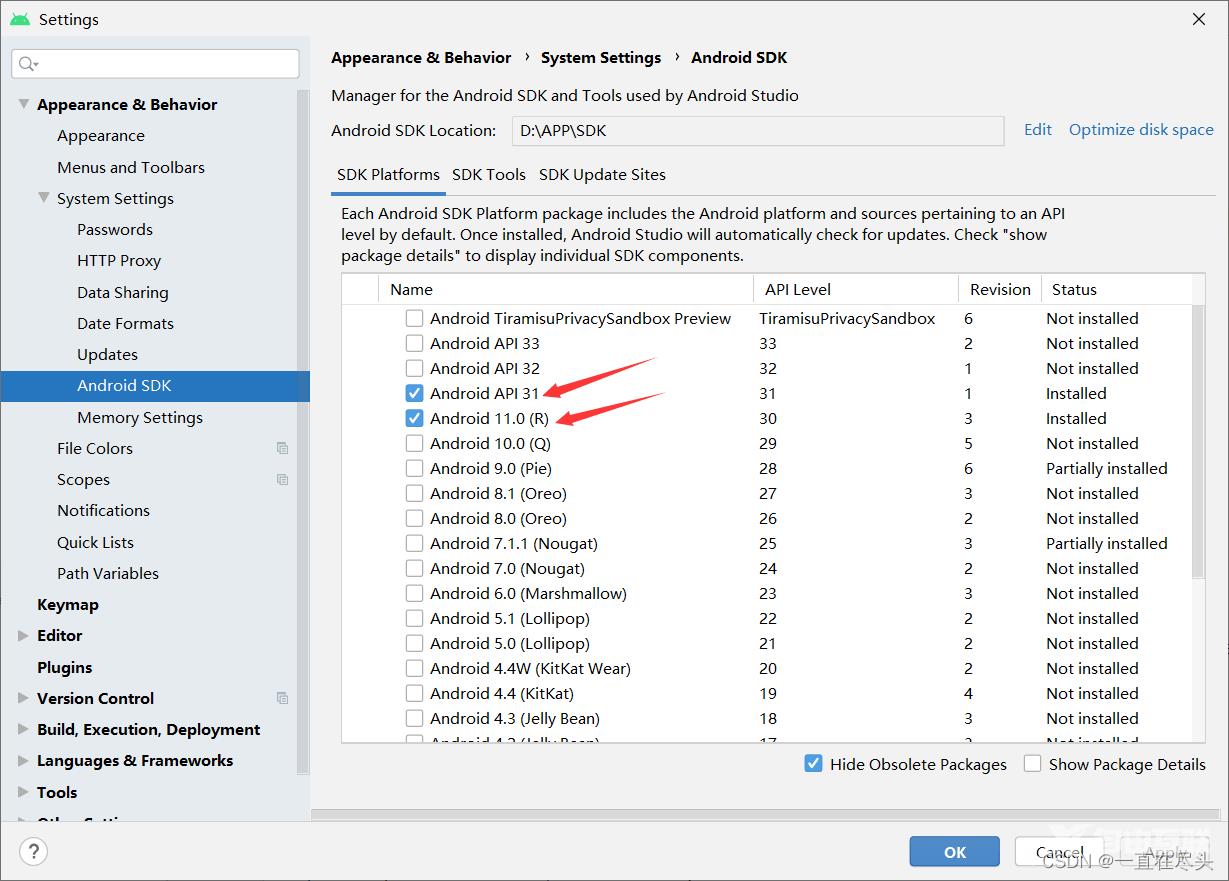
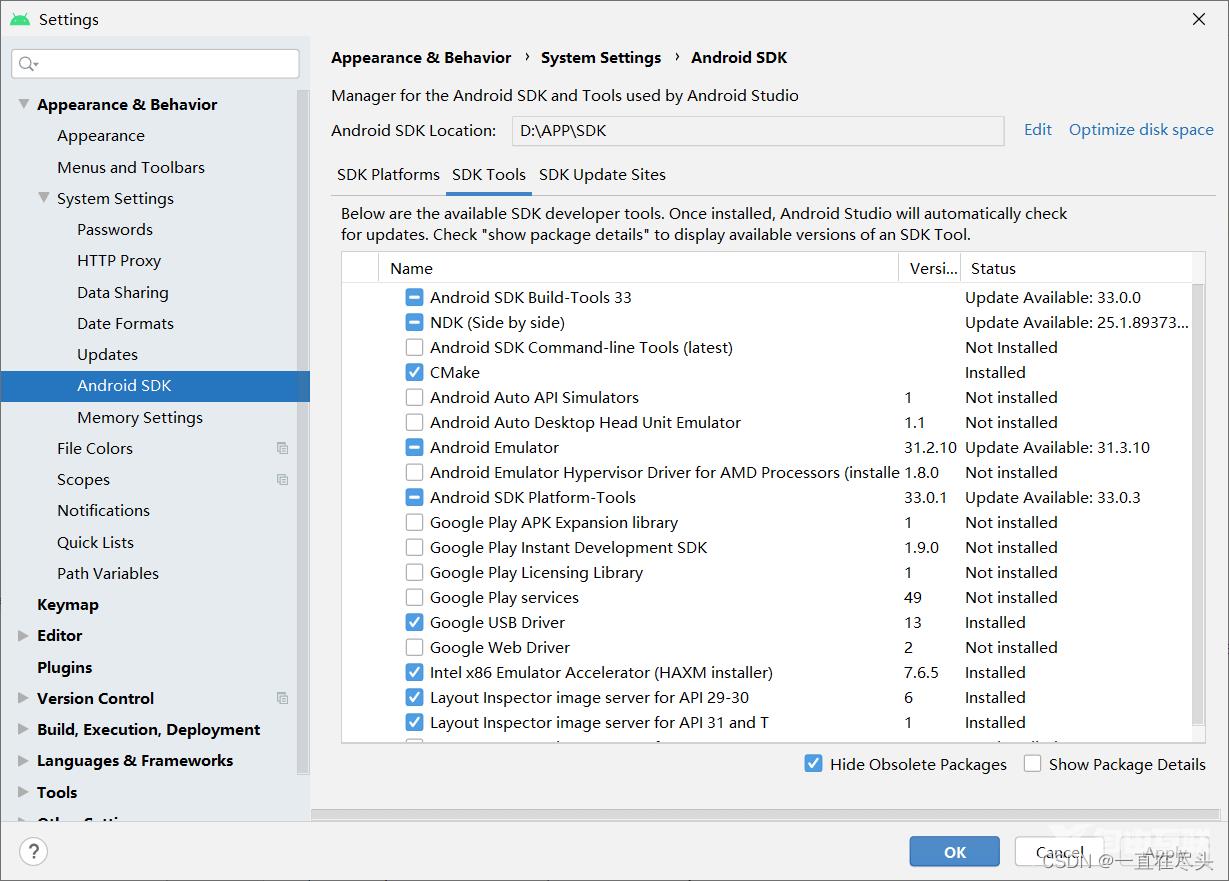
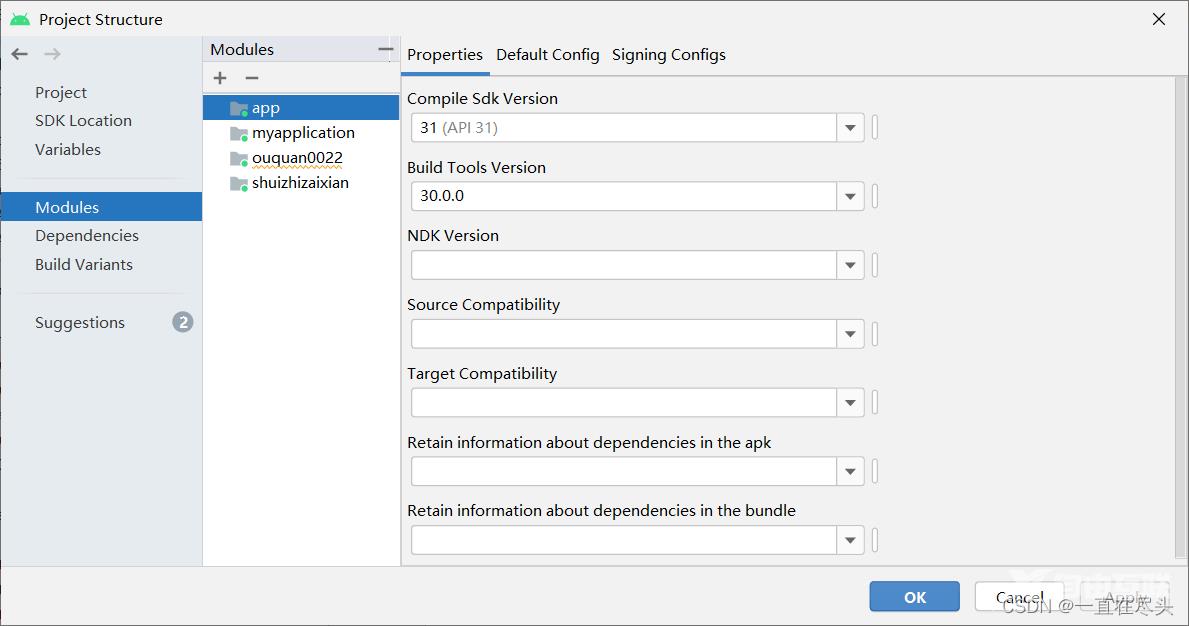
4、Android API配置
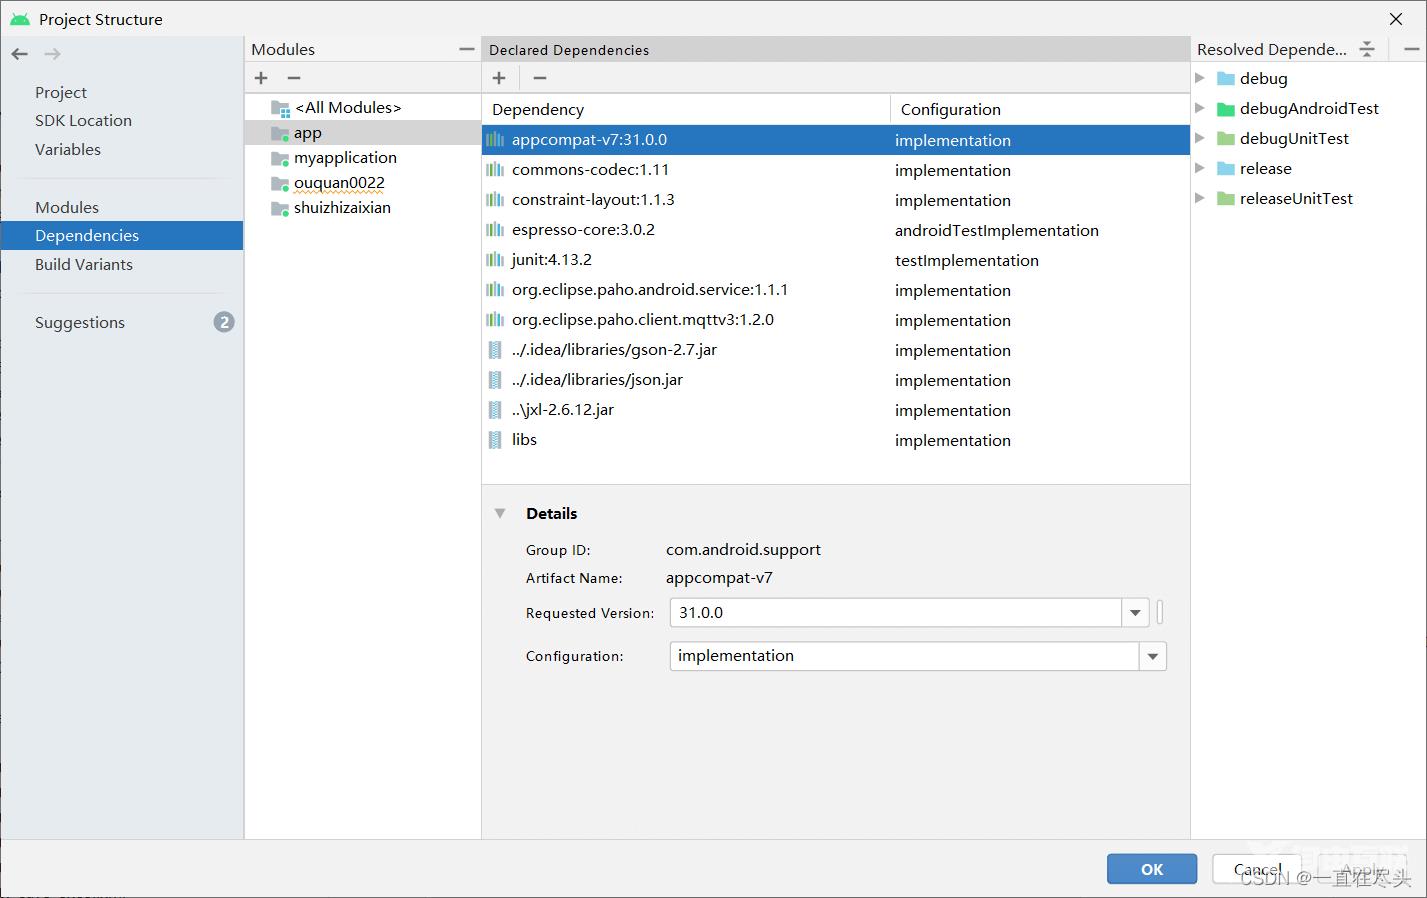
5、项目依赖配置
二、项目细节详情
1、andriodmanifest.xml配置详情
<?xml version="1.0" encoding="utf-8"?>
<manifest xmlns:android="http://schemas.android.com/apk/res/android"
    package="com.groundspace.lampmqtt">
    <!-- Permissions the Application Requires -->
    <uses-permission android:name="android.permission.WAKE_LOCK" />
    <uses-permission android:name="android.permission.WRITE_EXTERNAL_STORAGE" />
    <uses-permission android:name="android.permission.ACCESS_NETWORK_STATE" />
    <!--<uses-permission android:name="android.permission.READ_PHONE_STATE" />-->
    <uses-permission android:name="android.permission.READ_EXTERNAL_STORAGE" />
    <uses-permission android:name="android.permission.INTERNET" />
    <uses-permission android:name="android.permission.RECEIVE_BOOT_COMPLETED" />
    <application
        android:allowBackup="true"
        android:icon="@mipmap/ic_launcher"
        android:label="@string/app_name"
        android:roundIcon="@mipmap/ic_launcher_round"
        android:supportsRtl="true"
        android:requestLegacyExternalStorage="true"
        android:screenOrientation="sensor"
        android:theme="@style/AppTheme">
        <activity android:name="com.groundspace.lampmqtt.MainActivity">
            <intent-filter>
                <action android:name="android.intent.action.MAIN" />
                <category android:name="android.intent.category.LAUNCHER" />
            </intent-filter>
        </activity>
        <receiver
            android:name=".BootBroadcastReceiver"
            android:enabled="true"
            android:permission="android.permission.RECEIVE_BOOT_COMPLETED" >
            <intent-filter>
                <action android:name="android.intent.action.BOOT_COMPLETED" />

                <category android:name="android.intent.category.DEFAULT" />
            </intent-filter>
        </receiver>
        <activity android:name=".Jieshou"/>
        <service android:name="org.eclipse.paho.android.service.MqttService">
        </service>
    </application>
</manifest>
2、ExampleInstrumentedTest配置详情
package com.groundspace.lampmqtt;
import android.content.Context;
import androidx.test.InstrumentationRegistry;
import androidx.test.runner.AndroidJUnit4;
import org.junit.Test;
import org.junit.runner.RunWith;
import static org.junit.Assert.assertEquals;
/**
 * Instrumented test, which will execute on an Android device.
 *
 * @see <a href="http://d.android.com/tools/testing" rel="external nofollow"  rel="external nofollow" >Testing documentation</a>
 */
@RunWith(AndroidJUnit4.class)
public class ExampleInstrumentedTest {
    @Test
    public void useAppContext() {
        // Context of the app under test.
        Context appContext = InstrumentationRegistry.getTargetContext();
        assertEquals("com.groundspace.lampmqtt", appContext.getPackageName());
    }
}
3、ExampleUnitTest配置详情
package com.groundspace.lampmqtt;
import org.junit.Test;
import static org.junit.Assert.*;
/**
 * Example local unit test, which will execute on the development machine (host).
 *
 * @see <a href="http://d.android.com/tools/testing" rel="external nofollow"  rel="external nofollow" >Testing documentation</a>
 */
class ExampleUnitTest {
    @Test
    public void addition_isCorrect() {
        assertEquals(4, 2 + 2);
    }
}
4、Utils配置详情
package com.groundspace.lampmqtt;
import javax.crypto.Mac;
import javax.crypto.SecretKey;
import javax.crypto.spec.SecretKeySpec;
public class Utils {
    public static final String bytesToHexString(byte[] bArray) {
        StringBuffer sb = new StringBuffer(bArray.length);
        String sTemp;
        for (int i = 0; i < bArray.length; i++) {
            sTemp = Integer.toHexString(0xFF & bArray[i]);
            if (sTemp.length() < 2) {
                sb.append(0);
            }
            sb.append(sTemp.toUpperCase());
        }
        return sb.toString();
    }
    public static String encryptHMAC(String signMethod, String content, String key) throws Exception {
        SecretKey secretKey = new SecretKeySpec(key.getBytes("utf-8"), signMethod);
        Mac mac = Mac.getInstance(secretKey.getAlgorithm());
        mac.init(secretKey);
        byte[] data = mac.doFinal(content.getBytes("utf-8"));
        return bytesToHexString(data);
    }
}
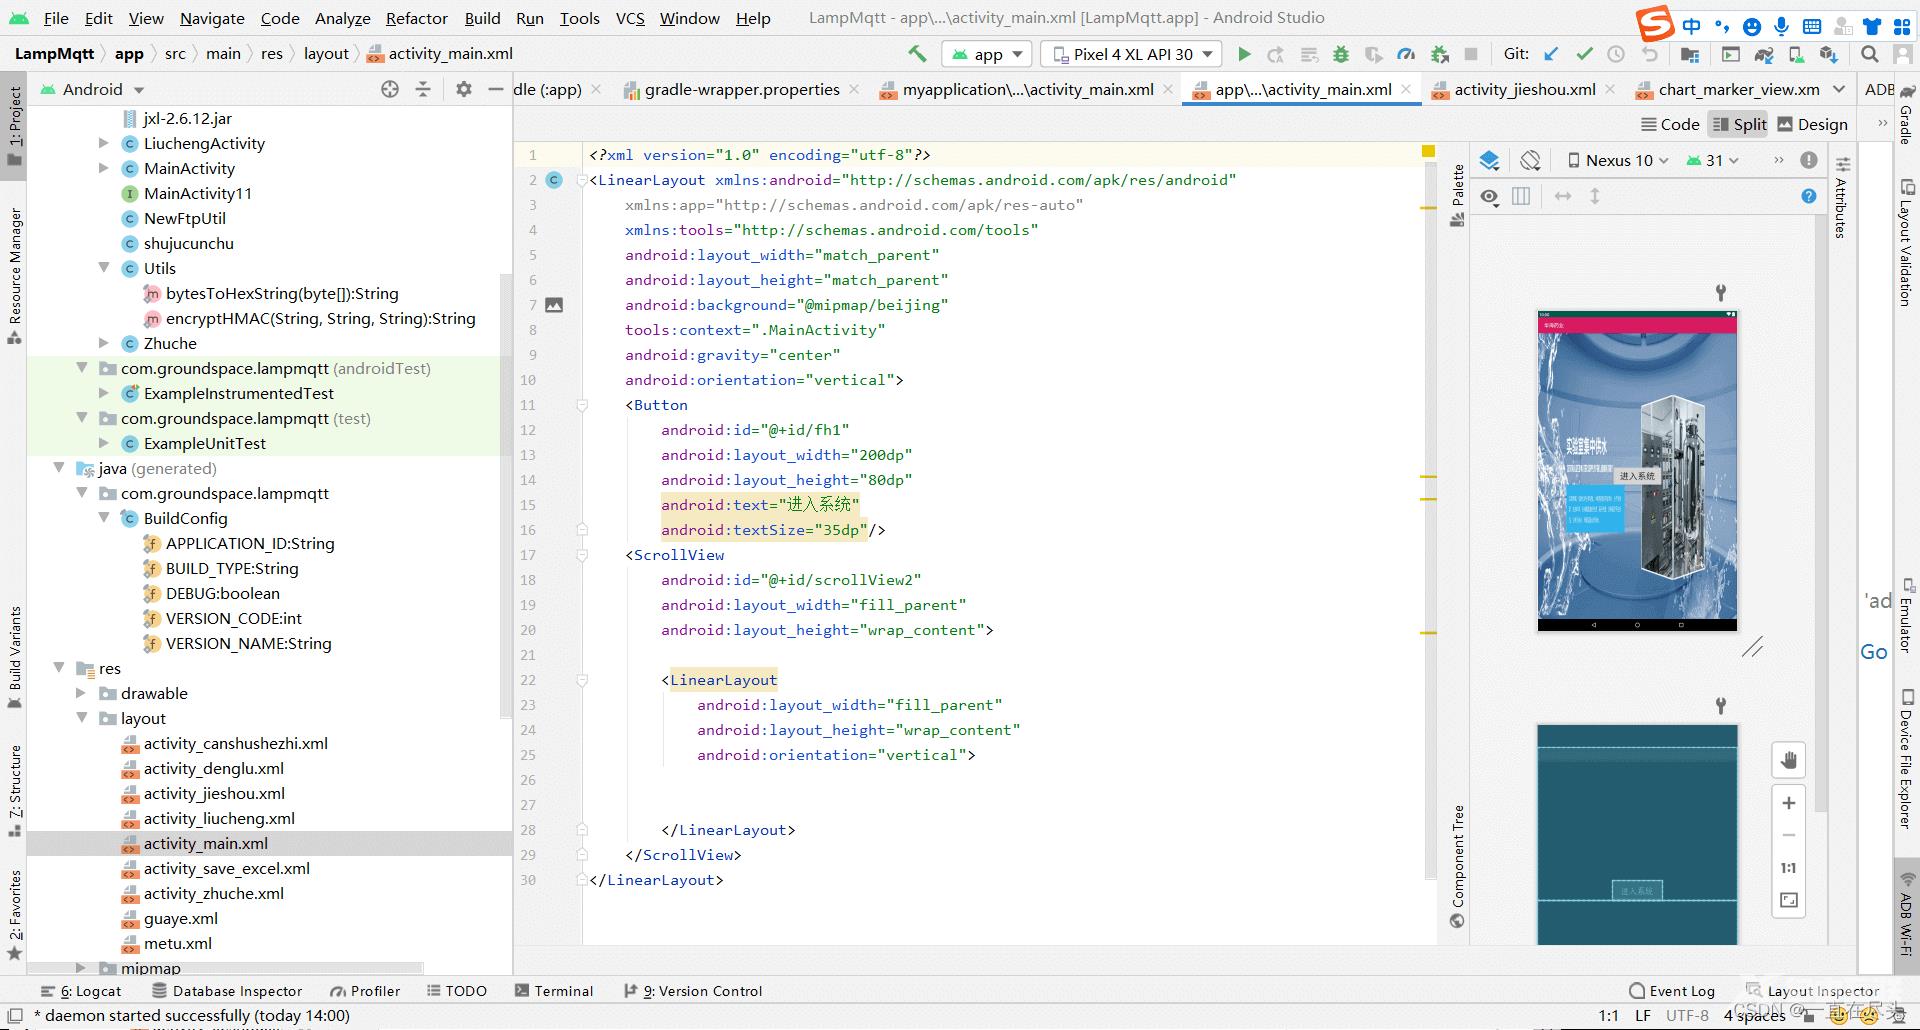
5、activity_main.xml配置详情
<?xml version="1.0" encoding="utf-8"?>
<LinearLayout xmlns:android="http://schemas.android.com/apk/res/android"
    xmlns:app="http://schemas.android.com/apk/res-auto"
    xmlns:tools="http://schemas.android.com/tools"
    android:layout_width="match_parent"
    android:layout_height="match_parent"
    android:background="@mipmap/beijing"
    tools:context=".MainActivity"
    android:orientation="vertical">
    <LinearLayout
        android:singleLine="true"
        android:layout_width="match_parent"
        android:layout_height="wrap_content"
        android:orientation="horizontal"
        android:paddingLeft="120dp"
        android:paddingTop="85dp">
    <ImageView
        android:layout_width="200dp"
        android:layout_height="80dp"
        android:src="@drawable/yaoquan"
        android:gravity="left"
      />
    </LinearLayout>
    <LinearLayout
        android:singleLine="true"
        android:layout_width="match_parent"
        android:layout_height="wrap_content"
        android:orientation="horizontal"
        android:paddingLeft="380dp"
        android:paddingTop="200dp">
    <Button
        android:id="@+id/fh1"
        android:layout_width="200dp"
        android:layout_height="80dp"
        android:text="进入系统"
        android:textSize="35dp"/>
    </LinearLayout>
    <ScrollView
        android:id="@+id/scrollView2"
        android:layout_width="fill_parent"
        android:layout_height="wrap_content">
        <LinearLayout
            android:layout_width="fill_parent"
            android:layout_height="wrap_content"
            android:orientation="vertical">
        </LinearLayout>
    </ScrollView>
</LinearLayout>
6、Gradle Scripts配置详情
build.gradle(Project)
// Top-level build file where you can add configuration options common to all sub-projects/modules.
buildscript {
repositories {
google()
jcenter()
}
dependencies {
classpath 'com.android.tools.build:gradle:4.1.0'
// NOTE: Do not place your application dependencies here; they belong
// in the individual module build.gradle files
}
}allprojects {
repositories {
google()
jcenter()
maven {
url "https://repo.eclipse.org/content/repositories/paho-snapshots/"
}
}
}task clean(type: Delete) {
delete rootProject.buildDir
}
build.gradle(Module)
apply plugin: 'com.android.application'
android {
compileSdkVersion 31
defaultConfig {
applicationId "com.groundspace.lampmqtt"
minSdkVersion 14
targetSdkVersion 31
versionCode 1
versionName "1.0"
testInstrumentationRunner "android.support.test.runner.AndroidJUnitRunner"
}
buildTypes {
release {
minifyEnabled false
proguardFiles getDefaultProguardFile('proguard-android-optimize.txt'), 'proguard-rules.pro'
}
}
buildToolsVersion '30.0.0'
}dependencies {
implementation 'org.eclipse.paho:org.eclipse.paho.client.mqttv3:1.2.0'
implementation group: 'commons-codec', name: 'commons-codec', version: '1.11'
implementation fileTree(dir: 'libs', include: ['*.jar'])
//noinspection GradleCompatible
implementation 'com.android.support:appcompat-v7:31.0.0'
implementation 'com.android.support.constraint:constraint-layout:1.1.3'
implementation 'org.eclipse.paho:org.eclipse.paho.android.service:1.1.1'
implementation files('..\\jxl-2.6.12.jar')
testImplementation 'junit:junit:4.13.2'
androidTestImplementation 'com.android.support.test.espresso:espresso-core:3.0.2'
implementation files('../.idea/libraries/gson-2.7.jar')
implementation files('../.idea/libraries/json.jar')
}
总结
以上就是今天要讲的内容,本文仅仅简单介绍了Android Studio 4.1写设备APP的配置,而Android Studio 4.1提供了大量能使我们快速便捷地开发客户端的具体部署和方法。
到此这篇关于设备APP开发环境配置细节介绍的文章就介绍到这了,更多相关设备APP内容请搜索自由互联以前的文章或继续浏览下面的相关文章希望大家以后多多支持自由互联!