目录
- 调用api接口实现数据的渲染及详情
- vue3常用api梳理
- setup参数
- 生命周期
- 响应式数据 ref、reactive
- coumputed
- watch && watchEffect
- 获取元素
- this不可用
调用api接口实现数据的渲染及详情
首先新建一个项目
yarn create vite vue3-template --template vue
然后下载相应的api
npm i axios router
首先配置
App.vue
<script setup>
</script>
<template>
  <router-view></router-view>
</template>
<style>
</style>
main.js
import { createApp } from 'vue'
import App from './App.vue'
import router from './router'
createApp(App).use(router).mount('#app')
封装axios src/utils/request.js
import axios from 'axios'
const instance = axios.create({
    baseURL:"https://cnodejs.org/api/v1"
})
export default instance
在src/api/topics.js 中请求
import axios from '../utils/request';
//请求列表的函数
export const getTopics = (params) => axios("/topics",{params})
//根据id获取详情
export const getTopic = (id,params) => axios.get(`/topic/${id}`,{params})
新建hooks src/componsables/useTopics.js
import { ref,onMounted } from 'vue'
import { getTopics } from '../api/topics'
export default function useTopics(){
    /**
 * 数据渲染功能
 */
//声明 数据
const topics = ref([])
//请求数据
onMounted(async () => {
    const res =await getTopics()
    topics.value = res.data.data
})
return {
    topics
}
}
新建hooks src/componsables/useTopic.js
import { useRouter } from 'vue-router'
export default function useTopics(){
  //跳转
const router = useRouter()
const go = (id) =>{
    router.push("/detail?id=" + id)
}
return {
    go
}
}
在 src 下 新建 /views/Index.vue
<template>
  <div>
      <ul>
          <li v-for="topic in topics" :key="topic.id" @click="go(topic.id)">
           {{topic.title}}
          </li>
      </ul>
  </div>
</template>
<script setup>
// import { onMounted,ref} from 'vue';
// import { getTopics } from '../api/topics'
// import { useRouter } from 'vue-router'
// /**
//  * 数据渲染功能
//  */
// //声明 数据
// const topics = ref([])
// //请求数据
// onMounted(async () => {
//     const res =await getTopics()
//     topics.value = res.data.data
// })
//数据渲染
import useTopics from '../componsables/useTopics'
const { topics } = useTopics();
//跳转
// const router = useRouter()
// const go = (id) =>{
//     router.push("/detail?id=" + id)
// }
//跳转
import useTopic from '../componsables/useTopic'
const { go } = useTopic();
</script>
<style>
</style>
在 src 下 新建 /views/Detail.vue
<template>
   <div>
     {{topic.title}}

     <!-- ?表示如果后续的属性不存在了 就不获取了 -->
     {{topic.author?.loginname}}
     {{topic.create_at}}
   </div>
</template>
<script setup>
 import { ref, onMounted } from 'vue';
 import { useRoute } from 'vue-router';
 import { getTopic } from '../api/topics';

 let topic = ref({})
 const route = useRoute()
 //获取id
 const { id } = route.query
 //拿着id进行数据的请求
 onMounted( async () => {
     const res = await getTopic(id)
     topic.value = res.data.data
 })
</script>
<style>
</style>
在src 下 新建 router/index.js
import { createWebHashHistory ,createRouter} from "vue-router"
import Index from '../views/Index.vue'
const routes = [
     {
         path:'/',
         component:Index
     },
     {
         path:'/detail',
         component:()=> import('../views/Detail.vue')
     },
     {
         path:"/store",
         component:()=> import('../views/Store.vue')
     }
]
 const router = createRouter({
    history:createWebHashHistory(),
    routes
})
export default router
即可实现数据的渲染以及跳转功能
vue3常用api梳理
setup参数
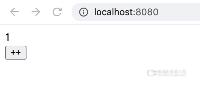
1.props
props 是响应式的,当传入新的 props 时,它将被更新。
示例如下:
//父组件
<template>
  <div>
    <com :num="num"></com>
    <button @click="add">++</button>
  </div>
</template>
<script>
import { ref } from 'vue';
import com from './components/com.vue';
export default {
  name: 'App',
  components: { com },
  setup() {
    const num = ref(1);
    const add = () => {
      num.value++
    }
    return {
      num,
      add
    }
  }
}
</script>
//子组件
<template>
  <div class="hello">
    {{num}}
  </div>
</template>
<script>
export default {
  props: {
    num: Number
  }
}
</script>
当点击按钮执行add方法,子组件num会自动更新。
2.context
attrs:Attribute (非响应式对象,等同于 $attrs)slots:插槽 (非响应式对象,等同于 $slots)emit:触发事件 (方法,等同于 $emit)expose:暴露公共 property (函数)
生命周期
示例如下:
<template>
  <div>
  </div>
</template>
<script>
import { onMounted } from 'vue';
export default {
  name: 'App',
  setup() {
    onMounted(() => {
      console.log('mounted')
    })
  }
}
</script>

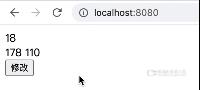
响应式数据 ref、reactive
ref:将一个原始数据类型(String、Number、BigInt、Boolean、Symbol、Null、Undefined)转换成一个带有响应式特性的数据类型。reactive:将一个对象(Object) 转换成带有响应式的特性。
示例如下:
<template>
  <div>
    <div>{{age}}</div>
    <div>{{data.height}} {{data.weight}}</div>
    <button @click="change">修改</button>
  </div>
</template>
<script>
import { reactive, ref } from 'vue';
export default {
  name: 'App',
  setup() {
    const age = ref(18);
    const data = reactive({
      sex: 1,
      height: 178,
      weight: 110
    })
    const change = () => {
      age.value = 20;
      data.height = 180;
      data.weight = 1111;
    }
    return {
      age,
      data,
      change
    }
  }
}
</script>
可能会觉得data.xxx 的写法太麻烦,那么我们可以使用torefs来解构。
torefs:可以将一个响应型对象(reactive) 转化为普通对象(obj),同时又把该对象中的每一个属性转化成对应的响应式属性(ref)。
示例如下,效果同上:
<template>
  <div>
    <div>{{age}}</div>
    <div>{{height}} {{weight}}</div>
    <button @click="change">修改</button>
  </div>
</template>
<script>
import { reactive, ref, toRefs } from 'vue';
export default {
  name: 'App',
  setup() {
    const age = ref(18);
    const data = reactive({
      sex: 1,
      height: 178,
      weight: 110
    })
    const change = () => {
      age.value = 20;
      data.height = 180;
      data.weight = 1111;
    }
    return {
      age,
      ...toRefs(data),
      change
    }
  }
}
</script>
在实际的开发过程中,给对象整体重新赋值的情况也屡见不鲜,倘若直接重新是不可以的,可以自行尝试,下面的一种比较推荐的写法,效果同上:
<template>
  <div>
    <div>{{content.height}} {{content.weight}}</div>
    <button @click="change">修改</button>
  </div>
</template>
<script>
import { reactive, toRefs } from 'vue';
export default {
  name: 'App',
  setup() {
    const data = reactive({
      content:{
        sex: 1,
        height: 178,
        weight: 110
      }
    })
    const change = () => {
      data.content ={
        sex: 2,
        height: 180,
        weight: 120
      }
    }
    return {
      ...toRefs(data),
      change
    }
  }
}
</script>
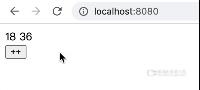
coumputed
<template>
  <div>
    <div>{{age}} {{age2}}</div>
    <button @click="add">++</button>
  </div>
</template>
<script>
import { ref, computed } from 'vue';
export default {
  name: 'App',
  setup() {
    const age = ref(18);
    const age2 = computed(() => {
      return age.value * 2
    })
    const add = () => {
      age.value++
    }
    return {
      age,
      age2,
      add
    }
  }
}
</script>
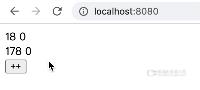
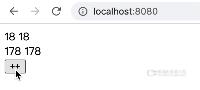
watch && watchEffect
watchEffect 它与 watch 的区别主要有以下几点:
- watchEffect不需要手动传入依赖
- watchEffect每次初始化时会执行一次回调函数来自动获取依赖
- watchEffect无法获取到原值,只能得到变化后的值
watch示例:
<template>
  <div>
    <div>{{age}} {{age2}}</div>
    <div>{{data.height}} {{data2.height}}</div>
    <button @click="add">++</button>
  </div>
</template>
<script>
import { ref, reactive, watch } from 'vue';
export default {
  name: 'App',
  setup() {
    const age = ref(18);
    const age2 = ref(0);
    const data = reactive({
      height: 178
    })
    const data2 = reactive({
      height: 0
    })

    /* eslint-disable */
    watch([age, ()=> data.height], ([newAge, newHeight], [oldAge, oldHeight]) =>{
      age2.value = oldAge;
      data2.height = oldHeight;
    })
    /* eslint-disable */
    const add = () => {
      age.value++,
      data.height++
    }
    return {
      age,
      age2,
      data,
      data2,
      add
    }
  }
}
</script>
watchEffect示例:
<template>
  <div>
    <div>{{age}} {{age2}}</div>
    <div>{{data.height}} {{data2.height}}</div>
    <button @click="add">++</button>
  </div>
</template>
<script>
import { ref, reactive, watchEffect } from 'vue';
export default {
  name: 'App',
  setup() {
    const age = ref(18);
    const age2 = ref(0);
    const data = reactive({
      height: 178
    })
    const data2 = reactive({
      height: 0
    })
    watchEffect(() => {
      age2.value = age.value;
      data2.height = data.height;
    })
    const add = () => {
      age.value++,
      data.height++
    }
    return {
      age,
      age2,
      data,
      data2,
      add
    }
  }
}
</script>
获取元素
获取单个元素使用ref(null),获取v-for中的ref数组需要绑定函数。
示例如下:
<template>
  <div>
    <div ref="name"></div>
    <div v-for="(val,index) in arr" :key="index" :ref="setItemRef"></div>
  </div>
</template>
<script>
import { ref, onMounted } from 'vue';
export default {
  name: 'App',
  setup() {
    const name = ref(null);
    const arr = new Array(10);
    const itemRefs = []
    const setItemRef = el => {
      if (el) {
        itemRefs.push(el)
      }
    }
    onMounted(() => {
      name.value.innerHTML = '风舞红枫';
      itemRefs.forEach((item, index) => {
        item.innerHTML = index;
      })
    })
    return {
      name,
      arr,
      setItemRef
    }
  }
}
</script>

this不可用
在 setup() 内部,this 不是该活跃实例的引用,因为 setup() 是在解析其它组件选项之前被调用的,所以 setup() 内部的 this 的行为与其它选项中的 this 完全不同。
可以使用下方语句代替
const {proxy} = getCurrentInstance()
以上为个人经验,希望能给大家一个参考,也希望大家多多支持易盾网络。