目录 1、nextTick 2、historyApiFallback 1、nextTick 官方解释:将回调推迟到下一个 DOM 更新周期之后执行。在更改了一些数据以等待 DOM 更新后立即使用它。 比如我们有下面的需求: 点击一个
目录
- 1、nextTick
- 2、historyApiFallback
1、nextTick
官方解释:将回调推迟到下一个 DOM 更新周期之后执行。在更改了一些数据以等待 DOM 更新后立即使用它。
比如我们有下面的需求:
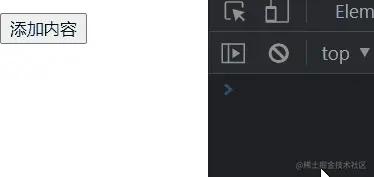
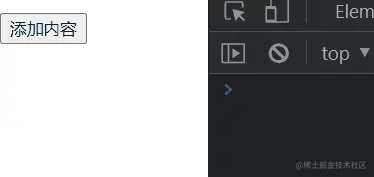
- 点击一个按钮,我们会修改在h2中显示的message;
- message被修改后,获取h2的高度;
<template>
  <div>
    <h3 class="title" ref="title">{{ message }}</h3>
    <button @click="handleClick">添加内容</button>
  </div>
</template>
<script setup>
import { ref } from 'vue'
const message = ref('')
const title = ref(null)

const handleClick = () => {
  message.value += 'NextTick!'
  console.log(title.value.offsetHeight)
}
</script>

<style scoped>
.title {
  width: 100px;
  word-break: break-all;
}
</style>
可以看到,上面每次打印的都是上一次元素内容的高度
实现上面的案例我们有三种方式:
- 方式一:在点击按钮后立即获取到h2的高度(错误的做法)
- 方式二:在updated生命周期函数中获取h2的高度(但是其他数据更新,也会执行该操作)
<template>
  <div>
    <h3 class="title" ref="title">{{ message }}</h3>
    <button @click="handleClick">添加内容</button>
  </div>
</template>

<script setup>
import { ref, onUpdated } from 'vue'

const message = ref('')
const title = ref(null)

const handleClick = () => {
  message.value += 'NextTick!'
}

onUpdated(() => {
  console.log(title.value.offsetHeight)
})
</script>

<style scoped>
.title {
  width: 100px;
  word-break: break-all;
}
</style>
方式三: 使用nextTick函数;
nextTick是如何做到的呢?
<template>
  <div>
    <h3 class="title" ref="title">{{ message }}</h3>
    <button @click="handleClick">添加内容</button>
  </div>
</template>
<script setup>
import { ref, nextTick } from 'vue'

const message = ref('')
const title = ref(null)

const handleClick = () => {
  message.value += 'NextTick!'

  // 更新 DOM
  nextTick(() => {
    console.log(title.value.offsetHeight)
  })
}
</script>

<style scoped>
.title {
  width: 100px;
  word-break: break-all;
}
</style>

2、historyApiFallback
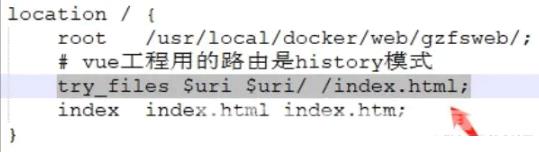
1.historyApiFallback是开发中一个非常常见的属性,它主要的作用是解决SPA页面在路由跳转之后,进行页面刷新时,返回404的错误。
2.boolean值:默认是false
- 如果设置为true,那么在刷新时,返回404错误时,会自动返回 index.html 的内容;
3.object类型的值,可以配置rewrites属性:
- 可以配置from来匹配路径,决定要跳转到哪一个页面;
4.事实上devServer中实现historyApiFallback功能是通过connect-history-api-fallback库的:
可以查看文档
代码在vue-cli脚手架项目的node_modules/@vue/cli-service/lib/commands/serve.js中:
const server = new WebpackDevServer(compiler, Object.assign({
  historyApiFallback: {
    disableDotRule: true
  }
}))
现在已经是vite打包工具了,上面是webpack的配置
自己配置可以在项目根目录下创建一个vue.config.js文件,在这个文件中进行配置:
module.exports = {
  configureWebpack: {
    devServer: {
      historyApiFallback: true
    }
  }
}
到此这篇关于vue3深入学习 nextTick和historyApiFallback的文章就介绍到这了,更多相关vue3 nextTick和historyApiFallback内容请搜索易盾网络以前的文章或继续浏览下面的相关文章希望大家以后多多支持易盾网络!