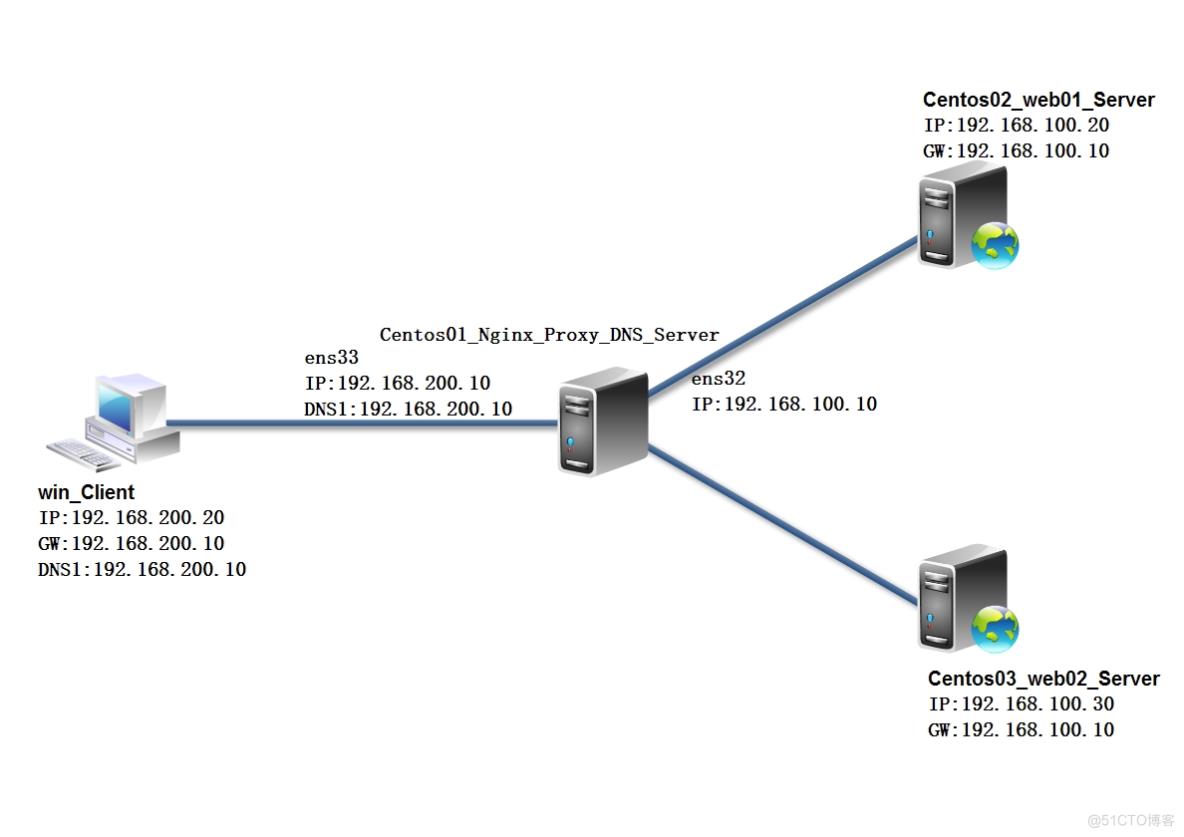
拓扑图:
推荐步骤:
- Nginx服务器开启路由功能,客户端和tomcat服务器配置IP地址设置正确
- 安装tomcat服务器配置网站
- 安装Nginx代理和负载均衡功能配置DNS服务器域名解析,客户端使用www.nlb.com负载均衡访问网站
实验步骤:
一、Nginx服务器开启路由功能,客户端和tomcat服务器配置IP地址设置正确
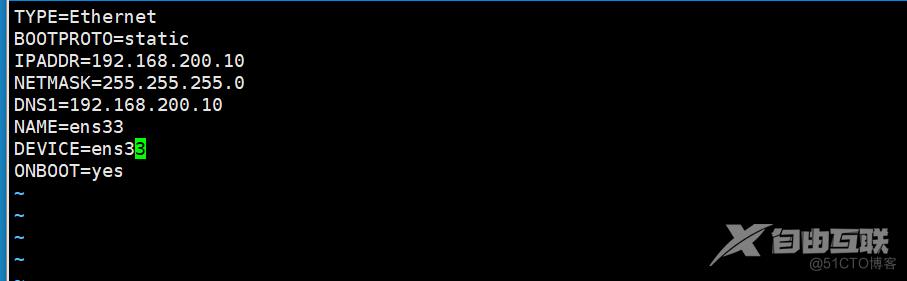
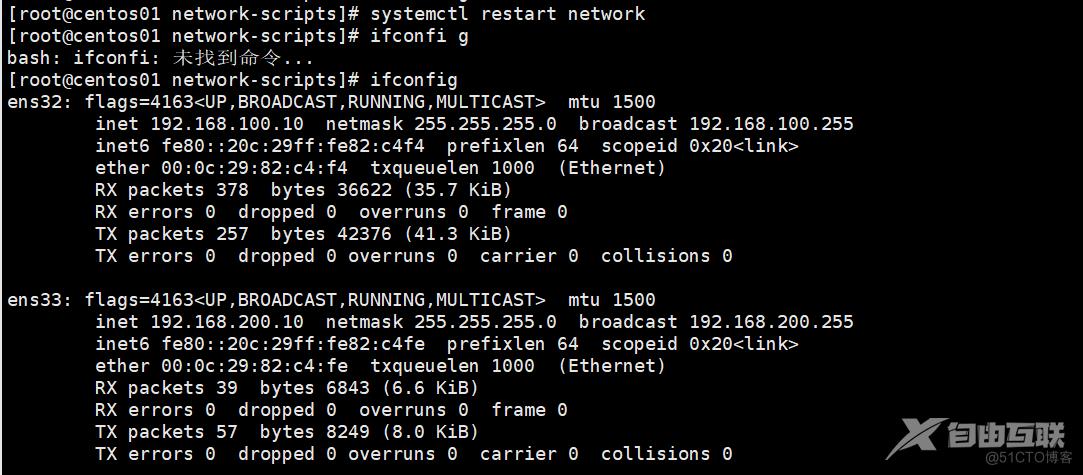
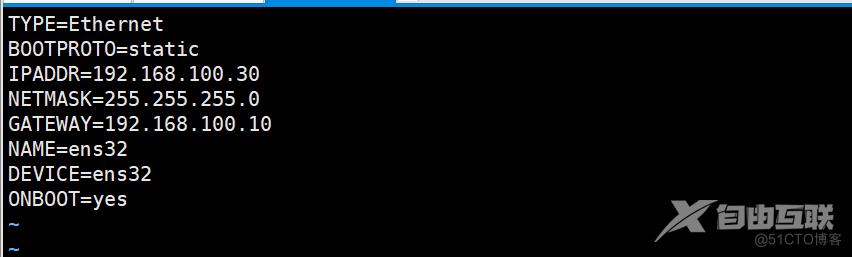
1、配置Nginx服务IP地址和路由转发功能
(1)Nginx服务器生成网卡配置文件

(2)配置内网网卡IP地址

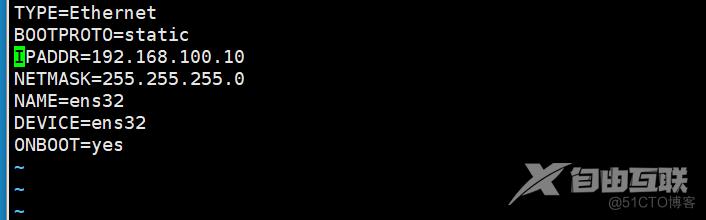
(3)配置外网网卡IP地址
vim ifcfg-ens33
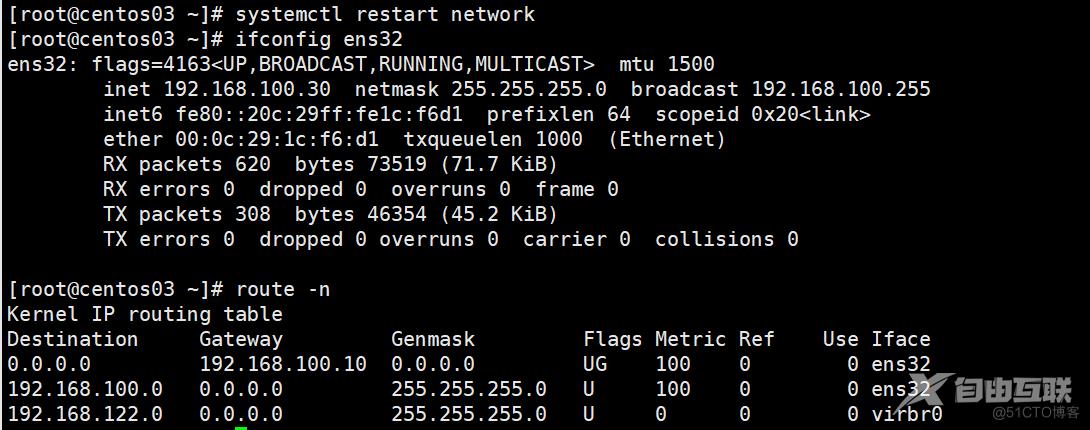
(4)重新启动服务查看IP地址
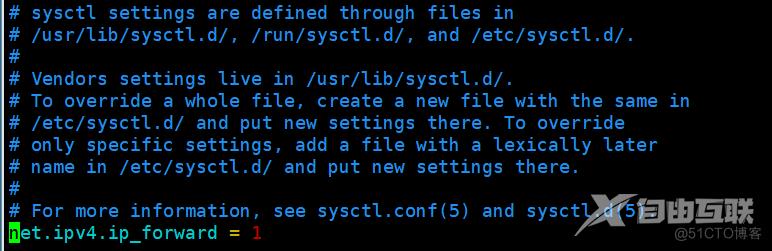
(5)配置路由转发功能开启路由功能


2、第一台tomcat服务器配置IP地址
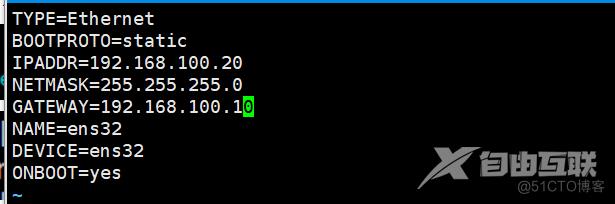
(1)第一台tomcat服务器配置IP地址

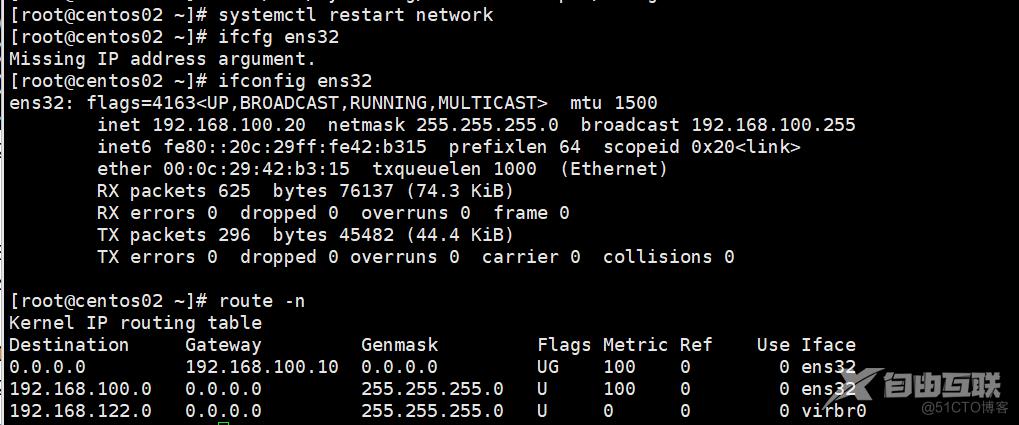
(2)重新启动网卡服务查看配置的网关
3、第二台tomcat服务器配置IP地址
(3)第二台tomcat服务器配置IP地址
vim /etc/sysconfig/network-scripts/ifcfg-ens32
(4)重新启动网卡服务查看配置的网关
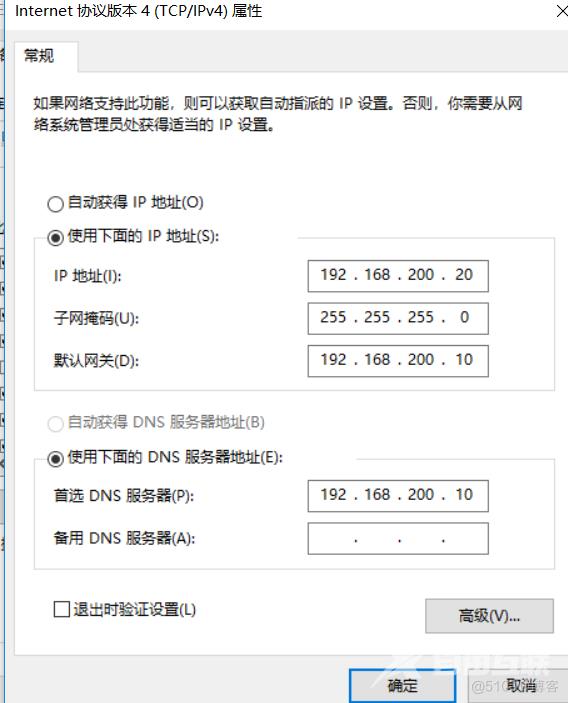
4、客户端配置IP地址和DNS
(1)客户端配置IP地址和DNS
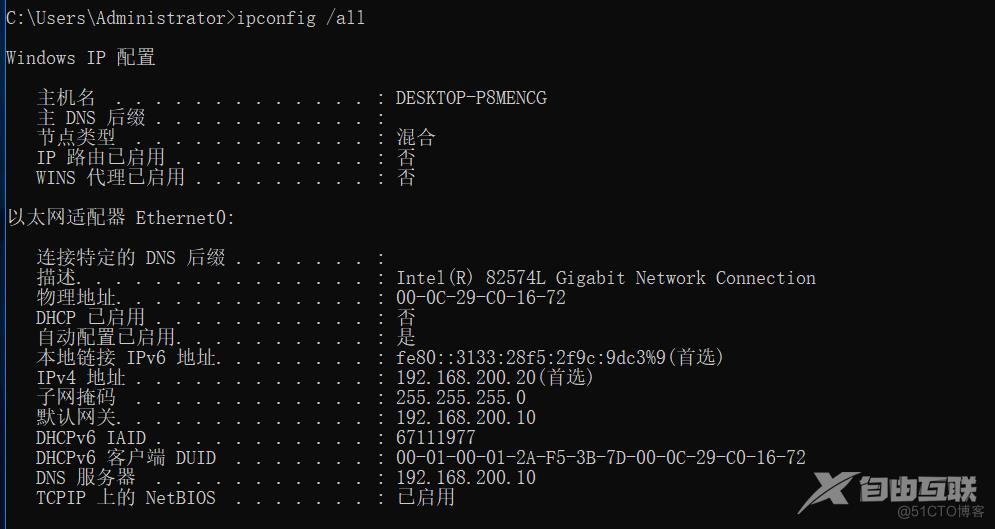
(2)查看配置的IP地址
二、安装tomcat服务器配置网站
1、安装第一台tomcat服务器
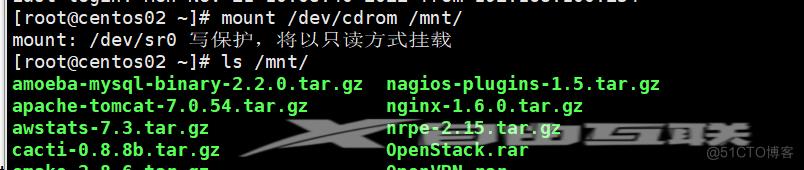
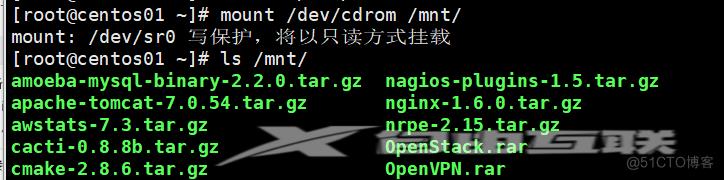
(1)切换到程序光盘

(3)挂载程序光盘到/mnt
(4)解压tomcat移动tomcat安装位置
tar zxvf /mnt/apache-tomcat-7.0.54.tar.gz -C /usr/src/
mv /usr/src/apache-tomcat-7.0.54/ /usr/local/tomcat/
2、配置第一台服务器
(1)创建网站服务器根目录设置网站主页

(2)修改tomcat主配置文件加载网站根目录
vim /usr/local/tomcat/conf/server.xml
124<Host name="localhost" appBase="webapps"
125unpackWARs="true" autoDeploy="true">
126 <Context docBase="/www/" path="" reloadable="fales"> </Context>
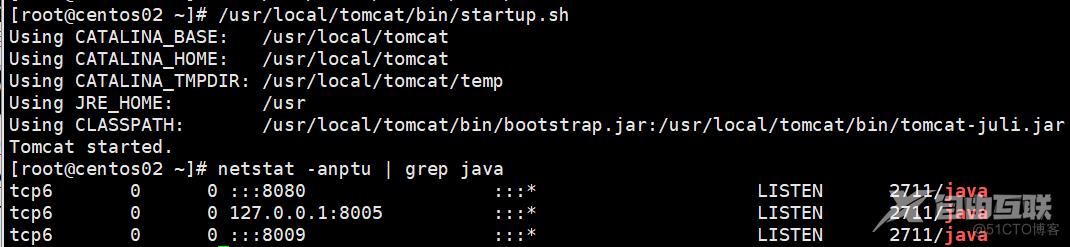
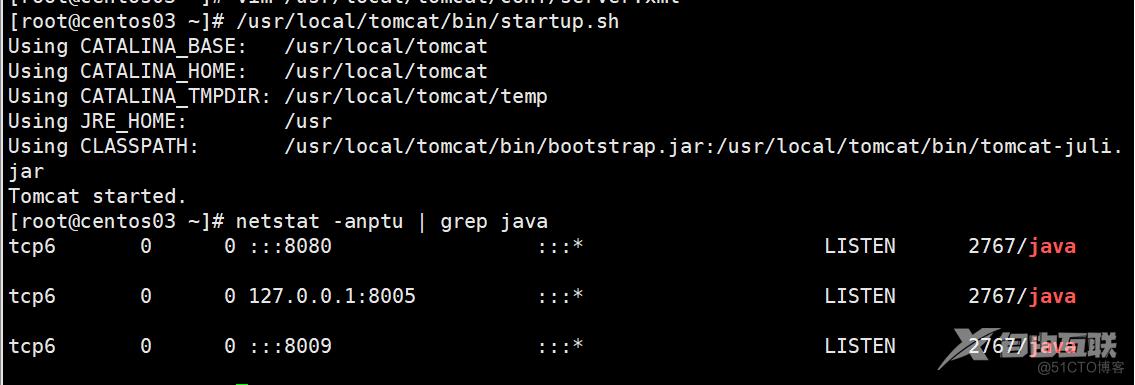
(3)启动tomcat服务查看服务运行状态
3、安装第二台tomcat服务器
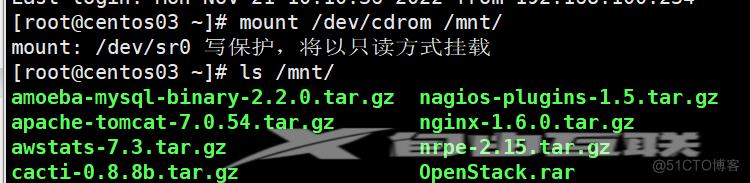
(1)切换到程序光盘
(2)挂载程序光盘到/mnt
(3)解压tomcat移动tomcat安装位置


4、配置第二台服务器
(1)创建网站服务器根目录设置网站主页

(2)修改tomcat主配置文件加载网站根目录

124 <Host name="localhost" appBase="webapps"
125 unpackWARs="true" autoDeploy="true">
126 <Context docBase="/www/" path="" reloadable="fales"> </Context>
(3)启动tomcat服务查看服务运行状态
三、安装Nginx代理和负载均衡功能配置DNS服务器域名解析,客户端使用www.nlb.com负载均衡访问网站
1、安装Nginx反向代理依赖软件和DNS服务
(1)切换到系统光盘
(3)挂载系统盘到/mnt目录

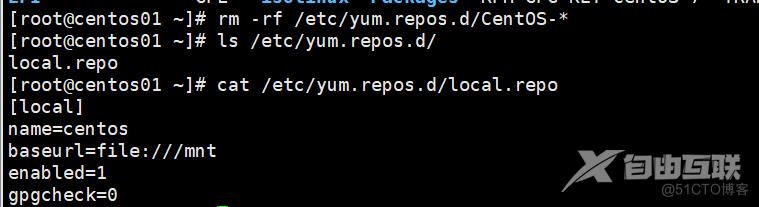
(4)删除系统自带yum源配置本地yum源
(5)安装依赖程序
yum -y install pcre-devel zlib-devel openssl-devel bind bind-chroot bind-utils
(6)创建管理Ngxinx服务用户

2、配置Nginx代理服务器
(1)切换到系统光盘、
(2)挂载系统光盘到/mnt目录
(3)配置Nginx


(4)编译安装Nginx

(5)优化Nginx服务命令

3、修改Nginx主配置配置支持负载均衡群集
(1)修改Nginx主配置文件

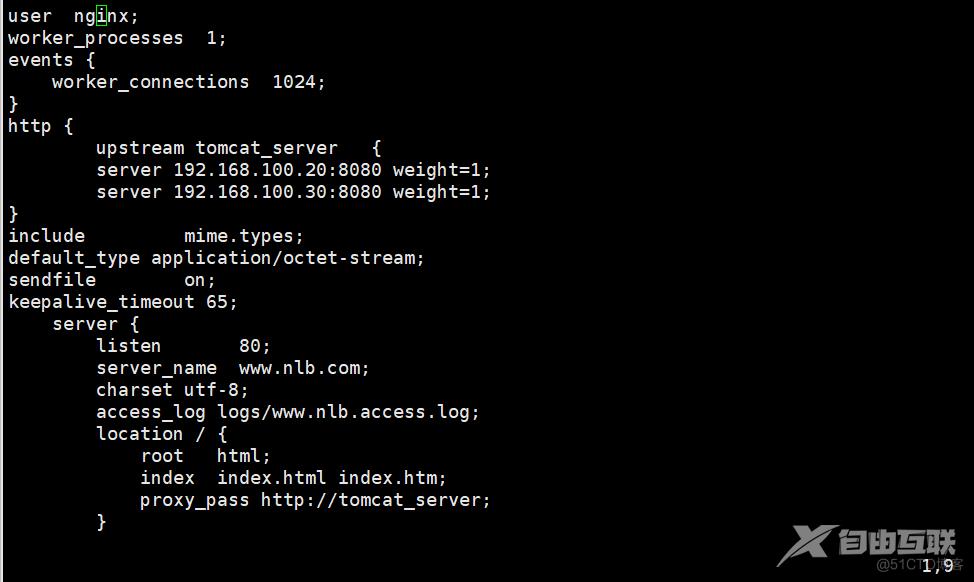
(2)检查Nginx主配置文件是否错误

(3)启动服务查看端口

4、配置DNS服务器
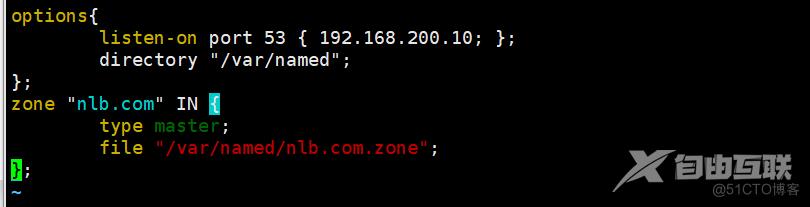
(1)修改DNS服务器主配置文件检查是否错误
vim /etc/named.conf

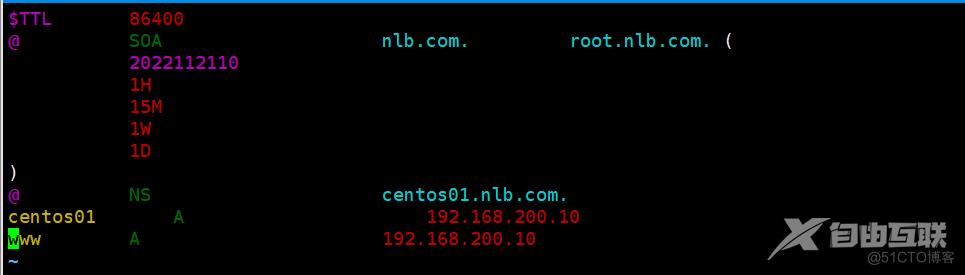
(2)配置DNS服务于数据库文件
vim /var/named/nlb.com.zone

(3)启动服务设置开机自动启动

(4)查看服务运行状态

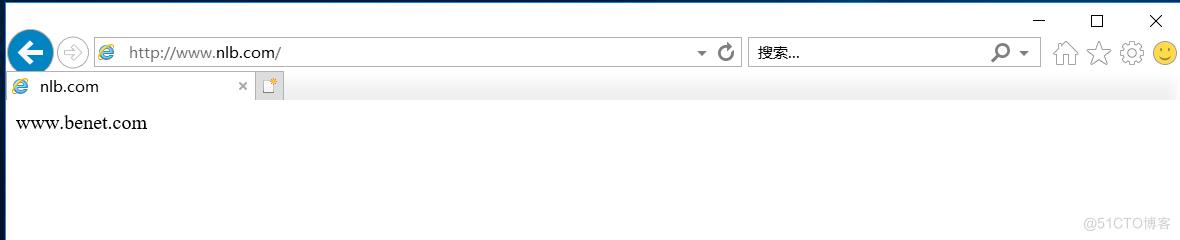
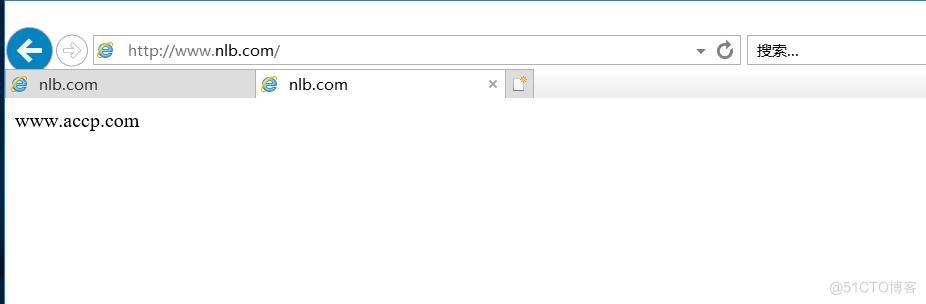
5、客户端验证
(1)客户端第一次访问网站服务器
(2)客户端第二次访问网站服务器