目录 1.猜数字 2.表白墙 3.切换日夜间模式 4.待办事项 1.猜数字 !DOCTYPE htmlhtml lang="en"head meta charset="UTF-8" meta http-equiv="X-UA-Compatible" content="IE=edge" meta name="viewport" content="width=device-width, ini
目录
- 1.猜数字
- 2.表白墙
- 3.切换日夜间模式
- 4.待办事项
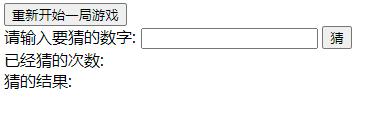
1.猜数字
<!DOCTYPE html>
<html lang="en">
<head>
    <meta charset="UTF-8">
    <meta http-equiv="X-UA-Compatible" content="IE=edge">
    <meta name="viewport" content="width=device-width, initial-scale=1.0">
    <title>猜数字游戏</title>
</head>
<body>
    <input type="button" id="reset" value="重新开始一局游戏">
    <div>
        <span>请输入要猜的数字:</span>
        <input type="text" id="num">
        <input type="button" value="猜" id="guess">
    </div>
    <div>
        <span>已经猜的次数: </span>
        <span id="count"> 0 </span>
    </div>
    <div>
        <span>猜的结果: </span>
        <span id="result"></span>
    </div>
    <script>
        // 先获取要用到的 JS 的 DOM 对象
        let resetButton =  document.querySelector("#reset") /* 参数时选择器,所以要通过特殊符号指定是哪种选择器*/
        let numInput = document.querySelector('#num');
        let guessButton = document.querySelector('#guess');
        let countSpan = document.querySelector('#count');
        let resultSpan = document.querySelector('#result');

        //生成一个1~100之间的随机整数
        let toGuess = Math.floor(Math.random()*100) + 1;
        let count = 0;
        console.log("toGuess: " + toGuess);

        guessButton.onclick = function(){
            // 用户点击 [猜] 这个按钮, 首先先更新点击次数的显示.
             count++;
             countSpan.innerHTML = count;
             // 读取到输入框的内容, 进行判定
             /* parseInt() 函数解析字符串并返回整数 */
             let num = parseInt(numInput.value);
             console.log("num: " + num);
             if(num < toGuess){
                 resultSpan.innerHTML = '猜低了';
                 resultSpan.style.color = 'red';
             }else if(num > toGuess){
                 resultSpan.innerHTML = '猜高了';
                 resultSpan.style.color = 'green';
             }else{
                 resultSpan.innerHTML = '猜对了';
                 resultSpan.style.color = 'orange';
             }
        }
        resetButton.onclick = function(){
            // 把 toGuess 和 count 清空, 同时重新生成一个随机的整数
            toGuess = Math.floor(Math.random() * 100) + 1;
            count = 0;
            resultSpan.innerHTML = '';
            countSpan.innerHTML = '';
            numInput.value = '';
        }
    </script>
</body>
</html>

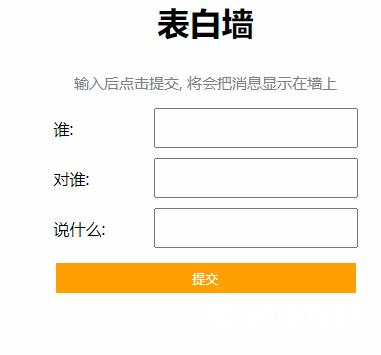
2.表白墙
<!DOCTYPE html>
<html lang="en">
<head>
    <meta charset="UTF-8">
    <meta http-equiv="X-UA-Compatible" content="IE=edge">
    <meta name="viewport" content="width=device-width, initial-scale=1.0">
    <title>messageWall</title>
</head>
<body>
    <style>
        *{
            margin:0;
            padding:0;
        }
        .container {
            width: 100%;
            height:100%;
        }
        h1{
            text-align:center;
            padding:20px 0;
        }
        p{
            font-size: 15px;
            color:grey;
            padding:10px 0;
            text-align: center;
        }
        .row{
            display:flex;
            height:50px;
            justify-content: center;
            align-items: center;
        }
        .row span{
            width:100px;
        }
        .row .edit{
            width: 200px;
            height: 36px;
        }
        .row .submit{
            width:300px;
            height:30px;
            background-color: orange;
            color:#fff;
            border: none; /* 去掉按钮边框*/
        }
        .row .submit:active{
            background-color: grey;
        }
    </style>
    <div class="container">
        <h1>表白墙</h1>
        <p>输入后点击提交, 将会把消息显示在墙上</p>
        <div class="row">
            <span>谁:</span>
            <input type="text" class="edit">
        </div>
        <div class="row">
            <span>对谁:</span>
            <input type="text" class="edit">
        </div>
        <div class="row">
            <span>说什么:</span>
            <input type="text" class="edit">
        </div>
        <div class="row">
            <input type="button" value="提交" class="submit">
        </div>
    </div>

    <script>
        let submitButton = document.querySelector('.submit');
        submitButton.onclick = function() {
            // 1. 获取到输入框里面的内容
            let edits = document.querySelectorAll('.edit');
            let from = edits[0].value;
            let to = edits[1].value;
            let message = edits[2].value;
            console.log(from + ", " + to + ", " + message);
            if (from == '' || to == '' || message == '') {
                return;
            }
            //2. 创建一个新的元素节点,即获取到的输入框信息
            //将其添加到DOM树中
            let row = document.createElement('div');/* 创建出新的idv节点*/
            row.className = 'row';/* 设置属性名 */
            row.innerHTML = from + '对' + to + '说: ' + message;

            let container = document.querySelector('.container');
            container.appendChild(row);

            //3. 把上次输入的内容清空
            for(let i = 0; i < edits.length; i++){
                edits[i].value = '';
            }
        }
    </script>
</body>
</html>

3.切换日夜间模式
<!DOCTYPE html>
<html lang="en">
<head>
    <meta charset="UTF-8">
    <meta http-equiv="X-UA-Compatible" content="IE=edge">
    <meta name="viewport" content="width=device-width, initial-scale=1.0">
    <title>切换日夜间模式</title>
</head>
<body>
    <style>
        /* 清除浏览器默认格式 */
        *{
            margin:0;
            padding: 0;
        }
        html,body {
            width: 100%;
            height: 100%;
        }
        .light{
            background-color: #fff;
            color: #000;
            font-size: 40px;;
        }
        .dark{
            background-color: #666;
            color: #eee;
            font-size: 40px;;
        }
    </style>
    <div class="light">
        代码案例:切换日夜间模式;
    </div>
    <script>
        /*获取元素*/
        let div = document.querySelector('div');
        div.onclick = function(){
            console.log(div.className); /* 获取属性值:content*/
            if (div.className.indexOf('light') != -1) {
                div.className = 'dark';
            }else{
                div.className = 'light';
            }
        }
    </script>

</body>
</html>
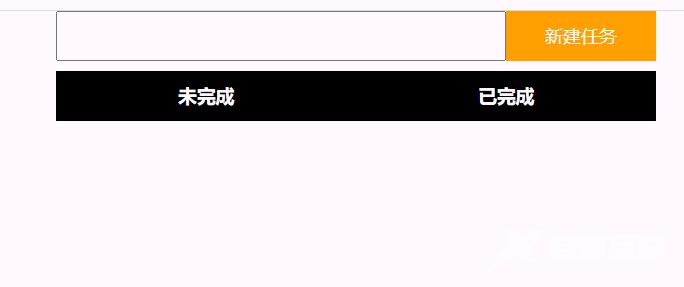
4.待办事项
<!DOCTYPE html>
<html lang="en">
<head>
    <meta charset="UTF-8">
    <meta http-equiv="X-UA-Compatible" content="IE=edge">
    <meta name="viewport" content="width=device-width, initial-scale=1.0">
    <title>todoList</title>
</head>
<body>
    <style>
        * {
            padding: 0;
            margin: 0;
            box-sizing: border-box;
        }

        .nav {
            width: 600px;
            margin: 0 auto;
            display: flex;
            justify-content: center;
            align-items: center;
        }

        .nav input {
            width: 450px;
            height: 50px;
            font-size: 25px;
            padding-left: 10px;
        }

        .nav button {
            width: 150px;
            height: 50px;
            border: none;
            color: white;
            background-color: orange;
            font-size: 18px;
        }

        .nav button:active {
            background-color: grey;
        }

        .container {
            width: 600px;
            margin: 0 auto;
            display: flex;
            justify-content: center;
            /* padding-top: 10px; */
            margin-top: 10px;

            /* background-color: green; */
        }

        .container .left,
        .container .right {
            width: 50%;
        }

        .container .left h3,
        .container .right h3 {
            text-align: center;
            height: 50px;
            line-height: 50px;
            background-color: black;
            color: white;
        }

        .container .row {
            height: 50px;
            display: flex;
            align-items: center;
            justify-content: flex-start;
        }

        .container .row span {
            width: 240px;
        }

        .container .row button {
            width: 40px;
            height: 30px;
        }

        .container .row input {
            margin-right: 5px;
        }

    </style>

    <!-- 表示上方的 div, 里面放输入框和按钮 -->
    <div class="nav">
        <input type="text">
        <button>新建任务</button>
    </div>

    <!-- 这个是下方的 div, 里面分成左右两栏 -->
    <div class="container">
        <div class="left">
            <h3>未完成</h3>
            <!-- <div class="row">
                <input type="checkbox">
                <span>吃饭</span>
                <button>删除</button>
            </div> -->
        </div>
        <div class="right">
            <h3>已完成</h3>
        </div>
    </div>

    <script>
        let addTaskBtn = document.querySelector(".nav button");
        addTaskBtn.onclick = function() {
            // 1. 获取到输入框的内容
            let input = document.querySelector(".nav input");
            let taskContent = input.value;
            // 2. 创建一个 div.row, 里面设置上需要的 复选框, 文本, 删除按钮
            let row = document.createElement('div');
            row.className = 'row';
            let checkBox = document.createElement('input');
            checkBox.type = 'checkbox';
            let span = document.createElement('span');
            span.innerHTML = taskContent;
            let deleteBtn = document.createElement('button');
            deleteBtn.innerHTML = '删除';
            row.appendChild(checkBox);
            row.appendChild(span);
            row.appendChild(deleteBtn);
            // 3. 把 div.row 添加到 .left 中~
            let left = document.querySelector('.left');
            left.appendChild(row);

            // 4. 给 checkBox 增加一个点击处理函数. 点击之后就能够移动任务
            checkBox.onclick = function() {
                // 当用户点击的时候, 就获取到当前的这个 row 这个元素
                // 把这 row 给添加到另外一侧.
                // 也可以根据 checkBox 的选中状态决定是在 left 还是 right
                let target = null;
                if (checkBox.checked) {
                    // 已经是选中的状态
                    // 就把这个元素放到右边
                    target = document.querySelector('.right');
                } else {
                    // 是未选中的状态
                    // 就把这个元素放到左边
                    target = document.querySelector('.left');
                }
                target.appendChild(row);
            }

            // 5. 实现删除效果, 给删除按钮新增一个删除操作
            deleteBtn.onclick = function() {
                // 要想删除 row, 就需要知道 row 的父元素
                let parent = row.parentNode;
                parent.removeChild(row);
            }
        }
    </script>
</body>
</html>

到此这篇关于HTML+CSS+JS实现的简单应用小案例分享的文章就介绍到这了,更多相关HTML CSS JS应用案例内容请搜索自由互联以前的文章或继续浏览下面的相关文章希望大家以后多多支持自由互联!
