C语言函数大全
本篇介绍C语言函数大全-- p 开头的函数
1. perror
1.1 函数说明
void perror(const char *s);
用于将当前错误码对应的错误信息打印到标准输出设备(通常是终端)。
参数:
- s : 用于描述错误类型或者出错的上下文信息。它会在该信息后面追加当前错误码对应的错误信息,并且自动换行。
1.2 演示示例
#include <stdio.h>
#include <errno.h>
int main() {
FILE *fp = fopen("tempfile.txt", "r");
if (fp == NULL) {
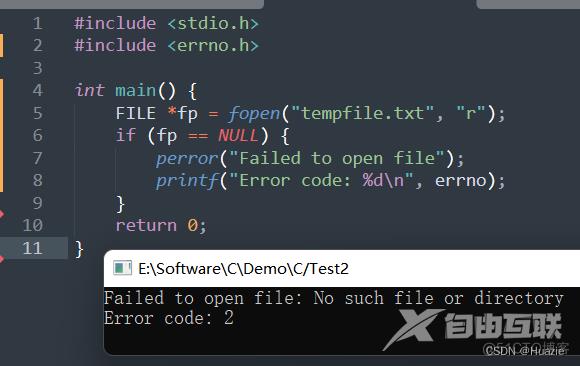
perror("Failed to open file");
printf("Error code: %d\n", errno);
}
return 0;
}
在上述的示例中,
- 我们首先尝试打开一个不存在的文件,并通过
fopen()函数返回的值来检查是否成功。由于该文件不存在,fopen()函数将返回NULL; - 然后我们可以使用
perror()函数来输出一个错误消息和具体的错误信息,以帮助我们找到问题所在。如果发生了错误,errno全局变量会被设置为一个非零值,我们还可以使用它来获取具体的错误代码。
1.3 运行结果
2. pieslice
2.1 函数说明
void pieslice(int x, int y, int stanle, int endangle, int radius);
参数:
- x : 圆心的x 坐标
- y : 圆心的y 坐标
- startangle : 圆弧的起始角度(以度为单位)
- endangle : 圆弧的结束角度(以度为单位)
- radius : 圆的半径
2.2 演示示例
#include <graphics.h>

int main() {
    int gdriver = DETECT, gmode;
    int midx, midy;
    int stangle = 45, endangle = 135, radius = 100;

    initgraph(&gdriver, &gmode, "");  // 初始化图形窗口

    midx = getmaxx() / 2;
    midy = getmaxy() / 2;

    setcolor(YELLOW);  // 设置画笔颜色为黄色
    setfillstyle(EMPTY_FILL, getmaxcolor()); // 设置填充样式。
    // 绘制一个半径为100像素、起始角度为45度、结束角度为135度的圆弧
    pieslice(midx, midy, stangle, endangle, radius);

    getch();  // 等待用户按键
    closegraph();  // 关闭图形窗口
    return 0;
}
2.3 运行结果

3. pow,powf,powl
3.1 函数说明
double pow(double x, double y);
用于计算 x 的 y 次幂,并返回结果(double)
float powf(float x, float y);
用于计算 x 的 y 次幂,并返回结果(float)
long double powl(long double x, long double y);
用于计算 x 的 y 次幂,并返回结果(long double)
3.2 演示示例
#include <stdio.h>
#include <math.h>
int main() {
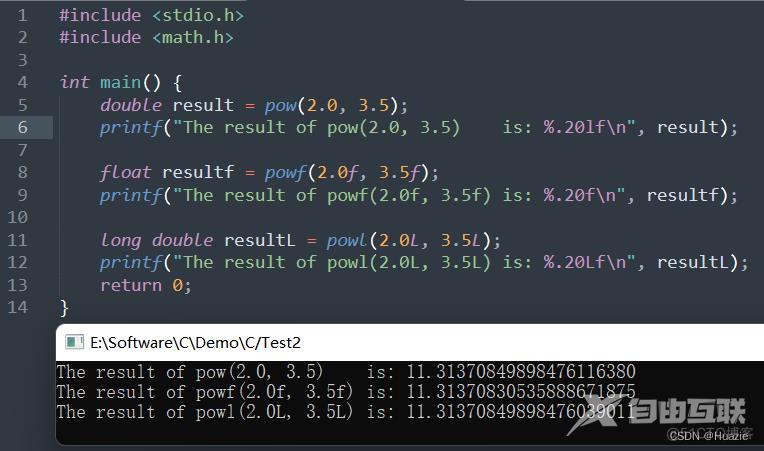
double result = pow(2.0, 3.5);
printf("The result of pow(2.0, 3.5) is: %.20lf\n", result);
float resultf = powf(2.0f, 3.5f);
printf("The result of powf(2.0f, 3.5f) is: %.20f\n", resultf);
long double resultL = powl(2.0L, 3.5L);
printf("The result of powl(2.0L, 3.5L) is: %.20Lf\n", resultL);
return 0;
}
3.3 运行结果
4. pow10,pow10f,pow10l
4.1 函数说明
double pow10(double x);
用于计算 $10^x$ (double)
float pow10f(float x);
用于计算 $10^x$(float)
long double pow10l(long double x);
用于计算 $10^x$ (long double)
4.2 演示示例
#include <stdio.h>
#include <math.h>

int main() {
    double result = pow10(-2.0);
    printf("The result is: %lf\n", result);
    return 0;
}
#include <iostream>
#include <cmath>

int main() {
    float result = std::pow10f(-2.0f);
    std::cout << "10^-2 = " << result << std::endl;

    long double result = std::pow10l(-2.0L);
    std::cout << "10^-2 = " << result << std::endl;

    return 0;
}
5. printf
5.1 函数说明
int printf(const char *format, ...);
它是标准 I/O 库中定义的函数,用于将格式化的数据输出到标准输出流(通常是控制台窗口)
参数:
- format : 一个格式化字符串
- 可变参数 : 任意数量,这些可变参数会根据格式化字符串进行格式化,并被输出到标准输出流。
返回值 :
- 成功打印的字符数。
5.2 演示示例
#include <stdio.h>
int main() {
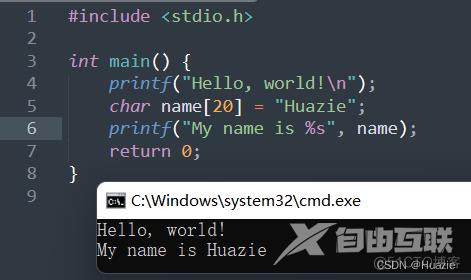
printf("Hello, world!\n");
char name[20] = "Huazie";
printf("My name is %s", name);
return 0;
}
5.3 运行结果
6. pthread_create,pthread_join
6.1 函数说明
int pthread_create(pthread_t *thread, const pthread_attr_t *attr, void *(*start_routine) (void *), void *arg);
创建一个新的线程
int pthread_join(pthread_t thread, void **retval);
阻塞当前线程,等待指定的线程结束。
pthread_create 参数:
- thread : 指向线程标识符的指针,用于返回新创建线程的标识符
- attr : 指向线程属性结构体的指针,用于指定线程的属性,通常为 NULL 表示使用默认属性
- start_routine : 指向线程函数的指针,用于指定线程的入口点
- arg : 传递给线程函数的参数,可以为任意类型的指针。
pthread_join 参数:
6.2 演示示例
#include <stdio.h>
#include <pthread.h>
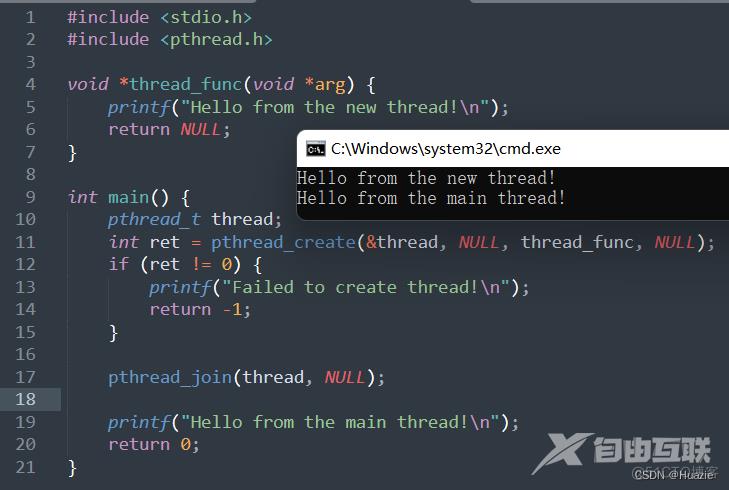
void *thread_func(void *arg) {
printf("Hello from the new thread!\n");
return NULL;
}
int main() {
pthread_t thread;
int ret = pthread_create(&thread, NULL, thread_func, NULL);
if (ret != 0) {
printf("Failed to create thread!\n");
return -1;
}
pthread_join(thread, NULL);
printf("Hello from the main thread!\n");
return 0;
}
在上述的示例中,主线程调用了 pthread_create() 函数来创建一个新的线程,并传递一个函数指针 thread_func 作为新线程的入口点。新线程运行这个函数,并输出一条消息。主线程等待新线程结束,然后继续运行自己的代码。
6.3 运行结果
7. pthread_mutex_init,pthread_mutex_destroy,pthread_mutex_lock,pthread_mutex_unlock
7.1 函数说明
int pthread_mutex_init(pthread_mutex_t *mutex, const pthread_mutexattr_t *attr);
初始化互斥锁。返回值为 0 表示成功,否则表示失败。
int pthread_mutex_destroy(pthread_mutex_t *mutex);
销毁互斥锁。返回值为 0 表示成功,否则表示失败。
int pthread_mutex_lock(pthread_mutex_t *mutex);
尝试获取互斥锁,如果已经被占用,则会阻塞当前线程。返回值为 0 表示成功获取互斥锁,否则表示失败。
int pthread_mutex_unlock(pthread_mutex_t *mutex);
释放互斥锁。
参数:
- mutex : 指向互斥锁对象的指针。
- attr : 指向线程属性结构体的指针,用于指定互斥锁对象的属性,通常为
NULL表示使用默认属性。
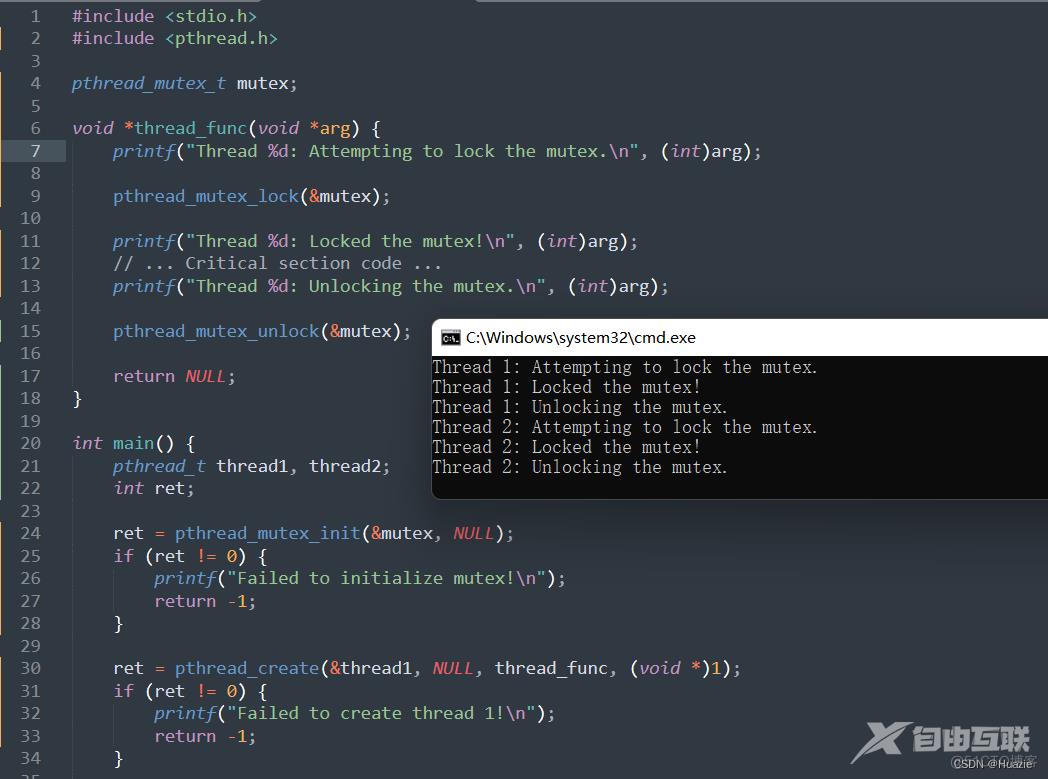
7.2 演示示例
#include <stdio.h>
#include <pthread.h>

pthread_mutex_t mutex;

void *thread_func(void *arg) {
    printf("Thread %d: Attempting to lock the mutex.\n", (int)arg);

    pthread_mutex_lock(&mutex);

    printf("Thread %d: Locked the mutex!\n", (int)arg);
    // ... Critical section code ...
    printf("Thread %d: Unlocking the mutex.\n", (int)arg);

    pthread_mutex_unlock(&mutex);

    return NULL;
}

int main() {
    pthread_t thread1, thread2;
    int ret;

    ret = pthread_mutex_init(&mutex, NULL);
    if (ret != 0) {
        printf("Failed to initialize mutex!\n");
        return -1;
    }

    ret = pthread_create(&thread1, NULL, thread_func, (void *)1);
    if (ret != 0) {
        printf("Failed to create thread 1!\n");
        return -1;
    }

    ret = pthread_create(&thread2, NULL, thread_func, (void *)2);
    if (ret != 0) {
        printf("Failed to create thread 2!\n");
        return -1;
    }

    pthread_join(thread1, NULL);
    pthread_join(thread2, NULL);

    pthread_mutex_destroy(&mutex);

    return 0;
}
在上述的示例中,两个线程分别调用了 pthread_mutex_lock() 和 pthread_mutex_unlock() 函数来保护临界区代码,以确保同时只有一个。
7.3 运行结果
8. putc
8.1 函数说明
int putc(int c, FILE *stream);
它是标准 I/O 库中定义的函数,用于将一个字符输出到指定的文件流。
参数:
- c : 要输出的字符
- stream : 指向目标文件流的指针
返回值: 成功输出的字符的 ASCII 码
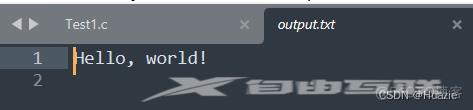
8.2 演示示例
#include <stdio.h>

int main() {
    FILE *fp;
    char *str = "Hello, world!\n";

    fp = fopen("output.txt", "w");
    if (fp == NULL) {
        printf("Failed to open file for writing!\n");
        return -1;
    }

    int i = 0;
    while (str[i] != '\0') {
        putc(str[i], fp);
        i++;
    }

    fclose(fp);

    return 0;
}
在上述的示例中,我们打开名为 output.txt 的文件以供写入,并使用 putc() 函数将字符串中的每个字符逐一输出到文件中。最后,我们关闭文件。
注意: 与
putchar()函数类似,putc()函数可以用来逐一输出字符串中的每个字符,但通常会更多地用于将数据写入文件或其他输出流。
8.3 运行结果
9. putchar
9.1 函数说明
int putchar(int c);
它是标准 I/O 库中定义的函数,用于将一个字符输出到标准输出流(通常是控制台窗口)。
参数:
- c : 要输出的字符
返回值 :
- 成功输出,则返回该字符的 ASCII 码值
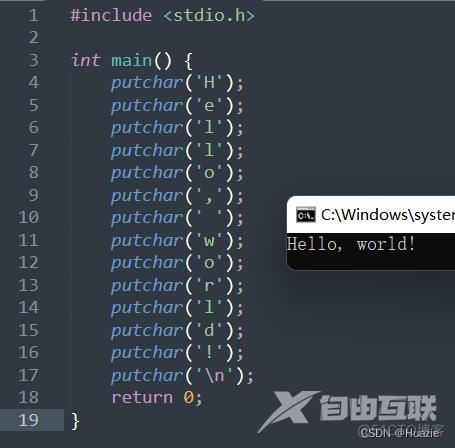
9.2 演示示例
#include <stdio.h>

int main() {
    putchar('H');
    putchar('e');
    putchar('l');
    putchar('l');
    putchar('o');
    putchar(',');
    putchar(' ');
    putchar('w');
    putchar('o');
    putchar('r');
    putchar('l');
    putchar('d');
    putchar('!');
    putchar('\n');
    return 0;
}
注意: 单引号用于表示字符常量,例如 'H' 表示字符 H 的 ASCII 码。
9.3 运行结果
10. putenv
10.1 函数说明
int putenv(char *string);
用于设置环境变量的值。
参数:
- string : 字符串参数,格式为 name=value,其中 name 是要设置的环境变量的名称,value 是要为其设置的值。
返回值:
0表示成功;- 非
0表示失败。
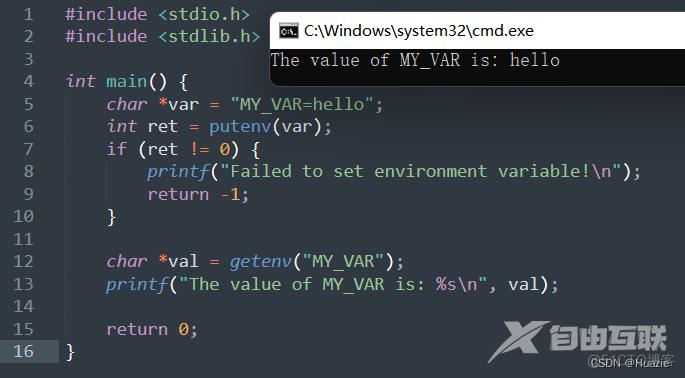
10.2 演示示例
#include <stdio.h>
#include <stdlib.h>

int main() {
    char *var = "MY_VAR=hello";
    int ret = putenv(var);
    if (ret != 0) {
        printf("Failed to set environment variable!\n");
        return -1;
    }

    char *val = getenv("MY_VAR");
    printf("The value of MY_VAR is: %s\n", val);

    return 0;
}
在上述的示例中,
- 我们首先使用
putenv()函数将一个名为 MY_VAR 的环境变量设置为字符串"hello"。 - 然后,我们使用
getenv()函数获取MY_VAR环境变量的值; - 最后使用
printf()函数输出它。
注意: 由于
putenv()函数接受一个指向可变字符串的指针,因此应该避免将局部变量的地址传递给它,以免在函数返回后出现未定义行为。
10.3 运行结果
11. putimage
11.1 函数说明
void putimage(int left, int top, void *bitmap, int op);
用于将位图图像输出到指定的窗口或屏幕上
参数:
- left: 表示位图左上角的
x坐标- top: 表示位图左上角的
y坐标- bitmap: 一个指向位图数据的指针,这个数据必须按照指定格式存储
- op: 表示绘制位图的方式,可以为以下值之一:
COPY_PUT:覆盖模式,即将位图完全覆盖到目标位置。AND_PUT:按位与模式,即将位图与目标位置进行按位与运算后输出。OR_PUT:按位或模式,即将位图与目标位置进行按位或运算后输出。XOR_PUT:按位异或模式,即将位图与目标位置进行按位异或运算后输出。
11.2 演示示例
#include <graphics.h>

#define ARROW_SIZE 10

void draw_arrow(int x, int y);

int main(void)
{
   int gdriver = DETECT, gmode;
   void *arrow;
   int x, y, maxx;
   unsigned int size;

   initgraph(&gdriver, &gmode, "");

   maxx = getmaxx();
   x = 0;
   y = getmaxy() / 2;

   draw_arrow(x, y);

   size = imagesize(x, y-ARROW_SIZE, x+(4*ARROW_SIZE), y+ARROW_SIZE);

   arrow = malloc(size);

   getimage(x, y-ARROW_SIZE, x+(4*ARROW_SIZE), y+ARROW_SIZE, arrow);

   while (!kbhit())
   {
      putimage(x, y-ARROW_SIZE, arrow, XOR_PUT);

      x += ARROW_SIZE;
      if (x >= maxx)
          x = 0;

      putimage(x, y-ARROW_SIZE, arrow, XOR_PUT);
   }

   free(arrow);
   closegraph();
   return 0;
}

void draw_arrow(int x, int y)
{
   moveto(x, y);
   linerel(4*ARROW_SIZE, 0);
   linerel(-2*ARROW_SIZE, -1*ARROW_SIZE);
   linerel(0, 2*ARROW_SIZE);
   linerel(2*ARROW_SIZE, -1*ARROW_SIZE);
}
上述程序使用了 graphics.h 图形库来画一个箭头,并在屏幕上循环移动它。
- 首先,程序初始化图形库,然后调用
getmaxx()和getmaxy()函数获取屏幕的宽度和高度。 - 接着,程序调用
draw_arrow()函数来绘制箭头图形,并使用imagesize()函数计算出需要分配给位图数据的内存大小。 - 接下来,程序使用
malloc()函数动态分配了一块内存空间,并调用getimage()函数获取箭头图像的位图数据。该函数会将指定位置的屏幕区域保存到指定的内存地址中。 - 最后,程序进入一个循环,在每次迭代中先使用
putimage()函数将之前存储的箭头图像覆盖掉屏幕上的箭头,然后将箭头向右移动一定的距离。当用户按下任意键时,程序结束循环并退出。
11.3 运行结果

12. putpixel
12.1 函数说明
void putpixel(int x, int y, int color);
用于将一个像素点画在指定的位置上
参数:
- x: 表示要绘制像素的
x坐标- y: 表示要绘制像素的
y坐标- color: 表示要绘制的像素颜色,通常为一个整数值。
12.2 演示示例
#include <graphics.h>
#include <time.h>

#define PIXEL_COUNT 1000
#define DELAY_TIME  100

int main(void)
{
    int gdriver = DETECT, gmode;
    int i, x, y, color, maxx, maxy, maxcolor, seed;

    initgraph(&gdriver, &gmode, "");

    maxx = getmaxx() + 1;
    maxy = getmaxy() + 1;
    maxcolor = getmaxcolor() + 1;

    while (!kbhit())
    {
        srand((unsigned)time(NULL));
        for (i=0; i<PIXEL_COUNT; i++)
        {
            x = rand() % maxx + 1;
            y = rand() % maxy + 1;
            color = rand() % maxcolor + 1;
            putpixel(x, y, color);
        }

        delay(DELAY_TIME);
    }

    getch();
    closegraph();
    return 0;
}
上述这个程序使用 graphics.h 图形库在屏幕上绘制随机像素点,并不断更新它们的颜色。
- 首先,程序初始化图形库,并调用
getmaxx()、getmaxy()和getmaxcolor()函数获取屏幕的尺寸和颜色范围。 - 接着,程序进入一个循环,在每次迭代中使用
rand()函数生成随机的坐标和颜色值,并使用putpixel()函数绘制对应位置的像素点。另外还使用了delay()函数来控制每次更新之间的时间间隔,该函数会使程序暂停指定的毫秒数,以便让用户观察到像素点的变化效果。 - 最后当用户按下任意键时,程序退出循环并结束执行。
12.3 运行结果

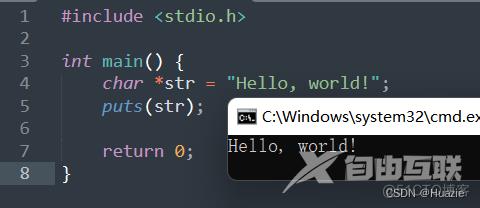
13. puts
13.1 函数说明
int puts(const char *s);
用于将一个字符串输出到标准输出流
参数:
- s: 要输出的以
'\0'结尾的字符串
返回值: 成功输出的字符数(包括换行符)
13.2 演示示例
#include <stdio.h>

int main() {
    char *str = "Hello, world!";
    puts(str);
    return 0;
}
注意: 在输出字符串时,
puts()函数会自动将字符串的内容和换行符写入到标准输出流中,因此不需要再进行额外的操作。如果要将字符串输出到文件或其他输出流中,则可以使用fputs()函数。
13.3 运行结果
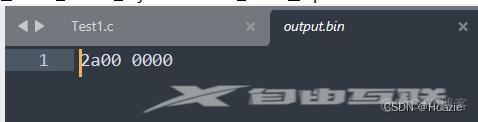
14. putw
14.1 函数说明
int putw(int w, FILE *stream);
用于将一个整数值以二进制形式写入到指定的文件中。
参数:
- w : 要写入的整数值
- stream : 指向要写入的文件的指针。
返回值:
- 如果成功,则返回写入的字节数(通常为
4个字节);- 如果发生错误,则返回
EOF。
14.2 演示示例
#include <stdio.h>

int main() {
    int num = 42;
    FILE *fp = fopen("output.bin", "wb");

    putw(num, fp);

    fclose(fp);
    return 0;
}
在上述的示例中,
- 我们首先定义了一个整数变量,并使用
fopen()函数打开一个名为"output.bin"的二进制文件; - 接着,我们调用
putw()函数将整数值写入到该文件中; - 最后关闭文件并结束程序。
注意: 由于
putw()函数是以二进制形式写入数据的,因此相对于文本文件而言,它更适合用于存储数字、结构体等复杂类型的数据。如果要将字符串或其他文本数据写入到文件中,则可以使用fprintf()函数。
14.3 运行结果
参考
- [API Reference Document]